入门优雅的Mo.js(图形动画Javascript库)
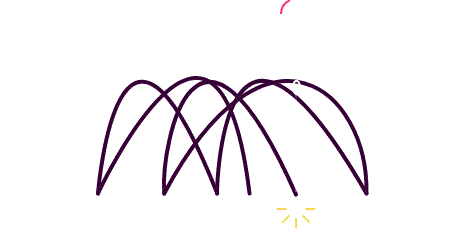
激发兴趣

Mo.js
Mo.js是一个"简洁、高效"图形动画库,拥有流畅的动画和惊人的用户体验,在任何设备上,屏幕密度独立的效果都很好,你可以绘制内置的形状或者自定义形状,随便,只要你喜欢,你还可以绘制多个动画,再让它们串联在一起,逼话不多说详细的请浏览 Mo.js官方网站
基础
首先你需要引入优雅的Mo.js
<script class="lazyload" src="data:image/png;base64,iVBORw0KGgoAAAANSUhEUgAAAAEAAAABCAYAAAAfFcSJAAAAAXNSR0IArs4c6QAAAARnQU1BAACxjwv8YQUAAAAJcEhZcwAADsQAAA7EAZUrDhsAAAANSURBVBhXYzh8+PB/AAffA0nNPuCLAAAAAElFTkSuQmCC" data-original="http://cdn.jsdelivr.net/mojs/latest/mo.min.js"></script>
使用Shape模块绘制图形
该模块提供的Api使用起来非常方便,也很好理解,原理便是通过Javascript生成SVG图形,需要注意的是,画出来的SVG默认给一个DIV包裹着,初始位置是绝对定位全屏居中
1. 画一个矩形
let rect = new mojs.Shape({
  shape: 'rect', // 定义形状为矩形
  isShowStart: true // 定义初始化之后就显示
})
2. 画一个圆形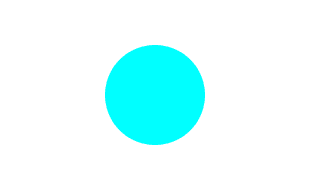
let circle = new mojs.Shape({
  shape: 'circle', // 定义形状为圆形
  fill: 'cyan', // 填充颜色
  isShowStart: true
})
3. 空心 + 边框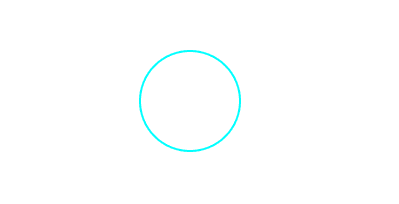
let circle = new mojs.Shape({
  shape: 'circle',
  stroke: 'cyan', // 画笔颜色
  fill: 'none', // 不填充
  isShowStart: true
})
4. 多图形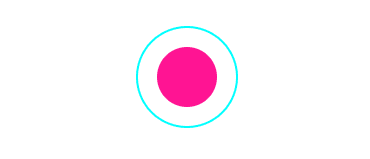
实例化两个Shape就行了
let circle1 = new mojs.Shape({
  shape: 'circle',
  stroke: 'cyan',
  fill: 'none',
  isShowStart: true
})

let circle2 = new mojs.Shape({
  shape: 'circle',
  radius: 30, // 半径
  isShowStart: true
})
5. 控制位置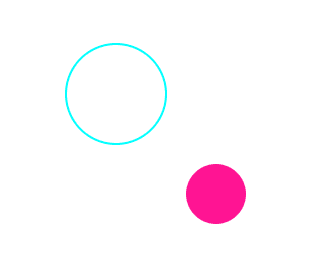
修改圆形二的x,y值(相对当前位置进行移动)
// 在原先的基础上增加
let circle2 = new mojs.Shape({
  x: 100,
  y: 100
})
使用Shape模块绘制动画
1. 过渡属性设置以及播放动画
旋转角度从-180过渡至0
let rect = new mojs.Shape({
  shape: 'rect',
  fill: 'none',
  stroke: 'cyan',
  radius: 10,
  strokeWidth: 20, // 画笔宽度
  angle: {
    [-180]: 0 // 使用对象的形式设置,key为开始值,val为结束值(任何属性都可以设置过渡)
  },
// duration: 400 // 默认为300ms
}).play()
Play方法为播放动画,上述是链式调用,相当于
let rect = new mojs.Shape();
rect.play();
去掉isShowStart,因为这里的Play方法也是初始化就调用,用不着初始化就显示该图形(除非你的动画是延迟执行的)
2. 其他过渡参数
动画轮流反向播放,即x坐标从-100至100、100至-100、-100至100共3次
let rect = new mojs.Shape({
  x: {
    [-100]: 100
  },
  delay: 500, // 动画延迟500ms执行
  repeat: 2, // 动画重复的次数
  isYoyo: true, // 是否轮流反向播放(类似css3中的animation-direction)
  isShowEnd: false // 动画结束后图形是否显示,默认为true
}).play()
这里没有设置isShowStart,动画又延迟500ms执行,所以一开始图形是不显示的
Then方法
Then方法其实就是字面上的意思“然后”,一个动画执行完之后的回调函数

上面动画分两步,旋转、缩小
new mojs.Shape({
  shape: 'rect',
  fill: 'none',
  stroke: 'cyan',
  radius: 10,
  strokeWidth: 20,
  angle: {
    [-180]: 0
  },
  duration: 600
}).then({
  strokeWidth: {
    50: 0 // 画笔大小由50过渡到0,所以图形消失了
  },
  stroke: {
    'magenta': 'yellow' // 画笔颜色由magenta过渡到yellow
  }
}).play()
回调函数
这里只列出3个常用的,回调函数内用this访问当前实例化对象
new mojs.Shape({
  onStart (isForward, isYoyo) {
    // 动画开始执行
  },
  onComplete (isForward, isYoyo) {
    // 动画执行完毕

    // this举例,如动画执行完成需要移除DOM
    this.el.remove()
  },
  onProgress (p, isForward, isYoyo) {
    // 动画执行时
  }
})
其他方法
这里只列出常用的4个常用的,都是实例化对象的方法
new mojs.Shape()
.play() // 执行动画
.pause() // 暂停动画
.stop() // 结束动画
.replay() // 重播动画,相当于stop + play
Timeline
把多个图形动画一起执行
let rect = mojs.Shape();
let circle = mojs.Shape();

// 相当于rect.play() && circle.play()
new mojs.Timeline().add(rect, circle).play();

每个图形的动画都是一样,只是颜色、形状、延迟播放的时间不一样
// 默认参数
const OPTIONS = {
  fill: 'none',
  radius: 50,
  strokeWidth: {
    50: 0
  },
  scale: {
    0: 1
  },
  angle: {
    [-100]: 0
  }
}

// 延迟时间跟动画
let delay = 0,
  delayStep = 150;

// 矩形
let rect = new mojs.Shape({
  ...OPTIONS,
  shape: 'rect',
  stroke: 'cyan'
});

// 圆形
let circle = new mojs.Shape({
  ...OPTIONS,
  shape: 'circle',
  stroke: 'yellow',
  radius: 25,
  strokeWidth: {
    25: 0
  },
  x: -35,
  y: -35,
  delay: delay += delayStep // 延迟执行的时间
});

// 三角形
let triangle= new mojs.Shape({
  ...OPTIONS,
  shape: 'polygon',
  stroke: 'magenta',
  radius: 25,
  strokeWidth: {
    25: 0
  },
  x: -35,
  y: -35,
 delay: delay += delayStep
});

// 五边形
let polygon= new mojs.Shape({
  ...OPTIONS,
  shape: 'polygon',
  points: 5,
  stroke: '#00F87F',
  x: -20,
  y: -35,
 delay: delay += delayStep
});

// 其他图形省略...

// 添加至timeline一起执行
new mojs.Timeline().add(rect, circle, triangle, polygon).play()
Tune
播放前重置参数
new mojs.Shape()
.tune({
  // 新的参数
})
.play()
先画两个圆形
const OPTIONS = {
  shape: 'circle',
  fill: 'none',
  radius: 25,
  stroke: 'cyan',
  scale: {
    0: 1
  },
  easing: 'cubic.out'
}

let circle1 = new mojs.Shape({
  ...OPTIONS,
  strokeWidth: {
    50: 0
  }
}).play()

let circle2 = new mojs.Shape({
  ...OPTIONS,
  radius: 10,
  stroke: 'magenta',
  strokeWidth: {
  15: 0
  },
  delay: 200
}).play()
把play去掉,默认参数加上top:0, left: 0(原本是页面的中心),鼠标点击的时候,动态设置x,y的值

document.addEventListener('click', e => {
  // 鼠标点击时的x,y坐标
  let x = e.pageX,
    y = e.pageY;

  // 播放圆形1动画
  circle1.tune({
    x,
    y
  }).replay()

  // 播放圆形2动画
  circle2.tune({
    x,
    y
  }).replay()
})
但是这样子写,一直都只存在一个circle1跟circle2,第一次点击还没执行完动画,我就点击第二次,会重新播放动画

我们可以选择在点击的时候才生成匿名的圆形对象,并且动画执行完毕之后移除DOM,这样子我们就不需要用到tune了
document.addEventListener('click', e => {
  let x = e.pageX,
    y = e.pageY;

  new mojs.Shape({
    ...OPTIONS,
    strokeWidth: {
      50: 0
    },
    x,
    y,
    onComplete() {
      this.el.remove()
    }
  }).play()

  new mojs.Shape({
    ...OPTIONS,
    radius: 10,
    stroke: 'magenta',
    strokeWidth: {
      15: 0
    },
    delay: 200,
    x,
    y,
    onComplete() {
      this.el.remove()
    }
  }).play()
})
效果如下,也可以不移除DOM,不过你点100次,页面就会生成100个DOM

监听click改成监听mousemove

如何给图形监听事件
let btn = new mojs.Shape();
btn.el.addEventListener(); // el表示svg的上层包裹dom
综合性基础案例

Timeline、Tune、回调、事件交互
先写一段样式
body,
html {
  padding: 0;
  margin: 0;
  width: 100%;
  height: 100%;
  background: #EA485C;
  overflow: hidden;
}
定义常量
// 颜色
const COLORS = {
  RED: '#FD5061',
  YELLOW: '#FFCEA5',
  BLACK: '#29363B',
  WHITE: 'white',
  VINOUS: '#A50710'
}

// 过渡时间
const DURATION = 800;
外层父元素图形
// 父元素图形,只用于整体的位置的变化
const showBase = new mojs.Shape({
  fill: 'none',
  radius: 20,
  x: {
    [-150]: 0,
    easing: 'cubic.out'
  },
  y: {
    [90]: 0,
    easing: 'cubic.out'
  },
  duration: DURATION + 400,
  // 动画执行完毕,添加样式、事件
  onComplete() {
    this.el.style.cursor = 'pointer';
    this.el.addEventListener('click', scaleAnime, false)
  }
});
圆形扩散

// 最后执行的圆形扩散
const circle = new mojs.Shape({
  fill: COLORS.WHITE,
  parent: showBase.el, // 定义父元素
  radius: 50,
  scale: {
    .4: 1
  },
  duration: 650,
  opacity: {
    .5: 0
  },
  delay: DURATION + 100,
  easing: 'cubic.out'
});
旋转圆形

const showUp = new mojs.Shape({
    fill: 'none',
    stroke: COLORS.WHITE,
    parent: showBase.el, // 定义父元素
    radius: {
      0: 10
    },
    angle: {
      560: 270
    },
    strokeWidth: {
      0: 22,
      easing: 'cubic.inout'
    },
    strokeDasharray: '100%',
    strokeDashoffset: {
      '-100%': '0%',
      easing: 'cubic.in'
    },
    strokeLinecap: 'round',
    duration: DURATION,
  })
  .then({
    scale: .75,
    duration: 250
  })
  .then({
    scale: 1,
    duration: 300
  });
加号

const addButtonCross = new mojs.Shape({
  shape: 'cross',
  parent: showUp.el, // 定义旋转的圆形为父元素
  fill: 'none',
  stroke: COLORS.VINOUS,
  radius: 6,
  strokeLinecap: 'round',
  isShowStart: true,
  duration: DURATION,
  angle: {
    0: -360
  },
  scale: {
    0: 1
  },
  y: {
    35: 0
  },
  x: {
    35: 0
  },
}).then({
  angle: -540,
  duration: DURATION / 2,
  easing: 'cubic.out'
});
使用Timeline
 const timelineback = new mojs.Timeline();
 timelineback.add(showBase, circle, showUp, addButtonCross).play();
scaleAnime函数
// 点击按钮放大动画
function scaleAnime() {
  circle.tune({
    delay: 0,
    scale: {
      .4: 30
    },
    opacity: 1,
    duration: 500,
    easing: 'cubic.inout'
  }).replay()
}
本文到此结束,由于是入门,所以只能写简单的动画,大家要深入学习自行去官网,在这里我推荐学习的方向
- Burst模块
- ShapeSwirl模块
- 自定义形状
- 自定义Easing
- 自定义运动曲线
共同学习,写下你的评论
评论加载中...
作者其他优质文章