
js事件冒泡、事件捕获、蒙版弹框运用
首先简单解释下事件冒泡与事件捕获
事件冒泡:当事件在某一DOM元素被触发时,事件将跟随着该节点继承自的各个父节点冒泡穿过整个的DOM节点层次,如果不停止事件的传播,事件将一直通过DOM冒泡直至到达文档根。
<div class="test1">
<p>第一层</p>
<div class="test2">
<p>第二层</p>
<div class="test3">
<p>第三层</p>
</div>
</div>
</div>
</body>
<script>
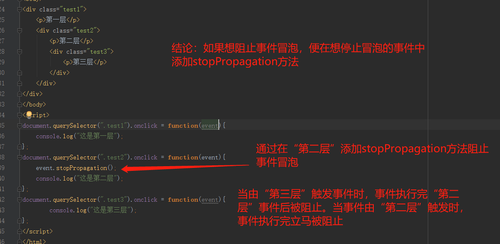
document.querySelector(".test1").onclick = function(){
console.log("这是第一层");
};
document.querySelector(".test2").onclick = function(){
console.log("这是第二层");
};
document.querySelector(".test3").onclick = function(event){
console.log("这是第三层");
};
</script>
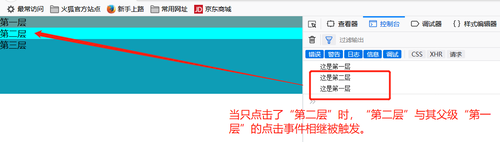
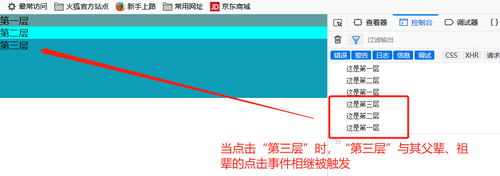
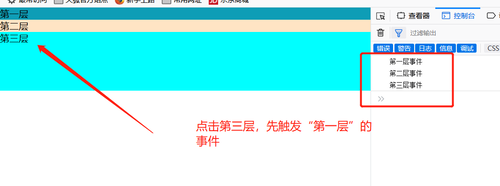
从上面简单的例子中可以得出,冒泡事件就是在执行自身事件后,依次执行父辈事件的一种现象。
如果想阻止这种现象,可以通过添加event.stopPropagation()方法阻止冒泡事件。
//兼容性写法
    if(event && event.stopPropagation){
        event.stopPropagation()
    }else{     //兼容ie
        event.cancelBubble = true
    };
注:jq中同样可以通过stopPropagation方法阻止冒泡事情
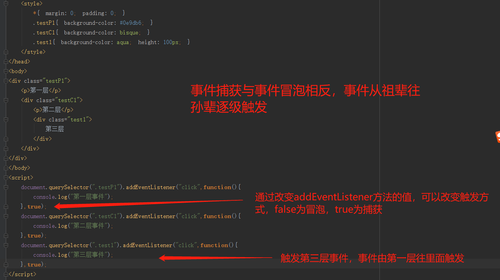
事件捕获:事件捕获指的是从document到触发事件的那个节点,即自上而下的去触发事件。(与冒泡相反)
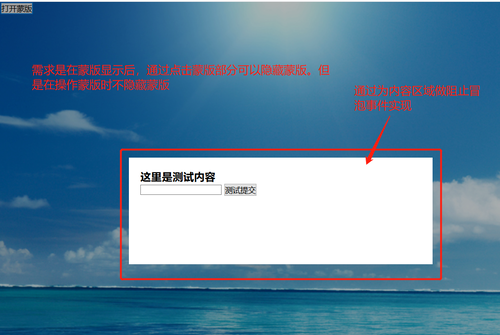
实用例子:蒙版弹框
<style>
*{ margin: 0; padding: 0; }
.testBody{ background-image: url("images/海洋天空.jpg"); background-size: cover; height: 120vh; }
.testMask{
display: none; justify-content:center; align-items:center; position: absolute; top: 0; left: 0; width: 100vw; height: 100vh; background-color: rgba(0,0,0,.3); z-index: 100; }
.testContent{ width: 50%; height: 20%; padding: 20px; background-color: white}
.testBody2{ height: 100vh; overflow: hidden }
</style>
</head>
<body>
<div class="testBody">
<button class="openMack">打开蒙版</button>
</div>
<div class="testMask">
<div class="testContent">
<h3>这里是测试内容</h3>
<form>
<input>
<button>测试提交</button>
</form>
</div>
</div>
</body>
<script>
var testBody = document.querySelector(".testBody");
var testMack = document.querySelector(".testMask");
var testContent = document.querySelector(".testContent");
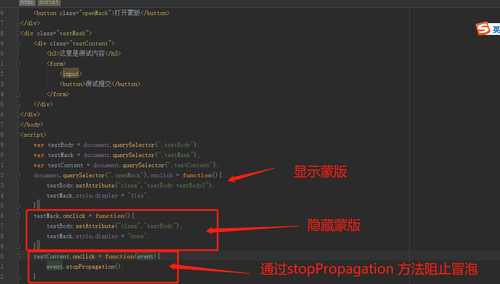
document.querySelector(".openMack").onclick = function(){
testBody.setAttribute("class","testBody testBody2");
testMack.style.display = "flex";
}
testMack.onclick = function(){
testBody.setAttribute("class","testBody");
testMack.style.display = "none";
}
testContent.onclick = function(event){
event.stopPropagation();
}
</script>点击查看更多内容
2人点赞
评论
共同学习,写下你的评论
评论加载中...
作者其他优质文章
正在加载中


感谢您的支持,我会继续努力的~
扫码打赏,你说多少就多少
赞赏金额会直接到老师账户
支付方式
打开微信扫一扫,即可进行扫码打赏哦