
本系列介绍
本系列《剖析缓存系列》,由浅到深的对缓存进行分析介绍,从缓存形式,更新策略,常见问题,以及JAVA缓存使用(JCache,Spring cache,Ehcache)和缓存服务器redis
系列目录
本章
本章分为两篇《熟悉JSR-107 JAVA规范》和《剖析JCache》。
《熟悉JSR-107 JAVA缓存规范》偏向熟悉JAVA缓存规范,JAVA缓存使用。
《剖析JCache》 重点讲解高级用法,包括监听器、资源加载、缓存处理以及其cache-ri-impl源码实现等。
基本方法和接口
缓存操作demo
先贴出一个简单的缓存存储-获取操作。看看cache-ri-impl是如何实现这个简单的操作的。
    public void simpleCache() {

        //创建一个缓存管理器
        CacheManager manager = Caching.getCachingProvider().getCacheManager();
        //创建一个配置管理器
        Configuration<String, String> configuration = new MutableConfiguration<String, String>().setTypes(String.class, String.class);
        //生成一个缓存对象
        Cache<String, String> simpleCache;
        //缓存数据
        simpleCache = manager.createCache("simpleCache22", configuration);
        simpleCache.put("baron", "china");
        //获取数据
        String value = simpleCache.get("baron");
        System.out.println("Value: " + value);

    }


输出结果:
Value: china
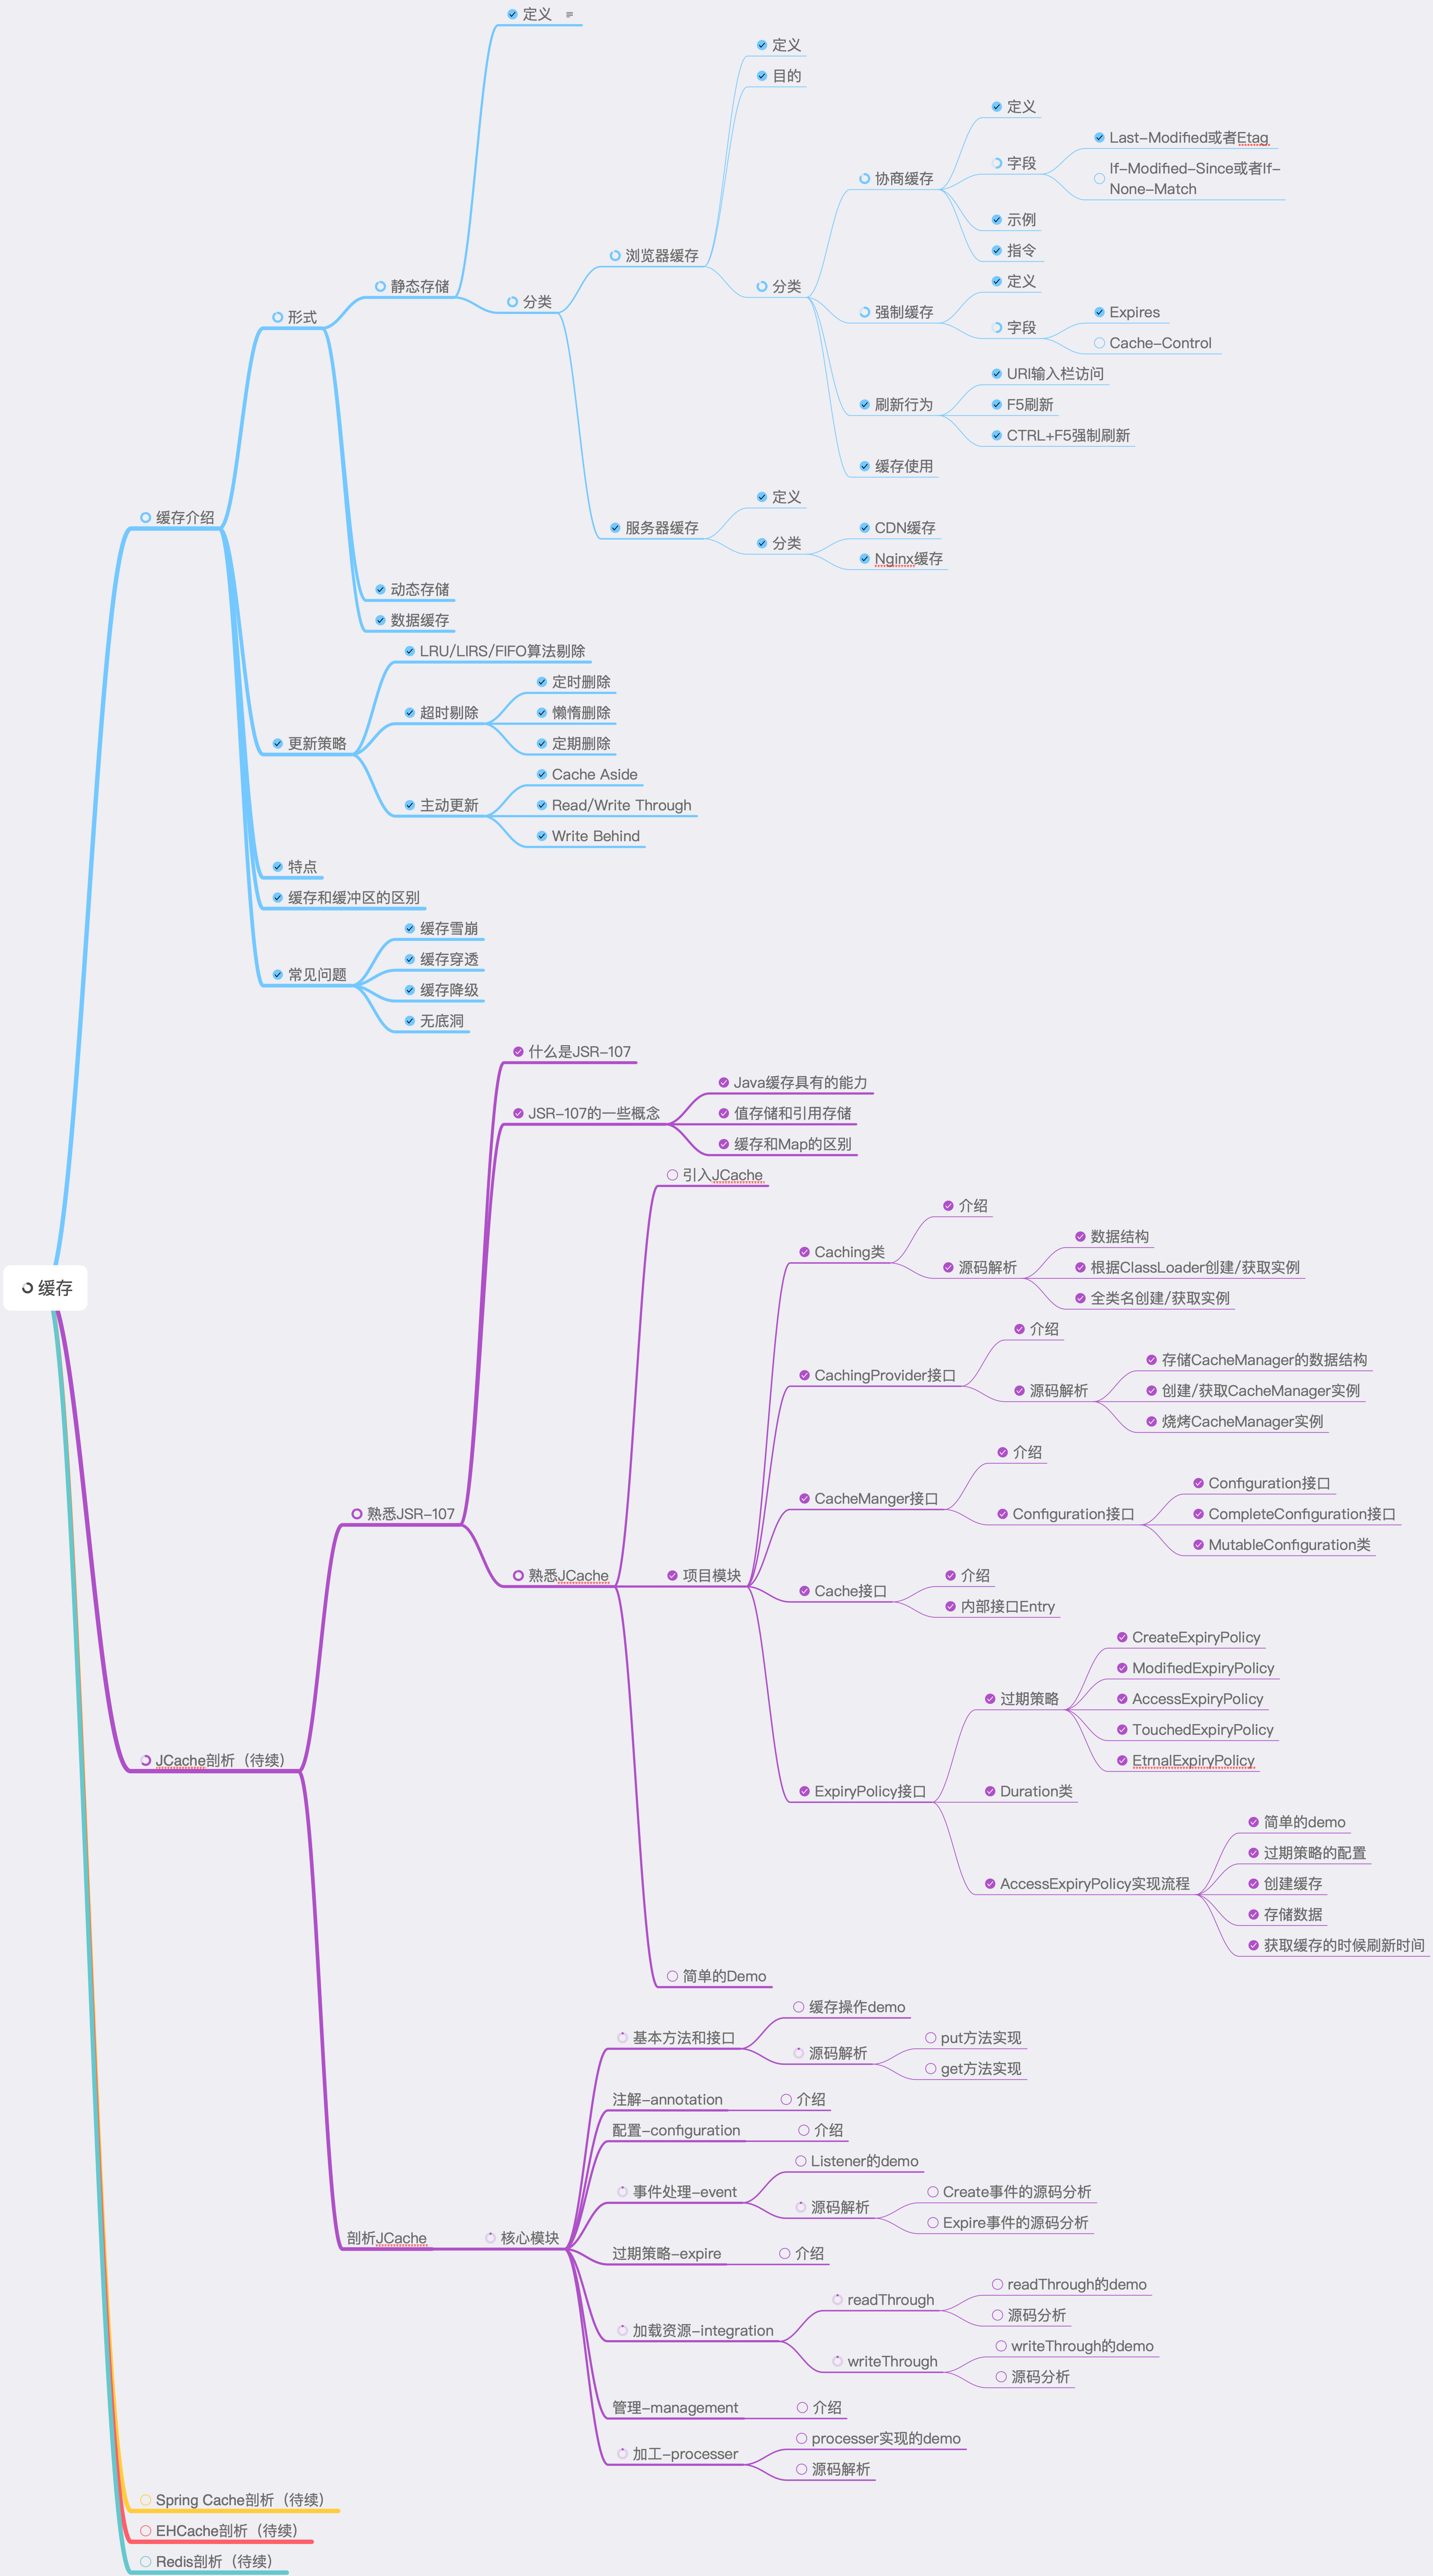
put方法实现过程
首先先分析simpleCache.put("baron", "china");的实现。
以下是RICache#put(K key, V value)的源码
public void put(K key, V value) {

    //已省略非核心代码

    //1 创建一个缓存对象事件记录实例
    RICacheEventDispatcher<K, V> dispatcher = new RICacheEventDispatcher<K, V>();

    //2 实现值存储还是引用存储
    Object internalKey = keyConverter.toInternal(key);
    Object internalValue = valueConverter.toInternal(value);

    //3 判断key是否已存在,若已存在,判断是否过期
    RICachedValue cachedValue = entries.get(internalKey);
    boolean isOldEntryExpired = cachedValue != null && cachedValue.isExpiredAt(now);

    //4 如果旧值已过期,那么移除该值并添加一个过期监听事件
    if (isOldEntryExpired) {
        V expiredValue = valueConverter.fromInternal(cachedValue.get());
        processExpiries(key, dispatcher, expiredValue);
    }
    //5 key不存在或者key存在但已过期
    if (cachedValue == null || isOldEntryExpired) {

        //5.1 创建一个 RIEntry,用于下文的writeThrough
        RIEntry<K, V> entry = new RIEntry<K, V>(key, value);
        Duration duration;
        try {
        //5.2 执行过期策略
          duration = expiryPolicy.getExpiryForCreation();
        } catch (Throwable t) {
          duration = getDefaultDuration();
        }
        long expiryTime = duration.getAdjustedTime(now);
        //5.3 创建存储对象,这个时候才是真正缓存数据
        cachedValue = new RICachedValue(internalValue, now, expiryTime);

        //5.4 实现writeThrough
        writeCacheEntry(entry);

        //5.5 判断是否已过期
        if (cachedValue.isExpiredAt(now)) {
          processExpiries(key, dispatcher, valueConverter.fromInternal(cachedValue.get()));
        } else {
        //5.6 将缓存存储到map中
          entries.put(internalKey, cachedValue);
          putCount++;
          // 5.7 增加一个创建监听事件
          dispatcher.addEvent(CacheEntryCreatedListener.class, new RICacheEntryEvent<K, V>(this, key, value, EventType.CREATED));
        }

      } else {

        //6 来到这里是,说明该key存在未过期的value,获取到旧的value
        V oldValue = valueConverter.fromInternal(cachedValue.get());
        RIEntry<K, V> entry = new RIEntry<K, V>(key, value, oldValue);
        //6.1 实现writeThrough
        writeCacheEntry(entry);

        try {
        //6.2 执行过期策略
          Duration duration = expiryPolicy.getExpiryForUpdate();
          if (duration != null) {
            long expiryTime = duration.getAdjustedTime(now);
            cachedValue.setExpiryTime(expiryTime);
          }
        } catch (Throwable t) {
          //leave the expiry time untouched when we can't determine a duration
        }

        //6.3 更新value
        cachedValue.setInternalValue(internalValue, now);
        putCount++;
        //6.4 增加一个缓存更新监听事件
        dispatcher.addEvent(CacheEntryUpdatedListener.class,
            new RICacheEntryEvent<K, V>(this, key, value, oldValue,
                EventType.UPDATED));
      }
      //7 执行所有监听事件
      dispatcher.dispatch(listenerRegistrations);

    }
    //8 数据统计
    if (statisticsEnabled() && putCount > 0) {
      statistics.increaseCachePuts(putCount);
      statistics.addPutTimeNano(System.nanoTime() - start);
    }

}
源码剖析
以下序号是上文put方法实现过程的代码序号
RICacheEventDispatcher是缓存事件处理类,主要存储缓存操作事件。例如:创建缓存事件,更新缓存事件,缓存过期事件。该对象存储的事件可以通过其内部方法dispatch() 通知各个事件的监听器。- 实现是值存储还是引用存储:
cache-ri-impl是定义了一个RIInternalConverter接口,该接口定义了存储和获取时对value处理的方法。有两个实现类RIReferenceInternalConverter和RISerializingInternalConverter。
RIInternalConverter接口源码:
public interface RIInternalConverter<T> {
  /**
   * Converts the value to an internal representation.
   * 将值转成内部类型,用于内部逻辑处理和存储
   */
  Object toInternal(T value);
  /**
   * Converts an internal representation of a value to a value.
   * 将内部类型转成对外类型T,提供给调用方使用
   */
  T fromInternal(Object internal);
}
RIReferenceInternalConverter 是引用存储的实现。源码如下
public class RIReferenceInternalConverter<T> implements RIInternalConverter<T> {
    //缓存内部和外部都是共享同一个的value
  @Override
  public T fromInternal(Object internal) {
    return (T) internal;
  }

  @Override
  public Object toInternal(T value) {
    return value;
  }
}
RISerializingInternalConverter 是值存储的实现,内部是用java序列号的方式创建一个新的对象.
@Override
  public Object toInternal(T value) {
    return new Serialized<T>(value);
  }

  Serialized(V value) {
      if (value == null) {
        this.hashCode = 0;
        this.bytes = null;
      } else {
        this.hashCode = value.hashCode();

        ByteArrayOutputStream bos = new ByteArrayOutputStream();
        try {
          ObjectOutputStream oos = new ObjectOutputStream(bos);
          oos.writeObject(value);
          bos.flush();
          this.bytes = bos.toByteArray();
        } catch (IOException e) {
          throw new IllegalArgumentException("Failed to serialize: " + value + " due to " + e.getMessage(), e);
        } finally {
          try {
            bos.close();
          } catch (IOException e) {
            // eat this up
          } } } }
5.1 RIEntry类并不是真实缓存数据的类,只用于内部逻辑处理时临时存储数据。
5.2 调用过期策略的getExpiryForCreation方法获取Duration(上篇有介绍)。注意的是,这里调用的是创建时触发的过期策略,如果开发者配置的是其他阶段的过期策略,那么返回的Duration对象也会不一样。可以看下面对比
下面是CreatedExpiryPolicy#getExpiryForCreation()获取到的是Duration对象
 public Duration getExpiryForCreation() {
    return expiryDuration;
  }
下面是EternalExpiryPolicy#getExpiryForCreation()获取到的是Duration空对象,代表永不过期。(EternalExpiryPolicy是永不过期的策略)
public static final Duration ETERNAL = new Duration();
 public Duration getExpiryForCreation() {
    return ETERNAL;
  }
5.3 在cache-ri-impl实现中,真实value的类是RICachedValue,其的作用用于存储value和过期时间以及一些初始化参数。详情可看源码。
5.4 WriteThrough是更新数据的一种策略(第一篇更新策略有介绍)。下文会详细讲解实现逻辑,先看看该方法的逻辑:
private void writeCacheEntry(RIEntry<K, V> entry) {
   //当开启isWriteThrough的时候,会调用cacheWriter.write方法
    if (configuration.isWriteThrough()) {
      try {
        cacheWriter.write(entry);
      } catch (Exception e) {
  }
5.6 缓存存储在RIInternalMap<Object, RICachedValue> entries,可以看到value是RICachedValue对象
7 dispatcher.dispatch()就是调用缓存事件处理对象上文的所存储事件(序号4,5.7,6.4)。
调用创建事件监听器代码如下
 events = eventMap.get(CacheEntryCreatedListener.class);
      if (events != null) {
        for (RICacheEntryListenerRegistration<K, V> registration : registrations) {
          CacheEntryEventFilter<? super K, ? super V> filter = registration.getCacheEntryFilter();
          Iterable<CacheEntryEvent<K, V>> iterable =
              filter == null ? events : new RICacheEntryEventFilteringIterable<K, V>(events, filter);

          CacheEntryListener<? super K, ? super V> listener = registration.getCacheEntryListener();
          if (listener instanceof CacheEntryCreatedListener) {
            ((CacheEntryCreatedListener) listener).onCreated(iterable);
          }
        }
      }
过程流程图: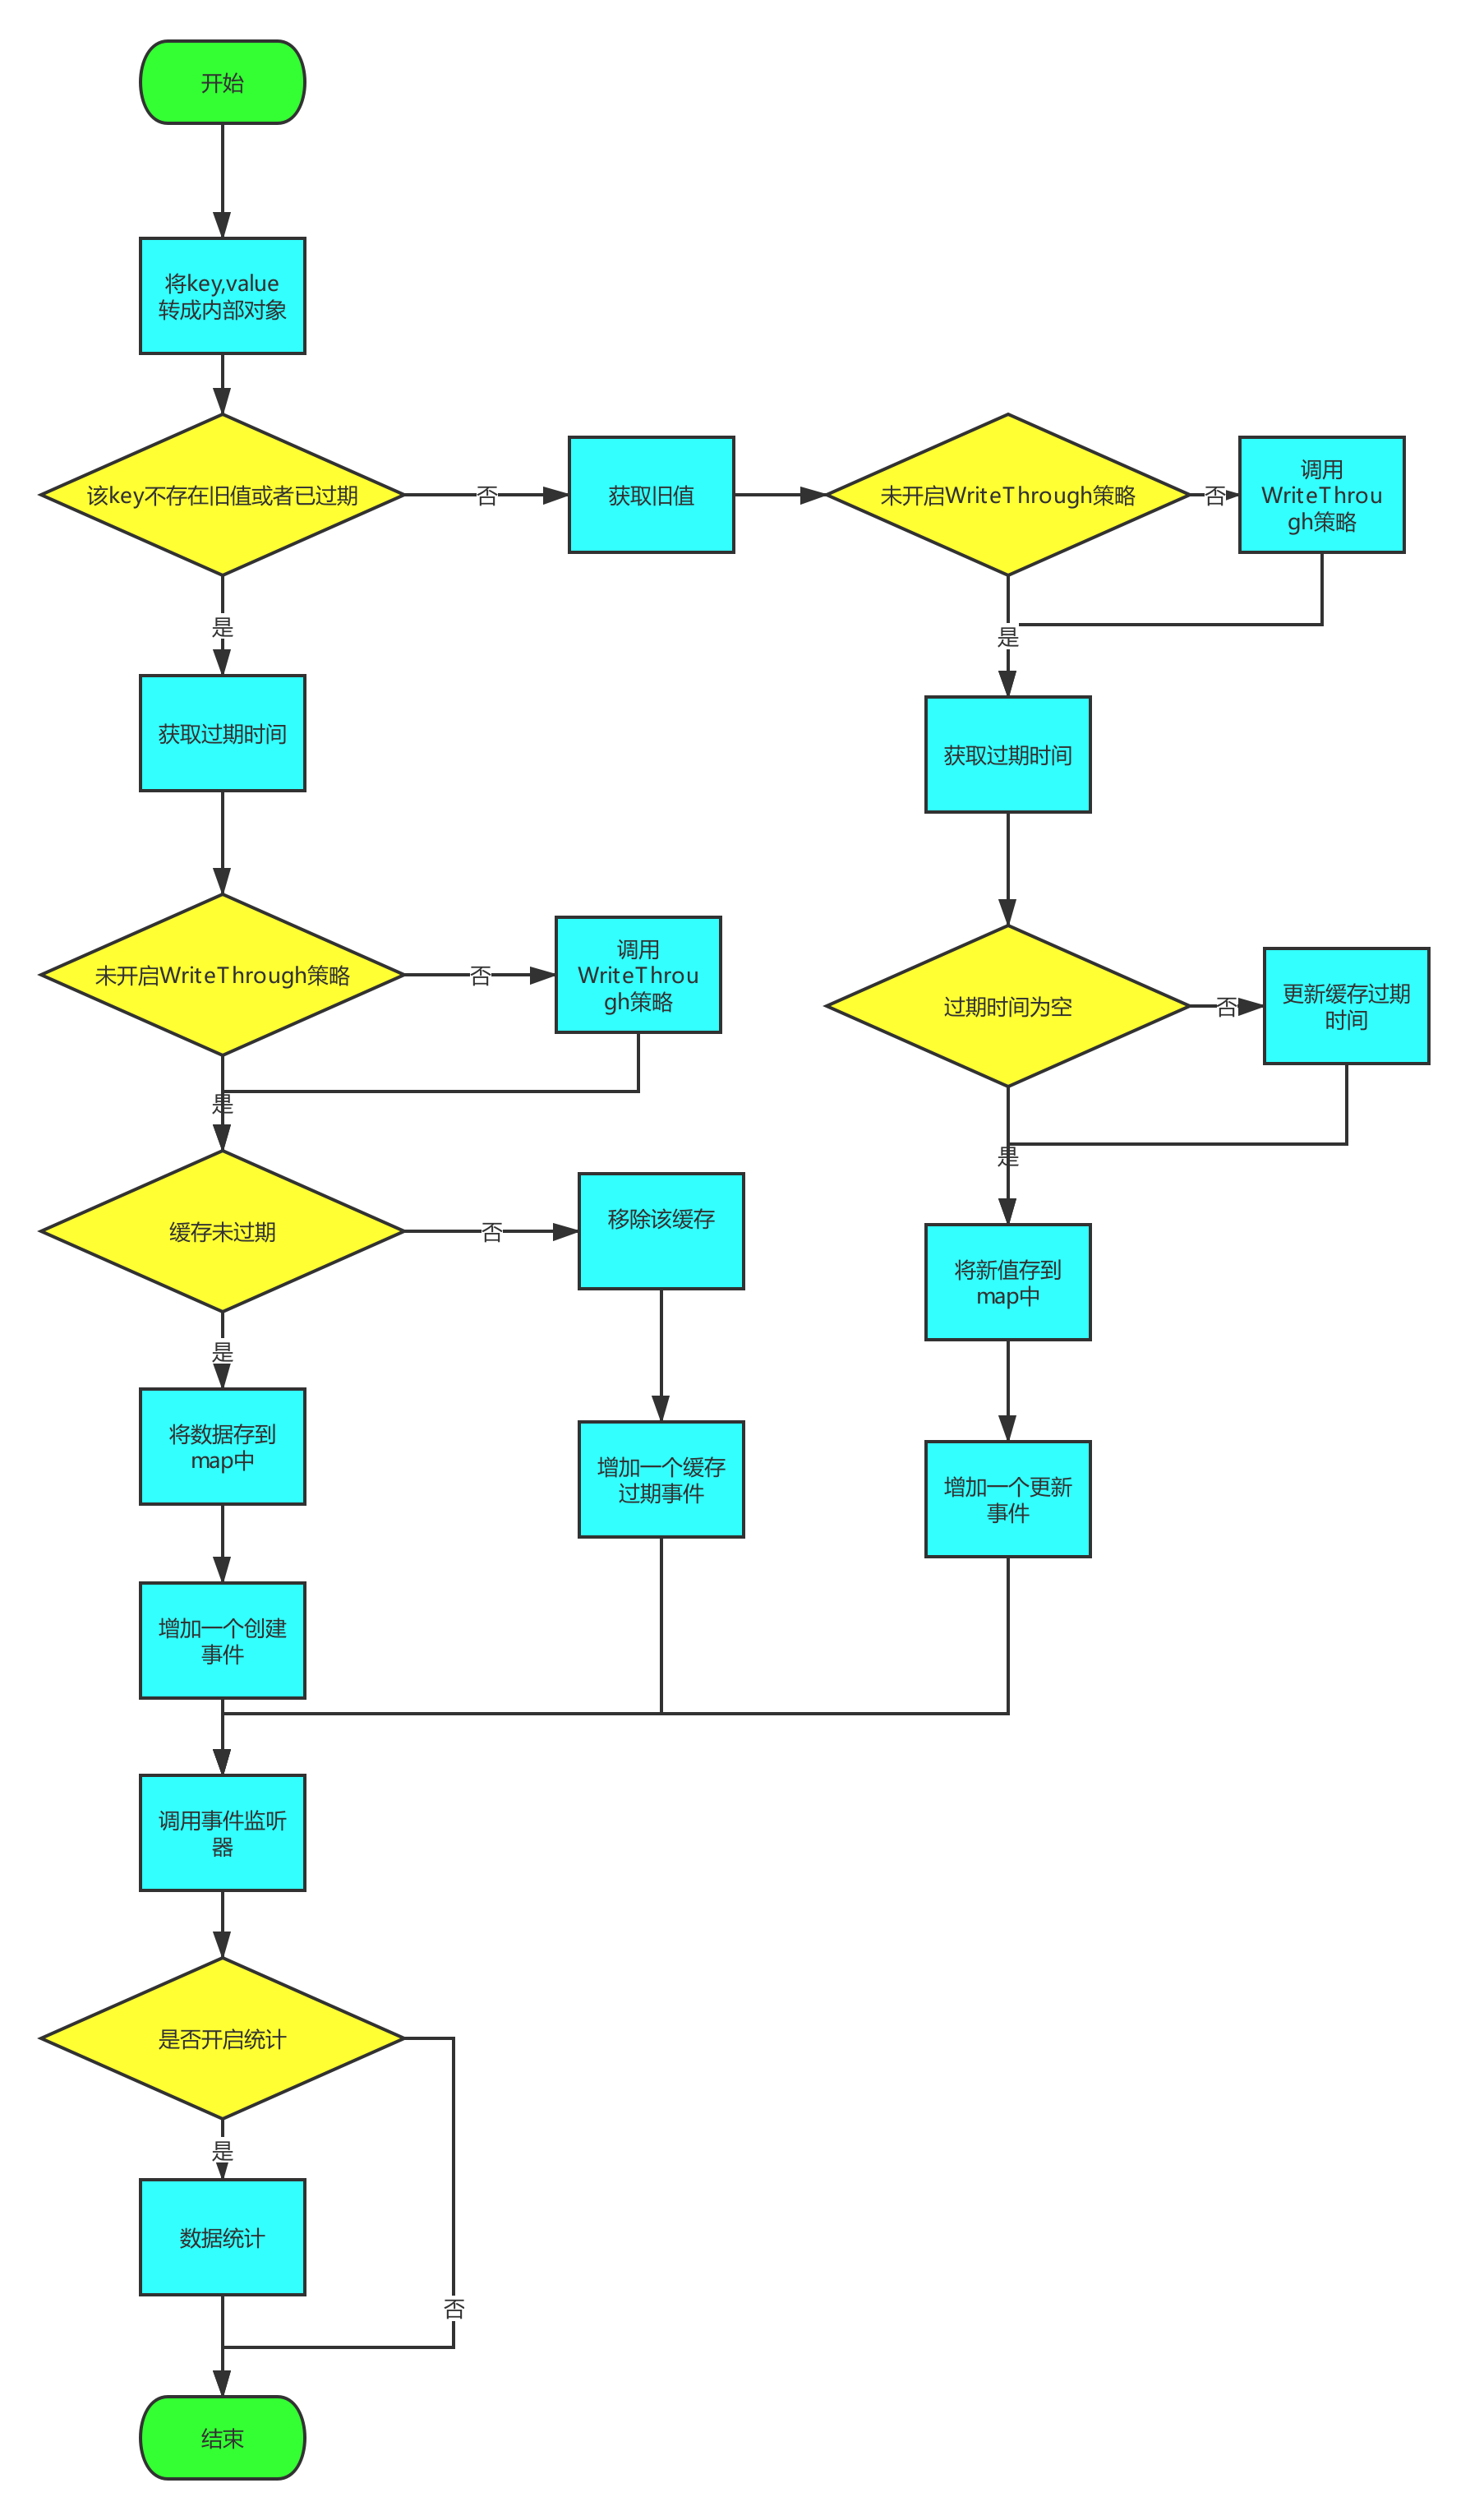
get方法实现
get的实现思路其实和put方法差不多。有一点需要注意的是get可实现缓存更新策略是ReadThrough,而put实现的是WriteThrough
缓存事件监听 Cache Entry Listeners
-
提供四个缓存事件
create,update,remove.expired -
CacheEntryListener接口,由4个事件接接口继承CacheEntryExpiredListener,CacheEntryCreatedListener,CacheEntryUpdatedListener,CacheEntryRemovedListener。4个事件触发都会调用其对应的接口
-
缓存配置监听器:
通过实现CacheEntryListenerConfiguration接口,可以将事件监听器绑定到缓存中。Cache提供了一个方法 registerCacheEntryListener( CacheEntryListenerConfiguration<K, V> cacheEntryListenerConfiguration) -
事件监听器的触发,其实是一个观察者模式,当
Cache某些方法被调用,就会主动去调用监听器方法。例如dispatcher.dispatch(listenerRegistrations); -
配置添加器还涉及到一个
CacheEntryEventFilter类,该类不是必须实现的,它的作用只是在调用监听器之前检验监听器的事件是否正确
简单的demo
这次demo是实现创建事件和过期事件的监听器。
public class SimpleExpireAndCreateListener implements CacheEntryCreatedListener<String,String> , CacheEntryExpiredListener<String,String> {
    @Override
    public void onCreated(Iterable<CacheEntryEvent<? extends String, ? extends String>> cacheEntryEvents) throws CacheEntryListenerException {
        for (CacheEntryEvent<? extends String, ? extends String> entryEvent : cacheEntryEvents) {
            System.out.println("Created的Listener方法: " + entryEvent.getKey() + " with value: " + entryEvent.getValue());
        }
    }

    @Override
    public void onExpired(Iterable<CacheEntryEvent<? extends String, ? extends String>> cacheEntryEvents) throws CacheEntryListenerException {
        for (CacheEntryEvent<? extends String, ? extends String> entryEvent : cacheEntryEvents) {
            System.out.println("Expired的Listener方法: " + entryEvent.getKey() + " with value: " + entryEvent.getValue()+" oldValue: "+entryEvent.getOldValue());
        }
    }
}
SimpleExpireAndCreateListener类实现了CacheEntryCreatedListener和CacheEntryExpiredListener接口。
public static void main(String[] args) throws InterruptedException {
        CachingProvider cachingProvider = Caching.getCachingProvider();
        CacheManager cacheManager = cachingProvider.getCacheManager();

        //创建缓存配置类
        MutableConfiguration mutableConfiguration = new MutableConfiguration();
        mutableConfiguration.setTypes(String.class, String.class);
        //设置1分钟过期时间
        mutableConfiguration.setExpiryPolicyFactory(AccessedExpiryPolicy.factoryOf(new Duration(SECONDS, 10)));

        MutableCacheEntryListenerConfiguration mutableCacheEntryListenerConfiguration = new MutableCacheEntryListenerConfiguration(
                FactoryBuilder.factoryOf(SimpleExpireAndCreateListener.class), null, false, false
        );
        //创建缓存操作类
        Cache<String, String> cache = cacheManager.createCache("simpleExpireListenerDemo", mutableConfiguration);

        cache.registerCacheEntryListener(mutableCacheEntryListenerConfiguration);

        cache.put("过期key", "过期value");

        //睡眠1分钟
        Thread.sleep(10000);

        String value = cache.get("过期key");

        System.out.println("获取到value:"+value);
    }

运行效果:
Created的Listener方法: 过期key with value: 过期value
Expired的Listener方法: 过期key with value: null oldValue: null
获取到value:null
事件监听器的调用其实在上文put和get源码中就有提及。
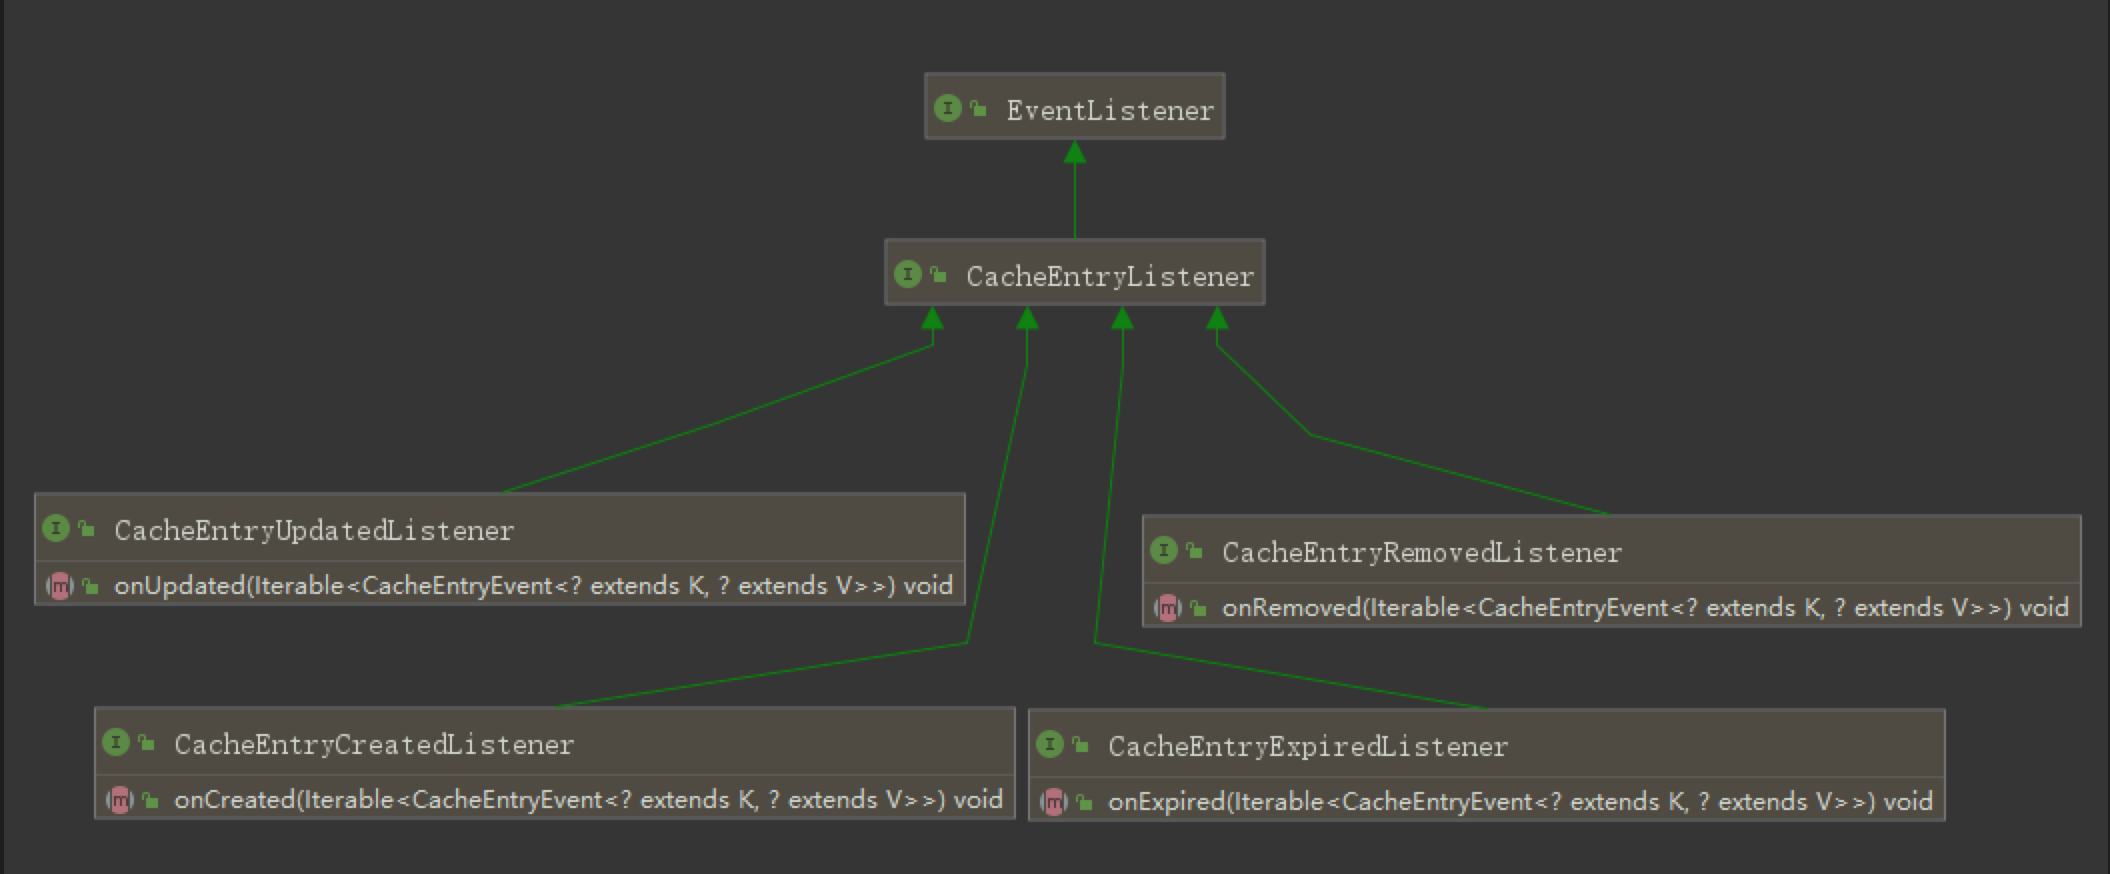
annotation
JCache也定义了使用注解缓存的规范,在cache-ri-impl包并没有实现。但是在Spring Cache中,注解缓存却用得很广泛。以后剖析Spring Cache时再说说这注解的实现和使用。
构造模块 configuration
这个模块主要为了方便开发者快速配置缓存,创建缓存,使用和管理缓存。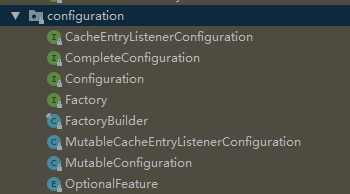
例如 FactoryBuilder类,就是工厂构建类。他不需要开发者实现Factory接口,主要使用FactoryBuilder就可以创建想要的类实例。
下面是使用例子
        //配置readThrough
        mutableConfiguration.setReadThrough(true);
        mutableConfiguration.setCacheLoaderFactory(FactoryBuilder.factoryOf(ReadThroughLoader.class));
例如MutableConfiguration类,是JCache提供的一个默认配置的CompleteConfiguration实现类,方便开发者可以便捷创建缓存
MutableConfiguration mutableConfiguration = new MutableConfiguration();
mutableConfiguration.setTypes(String.class, String.class);
//创建缓存
Cache<String, String> cache = cacheManager.createCache("simpleCache", mutableConfiguration);
integration
integration 模块只是提供ReadThrough和WriteThrough更新策略的实现规范。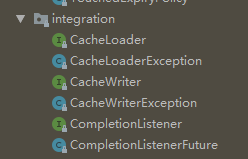
ReadThrough
ReadThrough 是一种更新缓存的策略,读取数据时的策略当缓存没有命中(缓存中没有得到数据),由缓存服务来加载数据。同时,请求可能会阻塞等待或者返回。在cache-ri-impl包中,get()方法中有一步是当缓存数据为空,并且ReadThrough开启时,会去调用ReadThrough实现。
实现ReadThrough需要实现CacheLoader接口,CacheLoader接口定义了两个方法load和loadAll
实现代码如下:
public class ReadThroughLoader implements CacheLoader {

    /**
     * 模拟数据库
     */
    private static final List<String> DATASOURCE ;
    private static final Random RANDOMINT;

    static {
        DATASOURCE = new ArrayList<>();
        DATASOURCE.add("datasource1");
        DATASOURCE.add("datasource2");
        DATASOURCE.add("datasource3");
        DATASOURCE.add("datasource4");
        RANDOMINT = new Random();
    }
    @Override
    public Object load(Object key) throws CacheLoaderException {
        System.out.println("[loader加载] 传入key:"+key);
        //模擬查询数据库的数据
        String value = DATASOURCE.get(RANDOMINT.nextInt(DATASOURCE.size()));
        return value;
    }
    @Override
    public Map loadAll(Iterable keys) throws CacheLoaderException {
        Map<String, String> map = new HashMap<>();
        keys.forEach(key->{
            //模擬查询数据库的数据
            String value = DATASOURCE.get(RANDOMINT.nextInt(DATASOURCE.size()));
            map.put(String.valueOf(key), value);
        });
        return map;
    }
}
上文实现是,模拟当缓存没有获取到值时,从数据库中获取数据的过程,然后存储到缓存中。
    public static void main(String[] args) throws InterruptedException {
        CachingProvider cachingProvider = Caching.getCachingProvider();
        CacheManager cacheManager = cachingProvider.getCacheManager();

        //创建缓存配置类
        MutableConfiguration mutableConfiguration = new MutableConfiguration();
        mutableConfiguration.setTypes(String.class, String.class);
        //开启readThrough模式
        mutableConfiguration.setReadThrough(true);
        mutableConfiguration.setCacheLoaderFactory(FactoryBuilder.factoryOf( ReadThroughLoader.class));

        //创建缓存
        cacheManager.createCache("readThroughDemo", mutableConfiguration);

        //获取缓存
        Cache<String, String> loaderDemo = cacheManager.getCache("readThroughDemo");

        String value = loaderDemo.get("key1");
        if (null != value) {
            System.out.println("命中缓存");
            System.out.println("缓存值:"+value);
        }
        //再获取一次该缓存
        String Oncevalue = loaderDemo.get("key1");
        System.out.println("再一次获取缓存的值:"+Oncevalue);
    }

 输出结果:
 [loader加载] 传入key:key1
命中缓存
缓存值:datasource3
再一次获取缓存的值:datasource3
从输出结果中可以看到,两次获取同一个key值得数据,第一次触发了ReadThrough,第二次并没有触发。
WriteThrough
WriteThrough的实现思路与ReadThrough类似,WriteThrough
直接看实现
public class WriteThroughWriter implements CacheWriter<String,String> {

    public final static String PREFIX = "[writeThrough]";

    @Override
    public void write(Cache.Entry<? extends String, ? extends String> entry) throws CacheWriterException {
        System.out.println("[CacheWrite] write方法 key:"+entry.getKey()+"   value:"+entry.getValue());
    }

    @Override
    public void writeAll(Collection<Cache.Entry<? extends String, ? extends String>> entries) throws CacheWriterException {
        System.out.println("[CacheWrite] writeAll方法 key:"+entries.toString());

    }

    @Override
    public void delete(Object key) throws CacheWriterException {
        System.out.println("[CacheWrite] delete方法 key:"+key);

    }

    @Override
    public void deleteAll(Collection<?> keys) throws CacheWriterException {
        System.out.println("[CacheWrite] deleteAll方法 key:"+keys.toString());
    }
}
调用代码
    public static void main(String[] args) throws InterruptedException {
        CachingProvider cachingProvider = Caching.getCachingProvider();
        CacheManager cacheManager = cachingProvider.getCacheManager();

        MutableConfiguration mutableConfiguration = new MutableConfiguration();
        mutableConfiguration.setWriteThrough(true);
        mutableConfiguration.setCacheWriterFactory(FactoryBuilder.factoryOf(SimpleExample.class));

        cacheManager.createCache("writeThrough", mutableConfiguration);

        Cache<Object, Object> writeThrough = cacheManager.getCache("writeThrough");

        writeThrough.put("key1", "value1");

    }
加工 processor
为了可以让开发者对缓存进行一些操作,改变缓存数据,提供了processor模块,可以调用invoke()/invokeAll()方法时实现
provesor模块主要看MutableEntry和EntryProcessor接口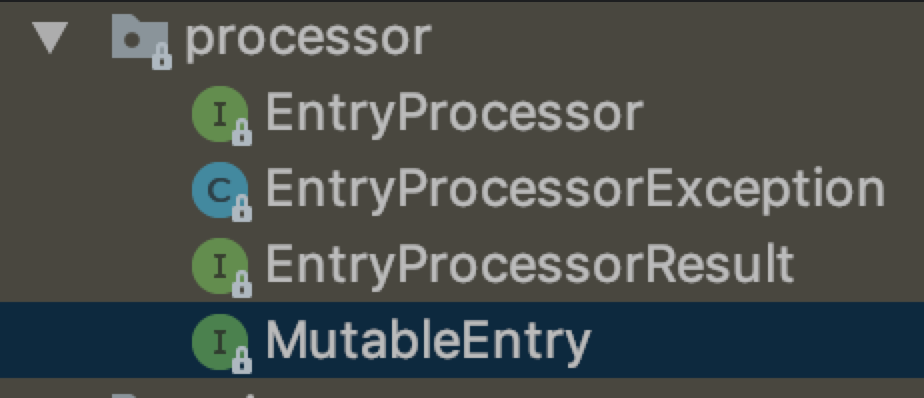
实现demo
public class ReadThroughEntryProcessor implements EntryProcessor<String,String,String> {
    private final String PREFIX = "prefix_";

    @Override
    public String process(MutableEntry<String,String> entry, Object... arguments) throws EntryProcessorException {
        //判断entry是否存在
        if (entry.exists()) {
            System.out.println("value存在,实现writeThrough");
            entry.setValue(PREFIX+entry.getValue());
        }else {
            System.out.println("value不存在,实现readThrough");
        }
        return entry.getValue();
    }
}

 public static void main(String[] args) {
        CachingProvider cachingProvider = Caching.getCachingProvider();
        CacheManager cacheManager = cachingProvider.getCacheManager();

        //创建缓存配置类
        MutableConfiguration mutableConfiguration = new MutableConfiguration();
        mutableConfiguration.setTypes(String.class, String.class);

        //配置readThrough
        mutableConfiguration.setReadThrough(true);
        mutableConfiguration.setCacheLoaderFactory(FactoryBuilder.factoryOf(ReadThroughLoader.class));

        //配置writeThrough
        mutableConfiguration.setWriteThrough(true);
        mutableConfiguration.setCacheWriterFactory(FactoryBuilder.factoryOf(WriteThroughWriter.class));

        //创建缓存
        Cache<String, String> cache = cacheManager.createCache("simpleCache", mutableConfiguration);

        cache.put("key1","value1");

        System.out.println("-----------");
        String value = cache.invoke("key", new ReadThroughEntryProcessor());
        System.out.println("-----------");
        String value1 = cache.invoke("key1", new ReadThroughEntryProcessor());


        System.out.println("获取的值:"+value);
        System.out.println("获取的值:"+value1);

    }

运行效果:
[CacheWrite] write方法 key:key1   value:value1
-----------
value不存在,实现readThrough
[loader加载] 传入key:key
-----------
value存在,实现writeThrough
[CacheWrite] write方法 key:key1   value:prefix_value1
获取的值:datasource4
获取的值:prefix_value1
上文例子展现了当key存在时,会将value添加一个前缀prefix。
剖析源码
可以看一下invoke()方法源码
public <T> T invoke(K key, javax.cache.processor.EntryProcessor<K, V,
      T> entryProcessor, Object... arguments) {

      // 已省略部分代码

     T result = null;
    try {
       //1 创建一个缓存对象事件记录实例
      RICacheEventDispatcher<K, V> dispatcher = new RICacheEventDispatcher<K, V>();
       //2 转换成内部类型
      Object internalKey = keyConverter.toInternal(key);
      RICachedValue cachedValue = entries.get(internalKey);
       //3 构建一个EntryProcessorEntry对象 这个对象用于处理EntryProcessor的实现类处理
      EntryProcessorEntry<K, V> entry = new EntryProcessorEntry<>(valueConverter, key,
          cachedValue, now, dispatcher, configuration.isReadThrough() ? cacheLoader : null);
       //4 调用process 实现对缓存的处理
      result = entryProcessor.process(entry, arguments);

       //5 这里对不同的操作事件进行处理
      Duration duration;
      long expiryTime;
      switch (entry.getOperation()) {
        case NONE:
          break;

        case ACCESS:
         //...省略
          break;

        case CREATE:
        case LOAD:
          //...省略
          break;

        case UPDATE:
         //...省略
          break;

        case REMOVE:
           //...省略
          break;

        default:
          break;
      }

      dispatcher.dispatch(listenerRegistrations);

    } finally {
      lockManager.unLock(key);
    }
    return result;
  }
以下序号是上文invoke()方法源码的代码序号
3 EntryProcessorEntry是cache-ri-impl包的类,实现MutableEntry接口。
那么我们看看MutableEntry用途是什么。MutableEntry继承了Cache.Entry,用于处理变化的Cache.Entry对象。
public interface MutableEntry<K, V> extends Cache.Entry<K, V> {

  boolean exists();

  void remove();

  V getValue();

  void setValue(V value);
}
4 调用demo的实现类ReadThroughEntryProcessor#process()方法,ReadThroughEntryProcessor类实现了EntryProcessor。EntryProcessor主要定义了可以通过函数处理Cache.Entry,并且是原子性的。
5 对于4的对缓存处理事件(NONE,ACCESS,CREATE…)实现不同的逻辑。
总结
本篇介绍了JCache缓存的代码结构。其中着重介绍了四个核心模块:processor,integration,expiry,event和构建模块configuration。
共同学习,写下你的评论
评论加载中...
作者其他优质文章


