@[toc](Spring IOC 容器的基本使用)
一、为什么要使用 Spring?
	1.1 传统的 MVC 架构的程序
	1.2 程序耦合性过高?
	1.3 如何解耦?
	1.4 Spring IOC 的依赖注入
二、Spring IOC 的依赖注入
	2.1 使用构造函数完成依赖注入
		2.1.1 标签的使用讲解
		2.1.2 构造函数依赖注入的优缺点
		2.1.3 使用构造函数完成依赖注入的实例
	2.2 使用 setter 完成注入
		2.2.1 使用 setter 完成依赖注入的功能
		2.2.2 基于 setter 完成依赖注入的分析
	2.3 复杂数据类型注入
		2.3.1 集合数据类型注入使用场景
		2.3.2 集合类型的数据注入
三、使用注解完成 Spring 的 IOC 注入
	3.1 用于创建对象的注解
		3.1.1 普通方法创建对象
		3.1.2 Componet 注解(还有和它功能一样的三层注解)
	3.2 用于注入数据的注解
		3.2.1 数据方式剖析
		3.2.2 注入方式一(Autowired + Qualifier)
		3.2.3 基于 Resource 的注解
四、Spring IOC 注入总结
本文的代码过多,但是每个点我会尽可能的写的很详细
一、为什么要使用 Spring?
1.1 传统的 MVC 架构的程序
我们平时编写一个小项目的时候,一般会采用 MVC 三层架构来编写一个项目
- M —— modal 模型层(实体类)
- V —— views 视图层 (界面)
- C —— controller 控制层 (用来完执行一些操作)
这三层架构各自分工,独自完成相对应的功能,但是这样的程序写出来会导致程序之间耦合性过高
1.2 程序耦合性过高?
耦合性过高实际上说的是程序之间的依赖性过高,解耦说的就是降低程序之间的依赖关系
我们使用 Java 通常都是写好一个类,构造方法,setter 和 getter 等等,我们在其他的类中使用该类就得 创建一个 该类的对象,然后通过对象调用该类的各种方法。这样整个程序之间就会产生多个类,对应的也会产生多个对象互相进行调用,因此我们整体的程序就会体现出耦合性过高的特点。
1.3 如何解耦?
- 我们在 Java SE 中学习过 JDBC,也学习过 properties 对象, 我们可以把 jdbc 的一些配置写进文件中。
- 我们传统一般都是创建对象,我们可以换一种方式,通过 Java 的反射机制获取类的信息,并且创建对象
- 读取 xml 文件
1.4 Spring IOC 的依赖注入
Spring 框架正式为了解决这样的情况出现了,它提供了 读取 xml配置,以及注解 两种方式实现 bean 的自动注入,而被注入的容器叫做 IOC 容器
    依赖注入:
        Dependency Injection
    IOC 的作用:
        降低程序键的耦合(依赖关系)
    依赖关系的管理:
       以后都交给 spring 来维护
       在当前类需要用到其他类的对象,由Spring来为我们提供,我们只需要在配置文件中说明

     依赖关系的维护:
            就称为依赖注入
     依赖注入:
            能注入的数据,有三类
                基本类型和 string
                其他 bean 类型(在配置文件中或者注解配置过的 bean—)
                复杂类型、集合类型

            注入的方式:有三种
                第一种:使用构造函数提供
                第二种:使用 set方法提供
                第三种:使用注解提供
二、Spring IOC 的依赖注入
2.1 使用构造函数完成依赖注入
2.1.1 标签的使用讲解
- 使用的标签:constructor-arg
- 标签出现的位置:bean标签的内部
- 标签中的属性
1. type:用于指定要注入的数据的数据类型,该数据类型可以是构造函数中某个或某些参数的类型
2. index: 用于指定要注入的数据给构造函数中指定索引位置的参数赋值,索引的位置也是从 0 开始
3. name:用于指定构造函数中指定名称的参数赋值
以上三个标签用于指定给构造函数中哪个参数赋值
5. value: 用于给基本类型和 String类型的数据
6. ref:用于指定其它的 bean 类型数据,它指的就是 spring IOC 核心容器中出现过的 bean 对象
2.1.2 构造函数依赖注入的优缺点
- 优势:
在获取 bean 对象时,注入数据是必须的操作,否则对象无法创建成功 - 弊端:
改变了bean 对象的实例化方式,使我们在创建对象时,如果用不到,也必须创建
2.1.3 使用构造函数完成依赖注入的实例
注意:后面的修改全部都是基于此类的修改在这里插入代码片
- 编写 bean.xml 配置文件
- 编写一个 AccountService 接口,后面的三种方法都要实现该接口
- 编写 AccountServiceImpl 实现该接口,并且记住该类的名称和位置
- 编写一个 Client 类,用来测试该接口中的方法
bean.xml 配置
<?xml version="1.0" encoding="UTF-8"?>
<beans xmlns="http://www.springframework.org/schema/beans"
       xmlns:xsi="http://www.w3.org/2001/XMLSchema-instance"
       xmlns:context="http://www.springframework.org/schema/context"
       xsi:schemaLocation="http://www.springframework.org/schema/beans
           http://www.springframework.org/schema/beans/spring-beans-3.0.xsd
           http://www.springframework.org/schema/context
           http://www.springframework.org/schema/context/spring-context-3.0.xsd">

    <!-- 使用构造函数注入
         使用的标签:constructor-arg
         标签出现的位置:bean标签的内部
         标签中的属性
            type:用于指定要注入的数据的数据类型,该数据类型可以是构造函数中某个或某些参数的类型
            index: 用于指定要注入的数据给构造函数中指定索引位置的参数赋值,索引的位置也是从 0 开始
            name:用于指定构造函数中指定名称的参数赋值
            ============== 以上三个用于指定给构造函数中哪个参数赋值 ============
            value: 用于给基本类型和 String类型的数据
            ref:用于指定其它的 bean 类型数据,它指的就是 spring IOC 核心容器中出现过的 bean 对象

            优势:
                在获取 bean 对象时,注入数据是必须的操作,否则对象无法创建成功
            弊端:
                改变了bean 对象的实例化方式,使我们在创建对象时,如果用不到,也必须创建
      -->
    <bean id="accountService" class="com.itheima.service.impl.IAccountServceImpl">
        <constructor-arg name="name" value="text"></constructor-arg>
        <constructor-arg name="age" value="18"></constructor-arg>
        <constructor-arg name="birthday"  ref="now"></constructor-arg>
    </bean>

    <!-- 配置一个日期对象,上面会引用到 now   -->
    <bean id="now" class="java.util.Date"></bean>
</beans>
IAccountService 接口编写
package com.itheima.service;

public interface IAccountService {
    void saveAccount();
}
IAccountServceImpl 接口实现类的编写
package com.itheima.service.impl;

import com.itheima.service.IAccountService;
import java.util.Date;

/**
 * 账户业务层的实现类
 * 构造函数的注入
 * */
public class IAccountServceImpl implements IAccountService {
    // 经常变化的数据,并不适用于注入的方式
    private  String name;
    private  Integer age;
    private Date birthday;

    // 创建有参的构造方法,这个方法必须存在, 在xml中,数据就是通过有参的构造方法擦混入的
    public IAccountServceImpl(String name, Integer age, Date birthday) {
        this.name = name;
        this.age = age;
        this.birthday = birthday;
    }

    public  IAccountServceImpl() {
        System.out.println("对象创建了");
    }

    public void saveAccount() {
        System.out.println("service 中的 saveAccount 方法执行了"+this.name + " "+ this.age + " " + this.birthday);
    }

	@Override
    public String toString() {
        return "IAccountServceImpl{" +
                "name='" + name + '\'' +
                ", age=" + age +
                ", birthday=" + birthday +
                '}';
    }
}
Client 类的编写
package com.itheima.client;

import com.itheima.service.IAccountService;
import org.springframework.context.ApplicationContext;
import org.springframework.context.support.ClassPathXmlApplicationContext;

/**
 * 模拟一个表现层,用于调用业务层
 * */
public class Client {

    public static void main(String[] args) {
        // 使用 mvc 三层架构,编写 (耦合性过高)
        // IAccountService as = new IAccountServceImpl();

		// =============== 划重点 ===============
        // 1. 获取核心容器对象
        ApplicationContext ac = new ClassPathXmlApplicationContext("bean.xml");
//        ApplicationContext ac = new FileSystemXmlApplicationContext("xxx"); // 这里填写配置文件,在你本机上的物理地址,很少用户

        // 2. 根据 id 获取 Bean 对象 (方式一)
        IAccountService as = (IAccountService) ac.getBean("accountService");
		System.out.println(as);
        as.saveAccount();

		//2. 根据 id 获取 Bean 对象 (方式二)
//        IAccountDao adao = ac.getBean("accountDao", IAccountDao.class);
//        as.saveAccount();
//        System.out.println(adao);
    }
}
运行结果:
我们没有使用 传统的方式,接用 Spring 框架完成了 bean 的实例化
2.2 使用 setter 完成注入
2.2.1 使用 setter 完成依赖注入的功能
    涉及的标签:property
    出现的位置:bean 标签的内部
    标签的属性:
    name:用于指定注入时所用的 set 方法名称

    == 以上三个用于指定给构造函数中哪个参数赋值 ==

    value: 用于给基本类型和 String类型的数据
    ref:用于指定其它的 bean 类型数据,它指的就是 spring IOC 核心容器中出现过的 bean 对象
2.2.2 基于 setter 完成依赖注入的分析
- 优势:
创建对象时没有明确的限制,可以直接使用默认构造函数 - 弊端:
如果某个成员必须有值,则获取对象可能 set 方法没有执行
有了前面的内容做铺垫,接下来做 setter 注入就会轻松很多,我们需要做如下步骤
- 在 bean.xml 添加依赖
    <!-- setter 方法注入
        涉及的标签:property
        出现的位置:bean 标签的内部
        标签的属性:
        name:用于指定注入时所用的 set 方法名称

        ============== 以上三个用于指定给构造函数中哪个参数赋值 ============
        value: 用于给基本类型和 String类型的数据
        ref:用于指定其它的 bean 类型数据,它指的就是 spring IOC 核心容器中出现过的 bean 对象
        优势:
            创建对象时没有明确的限制,可以直接使用默认构造函数
        弊端:
            如果某个成员必须有值,则获取对象可能 set 方法没有执行
     -->

    <bean class="com.itheima.service.impl.IAccountServiceImpl2" id="accountService2">
        <property name="name" value="小红"></property>
        <property name="age" value="19"></property>
        <property name="birthday" value="2000/4/12"></property>
    </bean>
- 编写 IAccountServiceImpl2
package com.itheima.service.impl;

import com.itheima.service.IAccountService;

import java.util.Date;

/**
 * setter 注入
 * */
public class IAccountServiceImpl2 implements IAccountService {
    private String name;
    private Integer age;
    private Date birthday;

    public void setName(String name) {
        this.name = name;
    }

    public void setAge(Integer age) {
        this.age = age;
    }

    public void setBirthday(Date birthday) {
        this.birthday = birthday;
    }

    @Override
    public String toString() {
        return "IAccountServiceImpl2{" +
                "name='" + name + '\'' +
                ", age=" + age +
                ", birthday=" + birthday +
                '}';
    }

    public void saveAccount() {
        System.out.println("service 中的 saveAccount 方法执行了");
    }
}
- Client 内容修改
package com.itheima.client;

import com.itheima.service.IAccountService;
import org.springframework.context.ApplicationContext;
import org.springframework.context.support.ClassPathXmlApplicationContext;

/**
 * 模拟一个表现层,用于调用业务层
 * */
public class Client {

    public static void main(String[] args) {
        // 1. 获取核心容器对象
        ApplicationContext ac = new ClassPathXmlApplicationContext("bean.xml");

        // 2. 根据 id 获取 Bean 对象 (两种方式)
        IAccountService as = (IAccountService) ac.getBean("accountService2");
        System.out.println(as);
        as.saveAccount();

    }
}
- 效果图(数据成功通过 setter 注入)


2.3 复杂数据类型注入
2.3.1 集合数据类型注入使用场景
复杂类型的注入,集合类型的注入
    常用 list 和 map
    用于给 List 结构集合注入的标签
        list array set
    用于给 Map 结构集合注入的标签
        map props
    结构相同,标签可以互换
2.3.2 集合类型的数据注入
- bean.xml 的配置
    <!--
    复杂类型的注入,集合类型的注入
        常用 list 和 map
        用于给 List 结构集合注入的标签
            list array set
        用于给 Map 结构集合注入的标签
            map props
        结构相同,标签可以互换

            IOC 内容结束
    -->
    <bean id="accountService3" class="com.itheima.service.impl.IAccountServiceImpl3">
    	<!-- 字符串注入 -->
        <property name="myStrs">
            <array>
                <value>AAA</value>
                <value>BBB</value>
                <value>CCC</value>
            </array>
        </property>

		<!-- 集合 List 的注入 -->
        <property name="myList">
            <list>
                <value>AAA</value>
                <value>BBB</value>
                <value>CCC</value>
            </list>
        </property>

		<!-- 集合 Set 注入-->
        <property name="mySet">
            <set>
                <value>AAA</value>
                <value>BBB</value>
                <value>CCC</value>
            </set>
        </property>

		<!-- Map 注入 -->
        <property name="myMap">
            <map>
                <entry key="testA" value="aaa"></entry>
                <entry key="testB">
                    <value>BBB</value>
                </entry>
            </map>
        </property>

		<!-- Properties 注入-->
        <property name="myPros">
            <props>
                <prop key="testC">CCC</prop>
                <prop key="testD">DDD</prop>
            </props>
        </property>
    </bean>
- IAccountServiceImpl3 编写
package com.itheima.service.impl;

import com.itheima.service.IAccountService;

import java.util.*;

public class IAccountServiceImpl3 implements IAccountService {
    private String[] myStrs;
    private List<String> myList;
    private Set<String> mySet;
    private Map<String,String> myMap;
    private Properties myPros;

    public void setMyStrs(String[] myStrs) {
        this.myStrs = myStrs;
    }

    public void setMyList(List<String> myList) {
        this.myList = myList;
    }

    public void setMySet(Set<String> mySet) {
        this.mySet = mySet;
    }

    public void setMyMap(Map<String, String> myMap) {
        this.myMap = myMap;
    }

    public void setMyPros(Properties myPros) {
        this.myPros = myPros;
    }

    public void saveAccount() {
        System.out.println(Arrays.toString(myStrs));
        System.out.println(myList);
        System.out.println(mySet);
        System.out.println(myMap);
        System.out.println(myPros);
    }

    @Override
    public String toString() {
        return "IAccountServiceImpl3{" +
                "myStrs=" + Arrays.toString(myStrs) +
                ", myList=" + myList +
                ", mySet=" + mySet +
                ", myMap=" + myMap +
                ", myPros=" + myPros +
                '}';
    }
}
- Client 编写
package com.itheima.client;

import com.itheima.service.IAccountService;
import org.springframework.context.ApplicationContext;
import org.springframework.context.support.ClassPathXmlApplicationContext;

public class Client {

    public static void main(String[] args) {
        // 1. 获取核心容器对象
        ApplicationContext ac = new ClassPathXmlApplicationContext("bean.xml");

        // 2. 根据 id 获取 Bean 对象 (两种方式)
        IAccountService as = (IAccountService) ac.getBean("accountService3");

        System.out.println(as);
        as.saveAccount();
    }
}
- 效果图

三、使用注解完成 Spring 的 IOC 注入
bean.xml 的配置
<?xml version="1.0" encoding="utf-8" ?>
<beans xmlns="http://www.springframework.org/schema/beans"
       xmlns:xsi="http://www.w3.org/2001/XMLSchema-instance"
       xmlns:context="http://www.springframework.org/schema/context"
       xsi:schemaLocation="http://www.springframework.org/schema/beans
           http://www.springframework.org/schema/beans/spring-beans-3.0.xsd
           http://www.springframework.org/schema/context
           http://www.springframework.org/schema/context/spring-context-3.0.xsd">

        <!--  使用注解来实现注入  -->

        <!--  告知 spring 在创建容器时要扫描的包,配置所需要的标签不是  在 beans 约束中,而是一个名为 context
              名称空间和约束中( 一个标签 + 注解的方式完成 IOC 注入)-->
        <context:component-scan base-package="com.itheima"></context:component-scan>

</beans>
编写 IAccountService 接口
package com.itheima.service;

public interface IAccountService {
    void saveAccount();
}
编写 IAccountDao 接口
package com.itheima.dao;

/**
 * 账户持久层接口
 * */
public interface IAccountDao {
    /**
     * 模拟保存账户
     * */
    void saveAccount();
}
3.1 用于创建对象的注解
我们在这里实现 IAccountService 接口 创建 IAccountServiceImpl类
3.1.1 普通方法创建对象
package com.itheima.service.impl;

/*   曾经的 xml 配置,我们要在这里协商这么一大段的 xml 才可以完成注入
 *  <bean id="accountService"
 *      class="com.itheima.service.impl.IAccountServceImpl
 *      <property name="" value="" | ref =""></property>
 *     "/>
 */

import com.itheima.service.IAccountService;
import com.itheima.dao.IAccountDao;

public class IAccountServiceImpl implements IAccountService {
    //1、 采用 new 创建对象,在外面还是需要通过类来创建对象解决
    private IAccountDao accountDao = new IAccountDaoImpl();

    public IAccountServiceImpl() {
        System.out.println("对象创建了");
    }

    public void saveAccount() {
        int i =1;
        accountDao.saveAccount();
        System.out.println(i);
        i++;
    }
    @Override
    public String toString() {
        return "IAccountServiceImpl{" +
                "accountDao=" + accountDao +
                '}';
    }
}
3.1.2 Componet 注解(还有和它功能一样的三层注解)
和它功能相同的还有
- Controller: 一般用在表现层
- Service: 一般用在业务层
- Respository: 一般用在持久层
	三层注解的解读:
 * 用于创建对象的注解
 *     他们的作用就和在 XML 配置文件中编写一个 <bean> 标签实现的功能是一样的
 *     @Componet
 *              作用:用于把当前类对象存入spring 容器中
 *              属性:
 *                  value 用于指定 bean 的 id,当我们不写时,它的默认是当前类名,(AccountService  => accountService)
 *                  我的是两个首字母都是大写,因此不用改 IAccountServceImpl
 *      Controller: 一般用在表现层
 *      Service: 一般用在业务层
 *      Respository: 一般用在持久层
 *      以上三个注解的作用和属性与 Component 是一模一样的,
 *      他们三个是 spring 框架为我们提供明确的三层使用的注解,使我们三层对象更加清晰
他们的用法都是一样的,如下
实现: IAccountService 接口
package com.itheima.service.impl;

import com.itheima.service.IAccountService;
import com.itheima.dao.IAccountDao;
import org.springframework.stereotype.Component;

@Component(value = "accountService")
//@Service(value = "accountService")  // 该注解和上面的注解功能是一模一样的,只是用来区分使用情景的,如果有两个注解,则 value 不能省去
public class IAccountServiceImpl implements IAccountService {
	// 这里的值为空,等会可以看到,因为我们只是通过 Spring 创建了对象,但是并没有把对象注入
    private IAccountDao accountDao;

    public void saveAccount() {
        int i =1;
        System.out.println(i);
        i++;
    }

    @Override
    public String toString() {
        return "IAccountServiceImpl{" +
                "accountDao=" + accountDao +
                '}';
    }
}
实现:IAccountDao 接口
package com.itheima.dao.impl;

import com.itheima.dao.IAccountDao;
import org.springframework.stereotype.Repository;

/**
 * 账户持久层的实现类
 * */
@Repository("accountDao") // 该注解功能同 Componet ,使用在持久层
public class IAccountDaoImpl implements IAccountDao {
    /**
     * 模拟保存账户
     */
    public void saveAccount() {
       System.out.println("保存了账户");
    }

    @Override
    public String toString() {
        return "IAccountDaoImpl{}";
    }
}
创建 Client 类
package com.itheima.client;

import com.itheima.service.IAccountService;
import org.springframework.context.ApplicationContext;
import org.springframework.context.support.ClassPathXmlApplicationContext;


/**
 * 模拟一个表现层,用于调用业务层
 * */
public class Client {
    /**
     * 获取 spring 的 Ioc 核心容器,并根据 id 获取对象
     * ApplicationCpmtext 的三个常用实现类
     *      ClassPathXMLApplicationContext:它可以加载类路径下的配置文件,要求配置文件必须在类路径下,不在的话,加载不了
     *      FileSystemXmlApplicationContext:它可以加载磁盘任意路径下的配置文件(必须有访问权限)
     *      AnnotationConfigApplicationContext:它是用于读取注解解耦容器的
     *
     * 核心容器的两个接口引发出的问题
     *   ApplicationContext:单例  采用此接口
     *      它在构建核心容器时,创建对象采用的策略是利用加载的方式,也就是说,只要一读取完配置文件马上就创建配置文件中的配置对象
     *   BeanFactory: 多例
     *      它在构建核心容器时:创建对象采取的策略是采用延迟加载的方式。也就是说,什么时候根据 id 获取对象了,什么时候才真正的创建对象
     * */
    public static void main(String[] args) {

        // 1. 获取核心容器对象
        ApplicationContext ac = new ClassPathXmlApplicationContext("bean.xml");
        // 2. 根据 id 获取 Bean 对象 (两种方式)
        IAccountService as = (IAccountService) ac.getBean("accountService");
        System.out.println(as);
        as.saveAccount();
    }
}
运行结果:
(因为我并没有进行对象注入,所以这里的值为 null)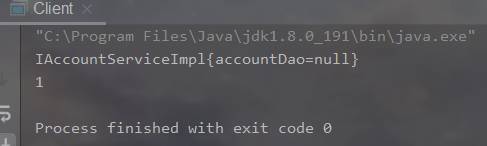
3.2 用于注入数据的注解
3.2.1 数据方式剖析
 *      他们的作用就和在 xml 配置文件中的 bean 标签写一个 <property>标签的作用是一样的
 *      Autowired:
 *          作用:自动按照类型注入。只要容器中有唯一的 bean 对象类型和要注入的变量类型匹配,就可以注入成功
 *                如果 IOC 容器中没有任何 bean 的类型和要注入的变量类型匹配,则报错
 *                如果 IOC 容器中有多个类型匹配时
 *          出现位置:
 *              可以是变量上,也可以是方法上
 *          细节:
 *              在使用注解注入时,set 方法就不是必须的了。
 *       Qualifier:
 *             作用:在按照类中注入的基础之上再按照名称注入,它在给类成员注入时不能单独使用,但是再给方法参数注入时可以使用
 *             属性:
 *                  value: 用于指定注入的 bean 的 id
 *             补充:必须和 Autowired 一起使用
 *       Resource
 *              作用:直接按照 Bean 的id 注入,它可以独立使用 (一个搞定上面两个)
 *              属性:
 *                  name:用于指定 bean 的id
3.2.2 注入方式一(Autowired + Qualifier)
重新编写
package com.itheima.service.impl;

/*		注入方式一
 *      Autowired:
 *          作用:自动按照类型注入。只要容器中有唯一的 bean 对象类型和要注入的变量类型匹配,就可以注入成功
 *                如果 IOC 容器中没有任何 bean 的类型和要注入的变量类型匹配,则报错
 *                如果 IOC 容器中有多个类型匹配时
 *          出现位置:
 *              可以是变量上,也可以是方法上
 *          细节:
 *              在使用注解注入时,set 方法就不是必须的了。
 *       Qualifier:
 *             作用:在按照类中注入的基础之上再按照名称注入,它在给类成员注入时不能单独使用,但是再给方法参数注入时可以使用
 *             属性:
 *                  value: 用于指定注入的 bean 的 id
 *             补充:必须和 Autowired 一起使用
*/

import com.itheima.service.IAccountService;
import com.itheima.dao.IAccountDao;
import org.springframework.beans.factory.annotation.Autowired;
import org.springframework.beans.factory.annotation.Qualifier;
import org.springframework.stereotype.Component;

@Service(value = "accountService")  // 看 Component
public class IAccountServiceImpl implements IAccountService {

    // 2、 采用注解的方式
    @Autowired
    @Qualifier("accountDao")
    private IAccountDao accountDao;

    public void saveAccount() {
        int i =1;
//        accountDao.saveAccount();
        System.out.println(i);
        i++;
    }

    @Override
    public String toString() {
        return "IAccountServiceImpl{" +
                "accountDao=" + accountDao +
                '}';
    }
}
运行效果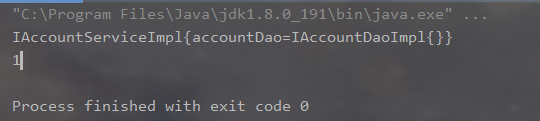
3.2.3 基于 Resource 的注解
这个注解就是将我们在上面用到两个注解替换成一个:@Resource(name = "accountDao") ,产生的结果是相同的,这里我就不放截图了
四、Spring IOC 注入总结
- 首先在配置文件中加入:
<context:component-scan base-package="com.itheima"></context:component-scan>,告知 Spring,我们要使用注解,然后我们在里面填写:base-package的值,告知 Spring 他要扫描的包 - 然后在接口的实现类中的类上添加注解(创建对象的注入):
@Component(value = "accountService")并指定其 value,(如果命名规范的话,比如我写的是 AccountService,默认值也就是上面的 value值),即可完成创建对象的操作,如果想划分的更细一点,可以使用如下三种注解,划分功能- @Controller: 一般用在表现层
- @Service: 一般用在业务层
- @Respository: 一般用在持久层
- 然后在类相对应的方法,完成数据的注入,使用两种方法都可以
- @Autowired + @Qualifier(“accountDao”) 完成对象的注入
- @Resource(name = “accountDao”) 完成对象的注入
共同学习,写下你的评论
评论加载中...
作者其他优质文章