路由之配置基础路由
基本概念
路由的概念并不是全新的,只不过一直是在服务器端编写路由代码。通常,服务器在收到 HTTP 请求时,会根据 URL 来显示相应的页面。
Angular 路由是在客户端编写路由,概念与服务器端基本类似,唯一不同的是,服务器端路由的核心概念是建立 URL 与页面的关系,而 Angular 路由的核心概念是建立 URL 与 组件的关系。
通过 Angular 编写的程序称之为单页面应用,原因就在于服务器只提供一个页面,其他页面的渲染全部由 Angular 去完成。
前提条件
实现路由第一个需要修改的文件是 index.html:
例子:
// index.html

<!doctype html>
<html lang="en">
<head>
  <meta charset="utf-8">
  <title>App</title>

  <!-- 添加 <base href="/"> -->
  <!-- 路由的根目录 -->
  <base href="/">

  <meta name="viewport" content="width=device-width, initial-scale=1">
  <link rel="icon" type="image/x-icon" href="favicon.ico">
</head>
<body>
  <app-root></app-root>
</body>
</html>
Angular 依靠 base 标签来构建路由信息,比如我们配置的路径为 /home,base 是
href="/app",那么所有的页面会使用 /app/home 作为实际路径。
配置基础路由
最基础的路由就是根路由,它也是其他子路由得以正常运行的基础。
导入
首先需要在路由文件中导入一些配置路由的接口。
例子:
// app-routing.module.ts

import { NgModule } from '@angular/core';

// 导入 RouterModule 和 Routes
import { RouterModule, Routes } from '@angular/router';

const routes: Routes = [];

@NgModule({
  imports: [RouterModule.forRoot(routes)],
  exports: [RouterModule]
})
export class AppRoutingModule { }
然后,将路由文件导入到根模块。
例子:
// app.module.ts

import { NgModule } from '@angular/core';
import { BrowserModule } from '@angular/platform-browser';

// 导入路由模块 AppRoutingModule
import { AppRoutingModule } from './app-routing.module';

import { AppComponent } from './app.component';

@NgModule({
  declarations: [
    AppComponent
  ],
  imports: [
    BrowserModule,

    // 添加 AppRoutingModule 到 imports 数组中
    AppRoutingModule
  ],
  providers: [],
  bootstrap: [AppComponent]
})
export class AppModule { }
*如果是通过 Angular Cli 构建的项目,以上步骤可省略。
配置根路由
在路由文件中,通过 Routes 来配置 Angular 路由,最基本的配置由 path 和 component 组成。
例子:
import { NgModule } from '@angular/core';
import { RouterModule, Routes } from '@angular/router';
import { LoginComponent } from './components/login/login.component';
import { WelcomeComponent } from './components/welcome/welcome.component';
import { PageNotFoundComponent } from './components//page-not-found/page-not-found.component';

const routes: Routes = [
  // path:指定路由的路径
  // component:建立与路由相关联的组件
  // redirectTo:将当前路径重定向到其他已知路由,常用于处理空路径的情况
  // **:通配符,当URL与所有路径都不匹配时,会选择这个路由,常用于展示404页面
  {
    path: 'login',
    component: LoginComponent
  },
  {
    path: 'welcome',
    component: WelcomeComponent
  },
  {
    path: '',
    redirectTo: '/login',
    pathMatch: 'full'
  },
  { path: '**',
    component: PageNotFoundComponent
  }
];

@NgModule({

  // 通过调用 RouterModule.forRoot() 方法安装根路由
  imports: [RouterModule.forRoot(routes)],

  exports: [RouterModule]
})
export class AppRoutingModule { }
*路由的顺序很重要,因为匹配路径时,遵循的是“先匹配先展示”原则,因此,首先配置具体的路由,然后配置空路径路由,最后是通配符路由。
添加路由出口
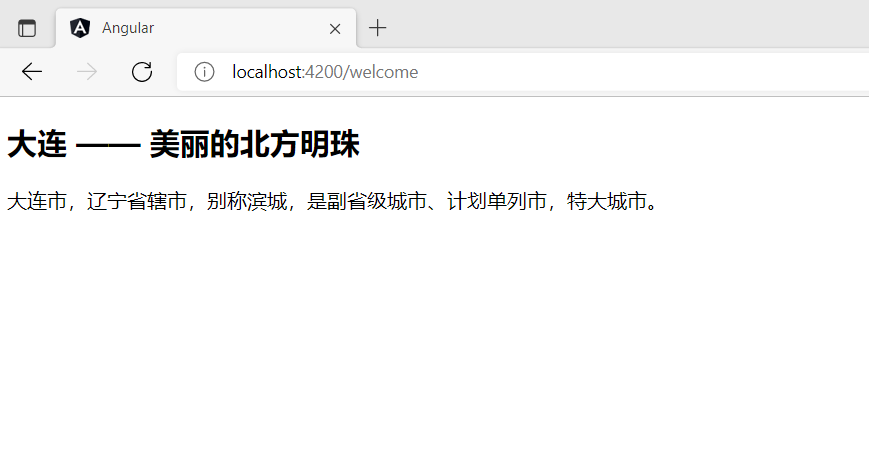
在模板中,通过
router-outlet元素指定了各个路由组件的内容在哪里被渲染。
例子:
// app.component.html

<section>
  <header>
    <h2>大连 —— 美丽的北方明珠</h2>
  </header>

  <!-- 路由出口 -->
  <router-outlet></router-outlet>

  <footer></footer>
</section>
end
点击查看更多内容
为 TA 点赞
评论
共同学习,写下你的评论
评论加载中...
作者其他优质文章
正在加载中
感谢您的支持,我会继续努力的~
扫码打赏,你说多少就多少
赞赏金额会直接到老师账户
支付方式
打开微信扫一扫,即可进行扫码打赏哦


