课程名称:web前端架构师
课程章节:第16周 第六章 使用手机号登录完成用户创建及验证功能
主讲老师:张轩
课程内容: 了解redis、 手机号完成用户的注册和登录
Redis
官网地址 https://redis.io/
cd /usr/local
sudo wget https://download.redis.io/redis-stable.tar.gz
sudo tar -xzvf redis-stable.tar.gz
cd redis-stable
make
redis-server
修改配置文件 redis.conf
vim redis.conf
搜索 daemonize 修改为 true
redis-server
ps aux | grep redis
nodejs 中使用 redis
npm i ioredis
基本使用
import Redis from 'ioredis'
const redis = new Redis()
async function main() {
    // string
    redis.set('name', 'bar');
    console.log(await redis.get('name'))
    redis.set('name', '');

    // array
    await redis.lpush('list', 'mysql', 'vscode')
    const arr = await redis.lrange('list', 0, 10)
    console.log(arr)
    await redis.del('list')

    // object
    // await redis.hmget('person', null)

    await redis.hmset('person', {
        name: 'shibin',
        age: 12
    })
    console.log(await redis.hgetall('person'))
    await redis.del('person')

    // pub sub 订阅 发布
    const sub = new Redis()
    const pub = new Redis()
    await sub.subscribe('channel-1')
    sub.on('message', (channel, message) => {
        console.log(channel, message)
    })
    await pub.publish('channel-1', '123')
}
使用 egg-redis
npm i egg-redis
启用 egg-redis 插件
const plugin: EggPlugin = {
  redis: {
    enable: true,
    package: 'egg-redis',
  },
};
在 config 文件中配置 redis
...
config.redis = {
  client: {
    port: 6379,
    host: '127.0.0.1',
    password: '',
    db: 0,
  },
}
...
使用手机号完成用户的注册和登录
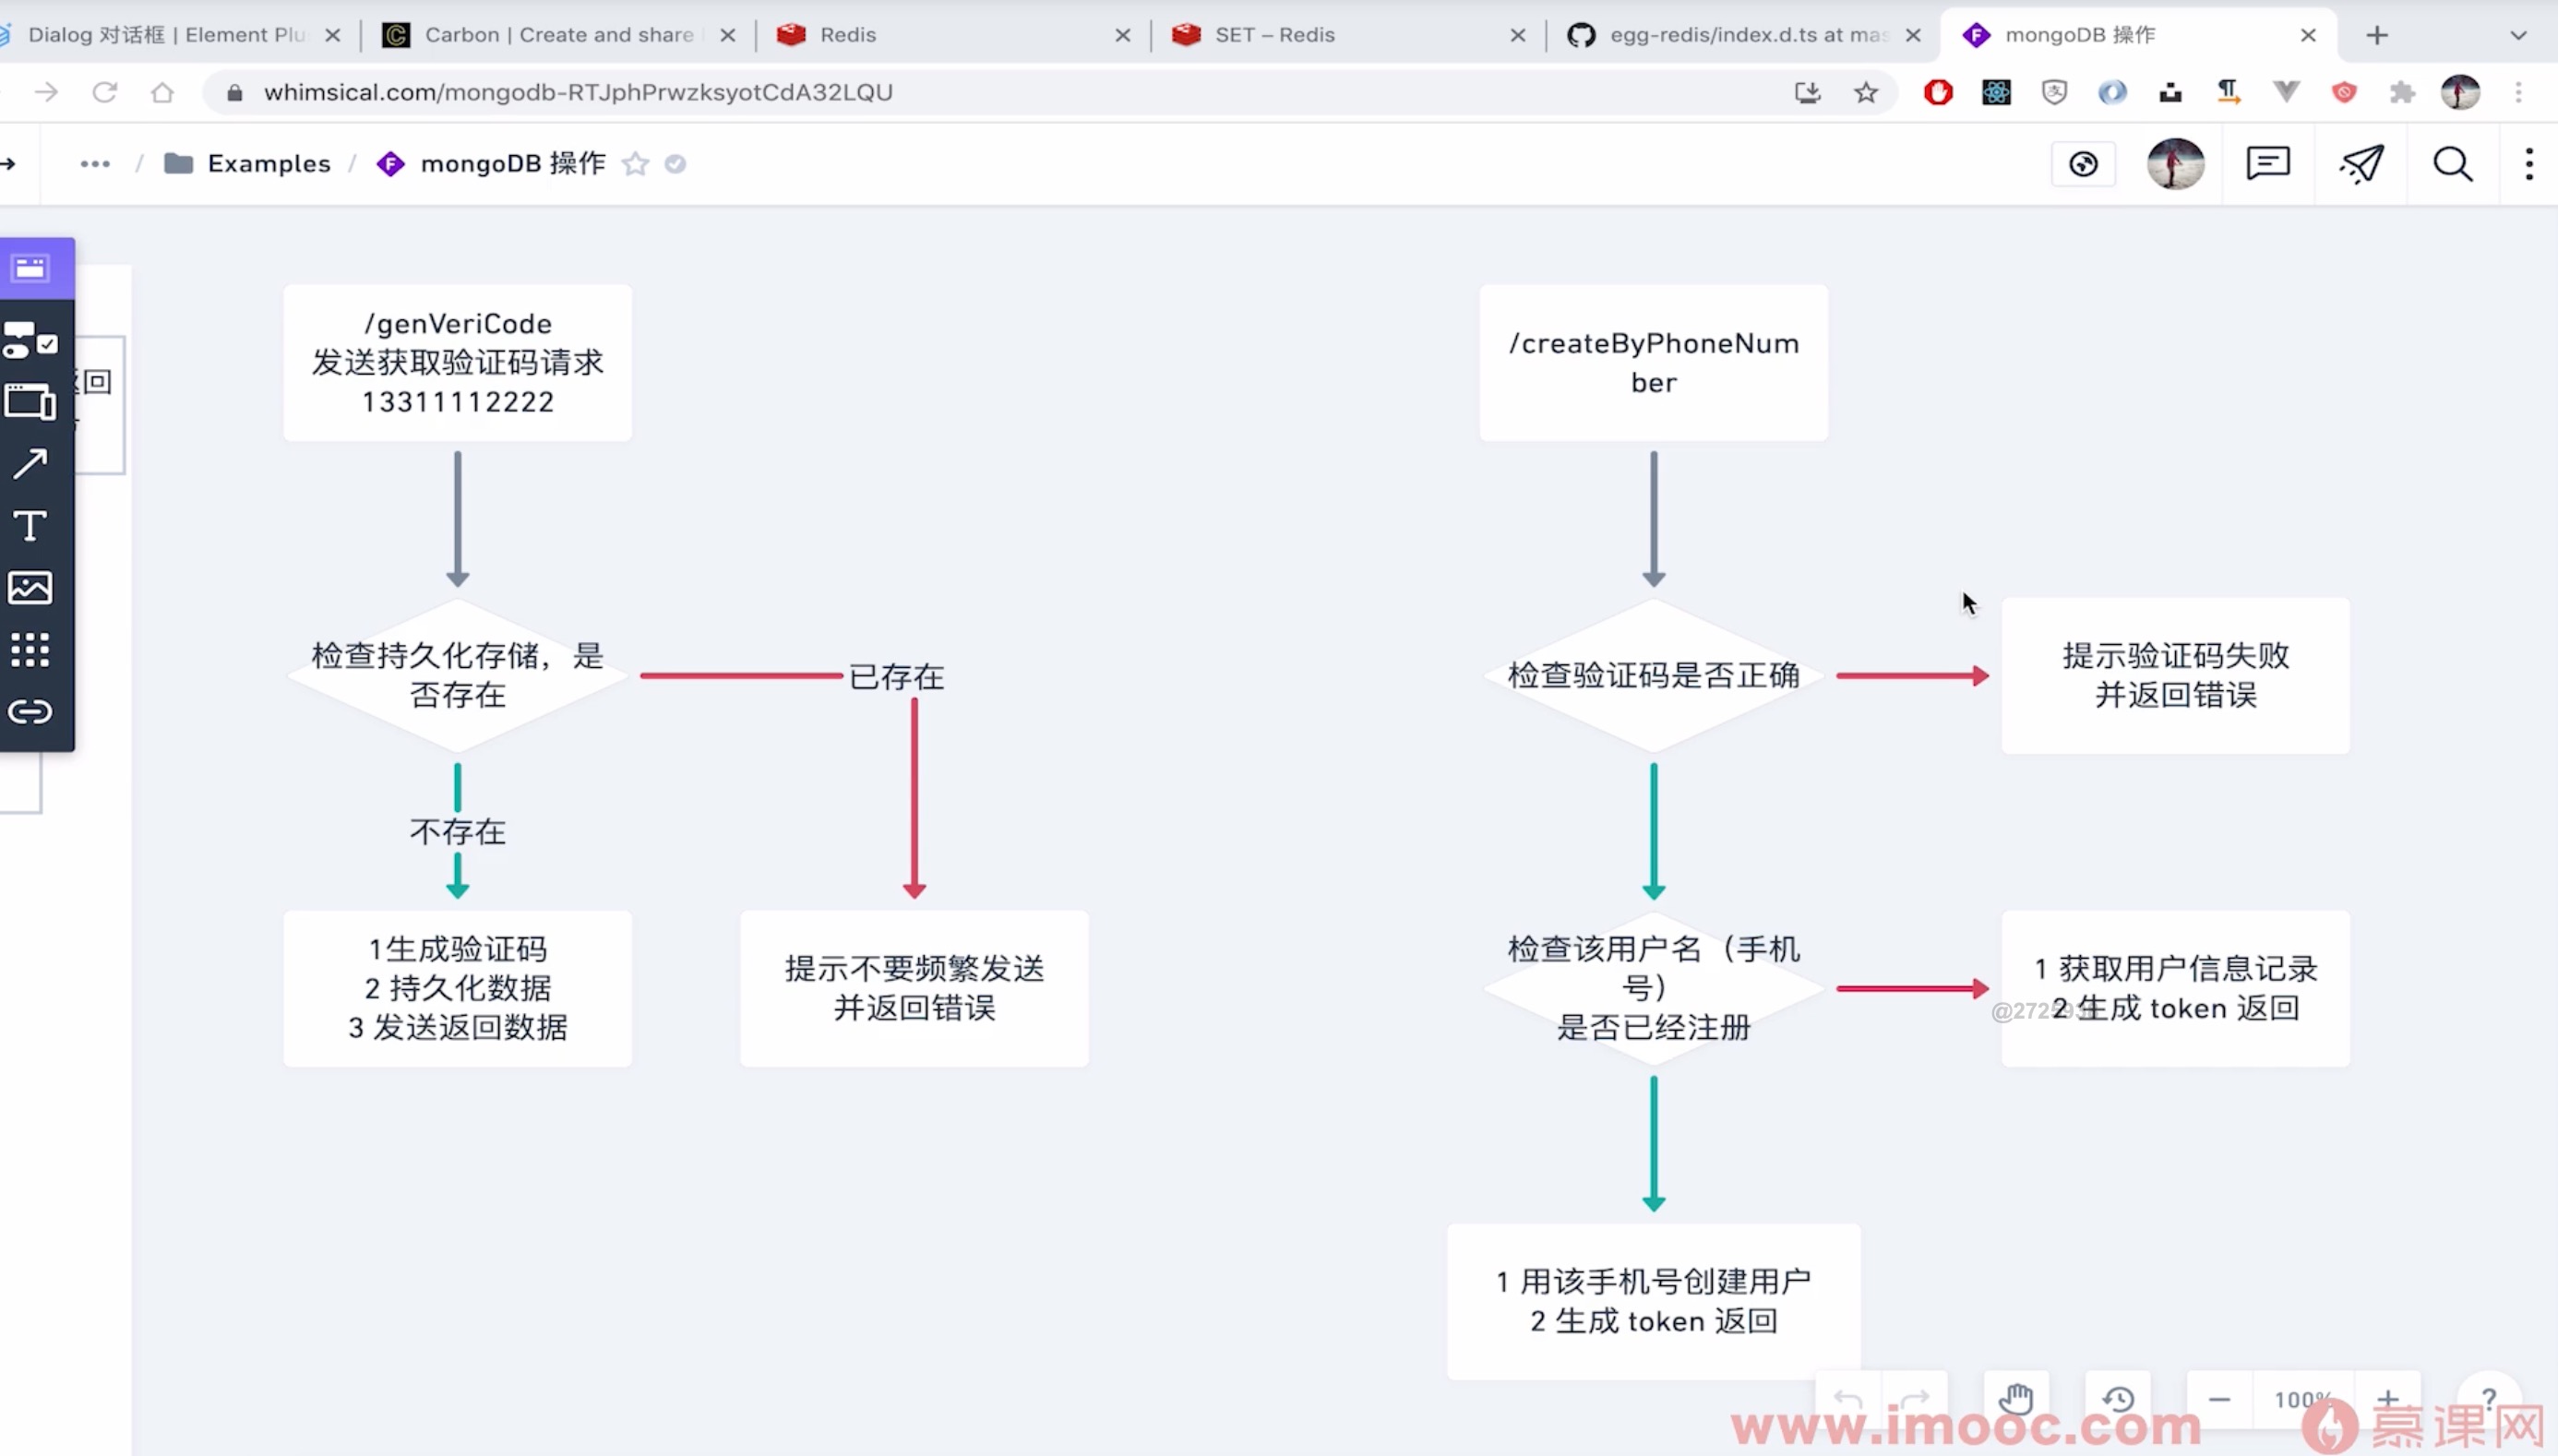
使用手机号登录,用户需要输入手机号和验证码,首先需要先生成验证码
生成验证码
首先我们需要生成一个 4 位数
`${Math.floor(Math.random() * 10000)}`.padStart(4, '0');
接下来实现获取手机验证码接口
首先需要验证手机号
const phoneRules = {
  tel: {
    type: 'string',
    format: /^1[3-9]\d{9}$/,
    message: '手机号格式错误',
  },
};
const errors = app.validator.validate(phoneRules, body);
if (errors && errors.length) {
  return ctx.helper.error({ ctx, errType: 'phoneValidateFail', err: errors });
}
然后生成验证码,将验证码保存到 redis 中,在这之前我们需要先判断用户是否已经获取了验证码,如果短时间内已经获取了验证码,那么就用户提示不要频繁获取验证码
 const userKey = `phoneVeriCode-${body.tel}`;
 // 获取该用户在 redis 中的验证码, 如果存在,就提示不要频繁获取验证码
const preVericode = await app.redis.get(userKey);
if (preVericode) {
  return ctx.helper.error({ ctx, errType: 'sendCodeFrequentlyFail' });
}
最后生成验证码返回给用户, 同时将获取的验证码放到 redis 中,用户验证使用
const code = `${Math.floor(Math.random() * 10000)}`.padStart(4, '0');
await app.redis.set(userKey, code, 'ex', 60);
ctx.helper.success({
  ctx,
  res: {
    code,
  },
});
登录
用户登录时,需要验证验证码是否正确
const userKey = `phoneVeriCode-${body.tel}`;
// 对比用户输入到验证码 和 redis 中的验证码是是否一样
 const preVericode = await app.redis.get(userKey);
 if (body.code !== preVericode) {
   return ctx.helper.error({ ctx, errType: 'signinCorrectCodeFail' });
 }
然后生成 token 返回给用户。生成 token 过程中,首先需要获取该用户信息,
- 如果不存在,说明该用户未注册,然后创建一个新的用户,然后再生成 token 返回给用户
- 存在生成 toke返回给用户
点击查看更多内容
为 TA 点赞
评论
共同学习,写下你的评论
评论加载中...
作者其他优质文章
正在加载中
感谢您的支持,我会继续努力的~
扫码打赏,你说多少就多少
赞赏金额会直接到老师账户
支付方式
打开微信扫一扫,即可进行扫码打赏哦


