Modal组件
长话不多说,接下来让我们来动手实现一个react Modal组件。
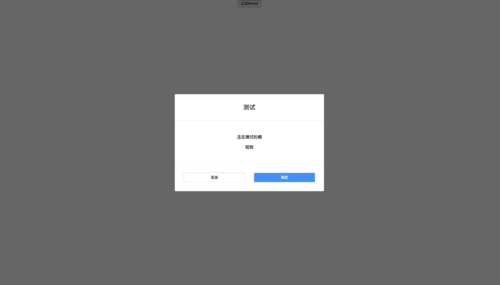
我们先来看一下实际效果
Modal的布局
首先,让我们先思考下一个Modal组件的布局是怎么样的。
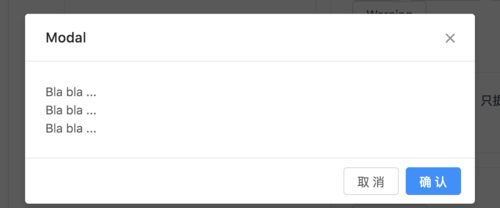
我们先拿一个基本的Modal样例来分析下。
如上图所示,一个Modal组件可以分为mask、header、body和footer四部分,mask就不用说了,header主要是显示title和关闭按钮,body则是使用者自己传的内容,footer主要是按钮控件。
Modal组件的参数(props)
我们确定了Modal组件的布局之后,我们来思考一下Modal组件可支持传递的参数。
作为一个Modal组件,总要有标题(title)吧?要有用户自定义传入的内容(children),还有一个确定按钮文案(okText)和一个取消按钮文案(cancelText)吧,并且允许用户传入点击确定按钮的回调函数(onOk)和点击取消按钮的回调函数(onCancel)。也需要有一个控制Modal是否显示的标志吧(visible)。所以,大体上有以下7个变量。
Modal的样式
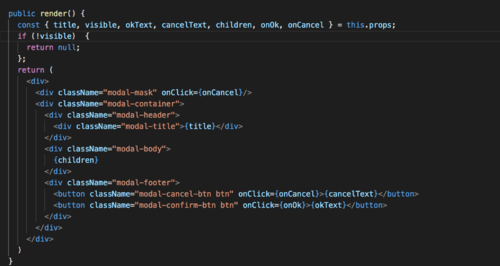
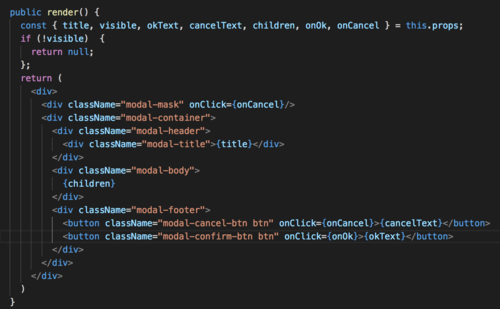
首先,根据Modal组件的布局和参数,我们可以确定react Modal的render函数如下:
我们都知道,Modal会覆盖在其他元素上面,并且主要分为两部分,一部分为mask阴影部分,一部分为主体内容,而且主体部分会覆盖在阴影部分上面。让我们一步步来实现这个效果。
实现mask效果
.modal-mask {
  // 让mask铺满整屏  position: fixed;  top: 0;  left: 0;  right: 0;  bottom: 0;  background: black;  opacity: 0.6;
  // 让mask覆盖在其他元素上面  z-index: 1000;
}
实现主体内容的样式,让其覆盖在其他元素(包括mask)上面,每一部分的作用可以看注释
.modal-container {
  // 让Modal的主体内容全局居中,通过position: fix以及top和left的50%让主体内容的左上角居中,再通过transform:translate(-50%, -50%)来让主体内容正确居中。
  position: fixed;  top: 50%;  left: 50%;  transform: translate(-50%, -50%);  background: white;  min-width: 500px;  border-radius: 4px;
  // 设置主体内容的z-index高于mask的,从而可以覆盖mask  z-index: 1001;
}
接下来是body、footer和header样式的实现,这个就直接贴代码了。
.modal-title {  padding: 30px;  color: black;  font-size: 20px;  border-bottom: 1px solid #e8e8e8;
}.modal-body {  padding: 30px;  font-size: 14px;  border-bottom: 1px solid #e8e8e8;
}.modal-footer {  text-align: center;  padding: 30px;  display: flex;
}.modal-footer .btn {  flex: 1;  height: 32px;  text-align: center;
}.modal-footer .modal-cancel-btn {  background: white;  margin-right: 30px;  border-color: #d9d9d9;  border-radius: 4px;
}.modal-footer .modal-confirm-btn {  background: #1890ff;  color: white;
}
Modal的交互逻辑实现
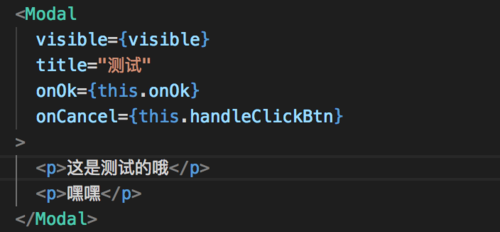
实际上Modal的交互是很简单的,一般的调用方式如下:
由外部传递自定义的body内容以及一些自定义的属性(比如title,点击按钮的回调还有Modal的标题)
我们先定义Modal组件里的props
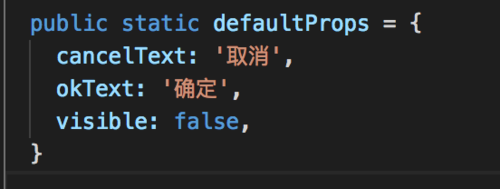
设置一些默认的props,当用户未传入参数的时候,则使用默认的props
实现render函数,根据用户传入的参数以及默认参数来渲染Modal节点,如果用户传入的visible属性为false(Modal不可见),则返回null,否则,返回Modal节点。
这样,一个简单的react Modal组件就完成了,上面的代码可以在https://github.com/chenjigeng/empty 查看,并且可以直接看到一个demo例子。
效果图如下:
最后再贴一下完整的Modal组件代码
// Modal.tsximport * as React from 'react';import './Modal.css';

interface IModalProps {  children: React.ReactChild | React.ReactChildren |  React.ReactElement<any>[],
  title?: React.ReactChild,  visible: boolean,
  onOk?: () => void,
  onCancel?: () => void,
  okText?: string,
  cancelText?: string,
}

export default class Modal extends React.Component<IModalProps> {

  public static defaultProps = {    cancelText: '取消',    okText: '确定',    visible: false,
  }

  public render() {    const { title, visible, okText, cancelText, children, onOk, onCancel } = this.props;    if (!visible)  {      return null;
    };    return (      <div>
        <div className="modal-mask" onClick={onCancel}/>
        <div className="modal-container">
          <div className="modal-header">
            <div className="modal-title">{title}</div>
          </div>
          <div className="modal-body">
            {children}          </div>
          <div className="modal-footer">
            <button className="modal-cancel-btn btn" onClick={onCancel}>{cancelText}</button>
            <button className="modal-confirm-btn btn" onClick={onOk}>{okText}</button>
          </div>
        </div>
      </div>
    )
  }
}
// Moda.css.modal-mask { position: fixed; top: 0; left: 0; right: 0; bottom: 0; background: black; opacity: 0.6; z-index: 1000;
}.modal-container { position: fixed; top: 50%; left: 50%; transform: translate(-50%, -50%); background: white; min-width: 500px; border-radius: 4px; z-index: 1001;
}.modal-title { padding: 30px; color: black; font-size: 20px; border-bottom: 1px solid #e8e8e8;
}.modal-body { padding: 30px; font-size: 14px; border-bottom: 1px solid #e8e8e8;
}.modal-footer { text-align: center; padding: 30px; display: flex;
}.modal-footer .btn { flex: 1; height: 32px; text-align: center;
}.modal-footer .modal-cancel-btn { background: white; margin-right: 30px; border-color: #d9d9d9; border-radius: 4px;
}.modal-footer .modal-confirm-btn { background: #1890ff; color: white;
}原文出处:https://www.cnblogs.com/chenjg/p/9501333.html
共同学习,写下你的评论
评论加载中...
作者其他优质文章


