
-
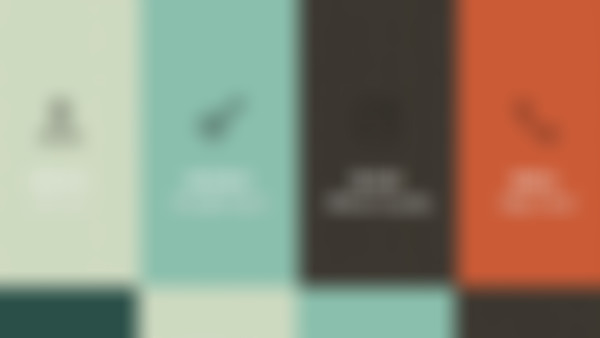
背景图片是 60px*120px;a标签只显示30px*120px,所以未选中的时候只显示上半部分(白色),选中之后设置 background-position:0 -30px,相当于显示的背景图片下移30px,于是能显示到橙色的。查看全部
-
背景图片是 60px*120px;a标签只显示30px*120px,所以未选中的时候只显示上半部分(白色),选中之后设置 background-position:0 -30px,相当于显示的背景图片下移30px,于是能显示到橙色的。查看全部
-
height与line-height设置成一样,文字就会垂直居中查看全部
-
鼠标每次经过触发背景图并且时其向上偏移30px,才会显示橘色的那个背景图片。查看全部
-
制作二级菜单下拉显示动画: <script> window.onload=function(){ var aLi=document.getElementsByTagName('li'); for(var i=0; i<aLi.length; i++){ aLi[i].onmouseover=function(){ //鼠标经过一级菜单,二级菜单动画下拉显示出来 var oSubNav=this.getElementsByTagName('ul')[0]; if(oSubNav){ var This=oSubNav; 以下基本通用:1.先清除;2.设置Interval(函数,延时);3.(宽度或高度;延长的最大值;清除) clearInterval(This.time); This.time=setInterval(function(){ This.style.height=This.offsetHeight+16+"px"; if(This.offsetHeight>=120) clearInterval(This.time); },30) } }查看全部
-
设置鼠标移过时,高度增加:【不设置圆角边框图片的情况下】 去掉a标签中的背景图片、和其位置的移动设置。重新增加鼠标移过时的背景颜色。 再添加移过鼠标时的a标签的高度height:40px,垂直居中:line-height:40px;并设置其margin-top:-10px;向上移动【因为增加高度后,默认向下增加】查看全部
-
background-position: 15px 20px;(指将图片向右移15px,向下移20px;) 简单地说,就是以图片的左上角顶点为原点,往下和右都为正,反之为负,查看全部
-
虽然你设置了a标签为块状元素,但是你没有设置它的宽度,所以你用margin并不能使它居中,这样就有几种方法解决,第一,你可以设置a标签的宽带;第二,你可以设置display:inline-block;text-align:center;这样也可以实现居中效果;第三,你可以使用float:left;让它浮动,然后设置父元素绝对定位position:absolute;left:50%;子元素left:-50%;这样也可以实现居中效果,好像还有其他方法,这我一下子也想不起来; 但是在这里你margin没用就是因为你没有定宽,因为只有定宽块状元素才能使用margin:0 auto;实现居中效果查看全部
-
作业代码 纯html+css完成 感谢 @LLeo小浩 提供代码 <body> <div class="wrap"> <ul class="nav clearfix"> <li><a href="#">1 <small>step1</small></a></li> <li><a href="#">2 <small>step2</small></a></li> <li><a href="#">3 <small>step3</small></a></li> </ul> </div> </body>查看全部
-
<style> .clearfix:before,.clearfix:after{ content:""; display:table; } .clearfix:after {clear:both;} .clearfix{ *zoom:1;/*IE/7/6*/} html {font-size: 62.5%;} body { font-size: 1.6rem; font-family: 'Segoe UI', Helvetica, Arial, sans-serif; line-height: 1; } ul li {list-style: none;} a {text-decoration: none;color: #5e5e5e;} .wrap { width: 800px; margin: 10% auto; } .nav li { float: left; } .nav a { font-size: 3rem; color: #fff; display: block; width: 150px; padding: 10px; background-color: #3e3e3e; position: relative; } .nav a small { font-size: 1.5rem; text-transform: uppercase; vertical-align: 30%; } .nav a:after { content: ""; position: absolute; right: -25px; z-index: 9; margin-top: -10px; border-left:solid 25px #3e3e3e; border-top:solid 25px rgba(0,0,0,0); border-bottom:solid 25px rgba(0,0,0,0); } .nav li + li > a { padding-left: 30px; } .nav li a:hover { background-color: #FFB90F; } .nav li a:hover::after { border-left:solid 25px #FFB90F; } </style>查看全部
-
文本缩进:text-indent;查看全部
-
全角的空格,全角的空格不会被忽略查看全部
-
文本缩进:text-indent; a:hover{背景颜色;字体颜色}查看全部
-
下划线去除:text-decoration; 条目前圆点去除:list-style:none; 块元素:display:block;查看全部
-
window.onload=function(){//定义全部加载完后实现 var aA=document.getElementsByTagName('a'); for(var i=0; i<aA.length; i++){ aA[i].onmouseover=function(){//当鼠标移动到 a标签时 实现代码 var This=this; clearInterval(This.time);//清除之前的计时器效果 This.time=setInterval(function(){ //设定计时器 This.style.width=This.offsetWidth+8+"px";//设定每次加 8像素 if(This.offsetWidth>=160) clearInterval(This.time); },30) } aA[i].onmouseout=function(){//当鼠标移出 a标签时 实现代码 clearInterval(this.time); var This=this; this.time=setInterval(function(){ This.style.width=This.offsetWidth-8+"px"; if(This.offsetWidth<=120){ This.style.width='120px'; clearInterval(This.time); } },30) } } } JQuery: $(function(){ $("a").hover( function(){ $(this).stop().animate({"width":"160px"},200);//开始动画之前,先把上一个动画清理掉 }, function(){ $(this).stop().animate({"width":"120px"},200); } ); });查看全部


举报
0/150
提交
取消