这篇文章是上一篇的继续,你可以先看这篇: “android开发(如何开发一个可以维护的好项目):一 、定义基类” 框架地址dileber android框架 希望大家能多多star一下
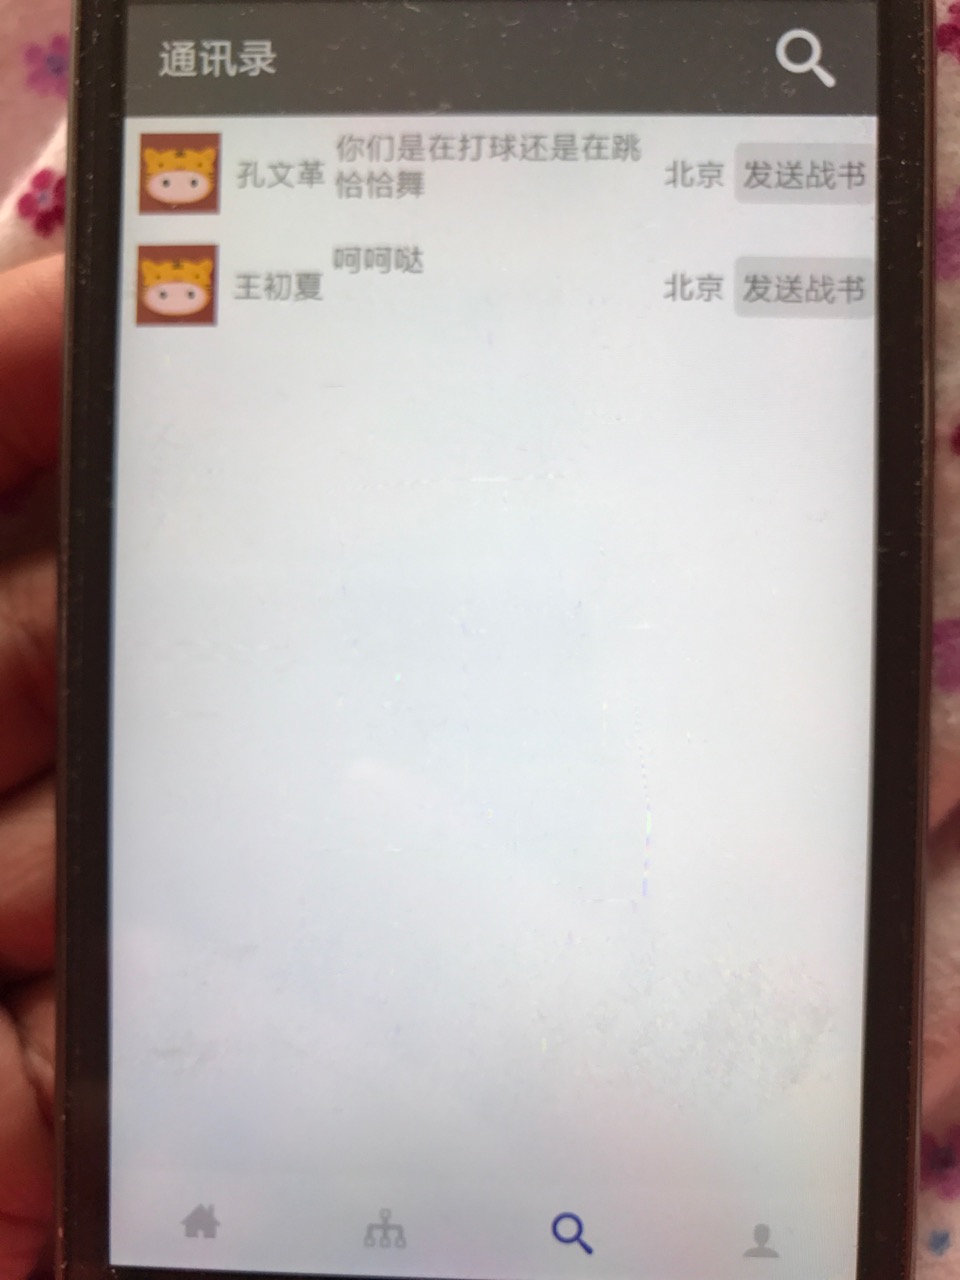
首先我把我写的这个首页拿出来,这个首页主要是有4个按钮。
跳转activity方法,将跳转作为一个静态函数,来处理,跳转简单,日后可以在这里直接添加跳转所需要的参数,减少代码改动量。方便美观。推荐使用~
public static void start(Context context){
        Intent intent = new Intent();
        intent.setClass(context,HomeActivity.class);
        context.startActivity(intent);
    }
layout xml直接写在一个方法里,其实也没啥太大用处
    protected int layoutViewId() {
        return R.layout.activity_home;
    }
配置titlebar,我把titlebar做成一个类,里面直接就能调用titlebar,还可以直接设置点击事件。
 UToolBar uToolBar = new UToolBar();
        uToolBar.setTitleId(R.string.takkyuu_home);
        uToolBar.setNeedNavigate(false);
        setToolBar(R.id.toolbar,uToolBar);
注意配置titlebar时候 xml里必须有 titlebar的配置
<android.support.design.widget.AppBarLayout
        android:layout_width="match_parent"
        android:layout_height="wrap_content"
        android:theme="@style/AppTheme.AppBarOverlay"
        android:id="@+id/view">

        <android.support.v7.widget.Toolbar
            android:id="@+id/toolbar"
            android:layout_width="match_parent"
            android:layout_height="?attr/actionBarSize"
            android:background="?attr/colorPrimary"
            app:popupTheme="@style/AppTheme.PopupOverlay">
        <include layout="@layout/toolbar_right" />
        </android.support.v7.widget.Toolbar>
    </android.support.design.widget.AppBarLayout>
底部菜单使用方式,里面采用的是字体图表的配置,如果大家不知道的话,请看我的上一篇文章。
mBar= getView(R.id.bar);
//设置字体为 R.string.home3  字体的类型为 BottomBarTab.TYPE_FONT
        mBar.addItem(new BottomBarTab(this,R.string.home3,BottomBarTab.TYPE_FONT)).
                addItem(new BottomBarTab(this,R.string.tree,BottomBarTab.TYPE_FONT)).
                addItem(new BottomBarTab(this,R.string.m_search,BottomBarTab.TYPE_FONT)).
                addItem(new BottomBarTab(this,R.string.user,BottomBarTab.TYPE_FONT));
        mBar.setOnClickItemMenu(new BottomBar.OnClickItemMenu() {
            @Override
            public void onClickItem(int nowPosition,int position) {

            }
        });
如何正确的加载fragment,我封装好了一个ActivityUtils方法,里面还有其他方法,大家可以看看,对fragment先进行查找,如果没有的话,再进行新增,提高的性能效率
HomeFragment homeFragment = ActivityUtils.getFragment(getSupportFragmentManager(),R.id.homeFrame,HomeFragment.newInstance());如下贴出整个代码。
xml
<?xml version="1.0" encoding="utf-8"?>
<RelativeLayout xmlns:android="http://schemas.android.com/apk/res/android"
    xmlns:tools="http://schemas.android.com/tools"
    android:layout_width="match_parent"
    android:layout_height="match_parent"
    xmlns:app="http://schemas.android.com/apk/res-auto"
    tools:context="com.zhonghua.sdw.takkyuu.activity.HomeActivity">

    <android.support.design.widget.AppBarLayout
        android:layout_width="match_parent"
        android:layout_height="wrap_content"
        android:theme="@style/AppTheme.AppBarOverlay"
        android:id="@+id/view">

        <android.support.v7.widget.Toolbar
            android:id="@+id/toolbar"
            android:layout_width="match_parent"
            android:layout_height="?attr/actionBarSize"
            android:background="?attr/colorPrimary"
            app:popupTheme="@style/AppTheme.PopupOverlay">
        <include layout="@layout/toolbar_right" />
        </android.support.v7.widget.Toolbar>
    </android.support.design.widget.AppBarLayout>

    <FrameLayout
        android:id="@+id/homeFrame"
        android:layout_width="match_parent"
        android:layout_height="match_parent"

        android:layout_alignParentLeft="true"
        android:layout_alignParentStart="true"
        android:layout_above="@+id/bar"
        android:layout_below="@+id/view">
    </FrameLayout>
    <FrameLayout
        android:id="@+id/consFrame"
        android:layout_width="match_parent"
        android:layout_height="match_parent"
        android:layout_alignParentLeft="true"
        android:layout_alignParentStart="true"
        android:layout_above="@+id/bar"
        android:layout_below="@+id/view"
        ></FrameLayout>
    <FrameLayout
        android:id="@+id/searchFrame"
        android:layout_width="match_parent"
        android:layout_height="match_parent"
        android:layout_alignParentLeft="true"
        android:layout_alignParentStart="true"
        android:layout_above="@+id/bar"
        android:layout_below="@+id/view"
        ></FrameLayout>
    <FrameLayout
        android:id="@+id/peopleFrame"
        android:layout_width="match_parent"
        android:layout_height="match_parent"
        android:layout_alignParentLeft="true"
        android:layout_alignParentStart="true"
        android:layout_above="@+id/bar"
        android:layout_below="@+id/view"
        >

    </FrameLayout>

    <com.drcosu.ndileber.view.BottomBar
        android:id="@+id/bar"
        android:layout_width="match_parent"
        android:layout_height="48dp"
        android:layout_gravity="end|bottom"
        android:layout_alignParentBottom="true"
        android:layout_alignParentLeft="true"
        android:layout_alignParentStart="true">

    </com.drcosu.ndileber.view.BottomBar>

</RelativeLayout>
activity~这个activity是继承了我上一个文章里写的TBaseActivity
public class HomeActivity extends TBaseActivity implements TakkyuuBaseFragment.OnFragmentInteractionListener{

    public static void start(Context context){
        Intent intent = new Intent();
        intent.setClass(context,HomeActivity.class);
        context.startActivity(intent);
    }

    @Override
    protected void startView(Bundle savedInstanceState) {

    }

    @Override
    protected int layoutViewId() {
        return R.layout.activity_home;
    }
    private final static String SELECT = "select";
    BottomBar mBar;
    Fragment temp;
    @Override
    protected void initView(final Bundle savedInstanceState) {
        UToolBar uToolBar = new UToolBar();
        uToolBar.setTitleId(R.string.takkyuu_home);
        uToolBar.setNeedNavigate(false);
        setToolBar(R.id.toolbar,uToolBar);
        mBar= getView(R.id.bar);
        mBar.addItem(new BottomBarTab(this,R.string.home3,BottomBarTab.TYPE_FONT)).
                addItem(new BottomBarTab(this,R.string.tree,BottomBarTab.TYPE_FONT)).
                addItem(new BottomBarTab(this,R.string.m_search,BottomBarTab.TYPE_FONT)).
                addItem(new BottomBarTab(this,R.string.user,BottomBarTab.TYPE_FONT));
        mBar.setOnClickItemMenu(new BottomBar.OnClickItemMenu() {
            @Override
            public void onClickItem(int nowPosition,int position) {

            }
        });

        HomeFragment homeFragment = ActivityUtils.getFragment(getSupportFragmentManager(),R.id.homeFrame,HomeFragment.newInstance());
        ConsFragment consFragment = ActivityUtils.getFragment(getSupportFragmentManager(),R.id.consFrame,ConsFragment.newInstance("3","2"));
        SearchFragment searchFragment = ActivityUtils.getFragment(getSupportFragmentManager(),R.id.searchFrame,SearchFragment.newInstance());
        PeopleFragment peopleFragment = ActivityUtils.getFragment(getSupportFragmentManager(),R.id.peopleFrame,PeopleFragment.newInstance());

//这是后续的MVP模式开发,后续我会继续讲解。
        new HomePresenter(homeFragment,SysRepository.getInstance());
        new PeoplePresenter(peopleFragment,SysRepository.getInstance());
        new SearchPresenter(searchFragment,SysRepository.getInstance());
//屏幕翻转,记录状态
        if(savedInstanceState!=null){
            mBar.setCurrentItem(savedInstanceState.getInt(SELECT));
        }

    }
//屏幕翻转,记录状态
    @Override
    protected void onSaveInstanceState(Bundle outState) {
        outState.putInt(SELECT,mBar.getmCurrentPosition());
        super.onSaveInstanceState(outState);
    }

//fragment与activity交互 后续会讲解
    @Override
    public SFont onRightButtonFont(Integer res) {
        String text = "";
        if(res!=null){
            text = getResources().getString(res);
        }
        SFont sFont = getView(R.id.toolbar_bar_right);
        sFont.setText(text);
        return sFont;
    }
//fragment与activity交互 后续会讲解
    @Override
    public void onTitleName(String title) {
        setTitle(title);
    }
//重写退出按钮处理函数。
    @Override
    public void onBackPressed() {
        dialogOk("确定要退出么", new DialogLinstener() {
            @Override
            public void confirm(Dialog dialog) {
                dialog.dismiss();
                HomeActivity.super.onBackPressed();
            }

            @Override
            public void cancel(Dialog dialog) {
                dialog.dismiss();
            }
        });

    }
}
点击查看更多内容
5人点赞
评论
共同学习,写下你的评论
评论加载中...
作者其他优质文章
正在加载中
感谢您的支持,我会继续努力的~
扫码打赏,你说多少就多少
赞赏金额会直接到老师账户
支付方式
打开微信扫一扫,即可进行扫码打赏哦


