Android学习-简易ViewPager的使用教程与Demo演示
摘要:最近在项目开发中使用到了ViewPager,结合自己几天下来的学习,总结一下ViewPager的使用方法以及实现过程。
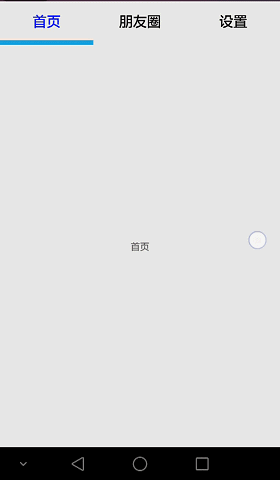
实例效果
前言
这是谷歌官方文档给我们提供的一个兼容包里面的类,它说我们的ViewPager通常是配合Fragment使用的,而官方是提供了FragmentPagerAdapter和FragmentStatePagerAdapter两种方便我们将ViewPager和Fragment配合使用。下面我们主要讲ViewPager+Fragment的使用。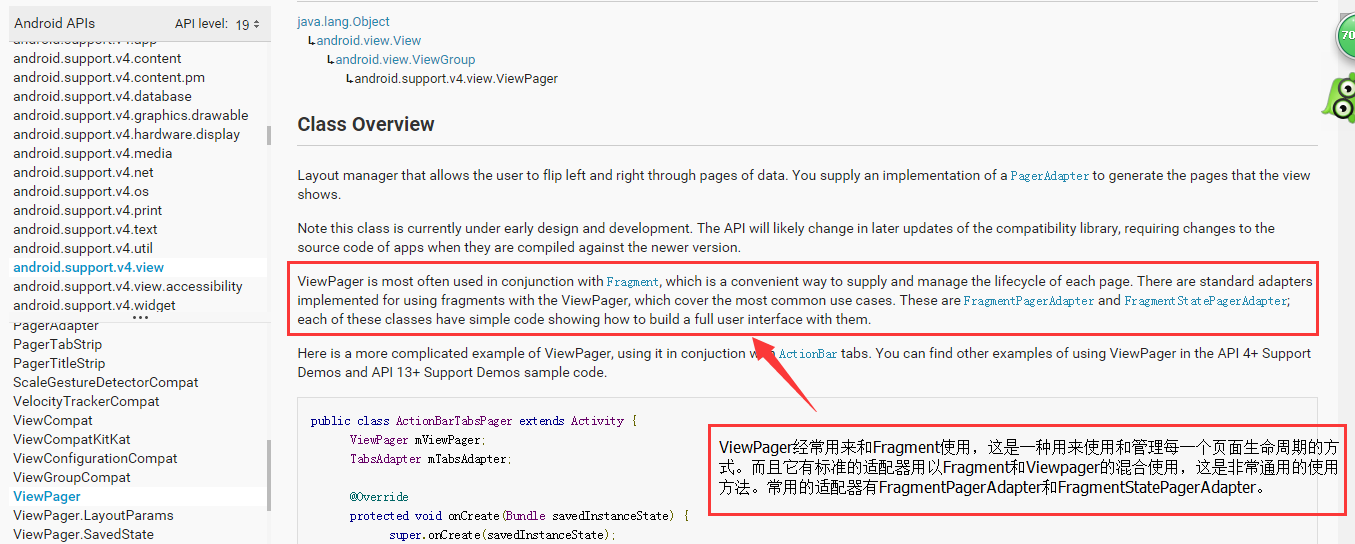
Demo剖析
这个Demo的难点主要在以下三部分,那么我们下面就对这三个部分进行剖析。
一、top_bar部分
这部分我们只需要设置一个外布局为LinearLayout(注意!这个Layout的高度一定不能为match_parent,只能为wrap_content,因为如果你这里使用了match_parent的话,那么就会遮挡了下面的ViewPager控件,详见我的main.xml布局文件以及top_bar.xml 布局文件,我的主布局为了代码布局清晰,所以通过定义了top_bar的layout,然后通过引入即可。)
二、下标部分
下标部分我们是通过一个imageview来实现。将此ImageView的背景设为一个蓝色的点九图,然后再逻辑文件中设置它的长度以及在滑动时的位置变化即可。
设置滑动条的宽度
 /**
  * 设置滑动条的宽度为屏幕的1/3(根据Tab的个数而定)
  */private void initTabLineWidth() {
    DisplayMetrics dpMetrics = new DisplayMetrics();
    getWindow().getWindowManager().getDefaultDisplay().getMetrics(dpMetrics);
    screenWidth = dpMetrics.widthPixels;
    LinearLayout.LayoutParams lp = (LinearLayout.LayoutParams) tab.getLayoutParams();
    lp.width = screenWidth / 3;
    tab.setLayoutParams(lp);
}
在onPagerScrolled方法中设置滑动条的位置变化
 @Override
 public void onPageScrolled(int position, float offset,                                   int offsetPixels) {
     LinearLayout.LayoutParams lp = (LinearLayout.LayoutParams) tablineIv.getLayoutParams();
    Log.i("mOffset", "offset:" + offset + ",position:" + position);
    if (currentIndex == 0 && position == 0)// 0->1
    {
        lp.leftMargin = (int) (offset * (screenWidth * 1.0 / 3) + currentIndex
                        * (screenWidth / 3));
    } else if (currentIndex == 1 && position == 0) // 1->0
    {
        lp.leftMargin = (int) (-(1 - offset) * (screenWidth * 1.0 / 3) + currentIndex * (screenWidth / 3));
    } else if (currentIndex == 1 && position == 1) // 1->2
    {
        lp.leftMargin = (int) (offset * (screenWidth * 1.0 / 3) + currentIndex
                        * (screenWidth / 3));
    } else if (currentIndex == 2 && position == 1) // 2->1
    {
        lp.leftMargin = (int) (-(1 - offset) * (screenWidth * 1.0 / 3) + currentIndex * (screenWidth / 3));
    }
    tablineIv.setLayoutParams(lp);
}
三、ViewPager实现部分
ViewPager的实现主要通过以下步骤:
把包含的Fragement存放到一个容器List里面去
创建一个FragmentPagerAdapter
为ViewPager绑定此FragmentPagerAdapter
ViewPager设置默认当前的项
ViewPager设置监听器,需要重写onPageScrollStateChanged,onPageScrolled,onPageSelected三个方法
代码实现
一、界面部分
在界面部分,需要将我们的顶部的内容和ViewPager分开。如下我们将top_bar内容和ViewPager分开。
main.xml
<LinearLayout xmlns:android="http://schemas.android.com/apk/res/android"
    xmlns:tools="http://schemas.android.com/tools"
    android:layout_width="match_parent"
    android:layout_height="match_parent"
    android:orientation="vertical">

    <!-- 顶部的内容 -->
    <include layout="@layout/top_bar" />

    <!-- ViewPager -->
    <android.support.v4.view.ViewPager
        android:id="@+id/viewpager"
        android:layout_width="match_parent"
        android:layout_height="0dp"
        android:layout_weight="1" >
    </android.support.v4.view.ViewPager></LinearLayout>
top_bar.xml
<?xml version="1.0" encoding="utf-8"?>
    <!--注意最外层布局的高度不能使用match_parent,不然将会遮挡了ViewPager部分-->
    <LinearLayout xmlns:android="http://schemas.android.com/apk/res/android"
    xmlns:tools="http://schemas.android.com/tools"
    android:layout_width="match_parent"
    android:layout_height="wrap_content"
    android:orientation="vertical">


    <LinearLayout
        android:layout_width="match_parent"
        android:layout_height="wrap_content"
        android:baselineAligned="false"
        android:orientation="horizontal">

        <TextView
            android:id="@+id/mainTv"
            android:layout_width="match_parent"
            android:layout_height="50dp"
            android:layout_weight="1"
            android:gravity="center"
            android:text="首页"
            android:textColor="#0000FF"
            android:textSize="18dp" />

        <TextView
            android:id="@+id/momentTv"
            android:layout_width="match_parent"
            android:layout_height="50dp"
            android:layout_weight="1"
            android:gravity="center"
            android:text="朋友圈"
            android:textColor="@android:color/black"
            android:textSize="18dp" />

        <TextView
            android:id="@+id/settingTv"
            android:layout_width="match_parent"
            android:layout_height="50dp"
            android:layout_weight="1"
            android:gravity="center"
            android:text="设置"
            android:textColor="@android:color/black"
            android:textSize="18dp" />
    </LinearLayout>

    <ImageView
        android:id="@+id/iv_tabline"
        android:layout_width="200dp"
        android:layout_height="wrap_content"
        android:contentDescription="tab"
        android:background="@drawable/tab" >
    </ImageView></LinearLayout>
还有我们的三个Fragment界面,基本一致。
fragment_main.xml
<?xml version="1.0" encoding="utf-8"?><LinearLayout xmlns:android="http://schemas.android.com/apk/res/android"
    android:layout_width="match_parent"
    android:layout_height="match_parent">

    <TextView
        android:layout_width="match_parent"
        android:layout_height="match_parent"
        android:gravity="center"
        android:text="首页"/></LinearLayout>
fragment_moment.xml
<?xml version="1.0" encoding="utf-8"?><LinearLayout xmlns:android="http://schemas.android.com/apk/res/android"
    android:layout_width="match_parent"
    android:layout_height="match_parent">

    <TextView
        android:layout_width="match_parent"
        android:layout_height="match_parent"
        android:gravity="center"
        android:text="朋友圈"/></LinearLayout>
fragment_setting.xml
<?xml version="1.0" encoding="utf-8"?><LinearLayout xmlns:android="http://schemas.android.com/apk/res/android"
    android:layout_width="match_parent"
    android:layout_height="match_parent">

    <TextView
        android:layout_width="match_parent"
        android:layout_height="match_parent"
        android:gravity="center"
        android:text="设置"/></LinearLayout>
二、逻辑代码
MainActivity.java
package com.example.ryan.viewpagerdemo;import android.graphics.Color;import android.os.Bundle;import android.support.v4.app.Fragment;import android.support.v4.app.FragmentActivity;import android.support.v4.view.ViewPager;import android.support.v4.view.ViewPager.OnPageChangeListener;import android.util.DisplayMetrics;import android.util.Log;import android.widget.ImageView;import android.widget.LinearLayout;import android.widget.TextView;import java.util.ArrayList;import java.util.List;/**
 * MainActivity需要继承FragmentActivity
 */public class MainActivity extends FragmentActivity {    private ViewPager viewPager;    private List<Fragment> mFragmentList = new ArrayList<Fragment>();    private FragmentAdapter mFragmentAdapter;    //Tab显示内容TextView
    private TextView mainTv, momentTv, settingTv;    //Tab的那个引导线
    private ImageView tablineIv;    //三个Fragment页面
    private MainFragment mainFg;    private MomentFragment momentFg;    private SettingFragment settingFg;    //ViewPager的当前选中页
    private int currentIndex;    //屏幕的宽度
    private int screenWidth;    @Override
    protected void onCreate(Bundle savedInstanceState) {        super.onCreate(savedInstanceState);
        setContentView(R.layout.activity_main);
        findById();
        init();
        initTabLineWidth();

    }    /**
     * 找到控件ID
     */
    private void findById() {
        mainTv = (TextView) this.findViewById(R.id.mainTv);
        momentTv = (TextView) this.findViewById(R.id.momentTv);
        settingTv = (TextView) this.findViewById(R.id.settingTv);
        tablineIv = (ImageView) this.findViewById(R.id.iv_tabline);
        viewPager = (ViewPager) this.findViewById(R.id.viewpager);
    }    /**
     * 初始化ViewPager和设置监听器
     */
    private void init() {
        mainFg = new MainFragment();
        momentFg = new MomentFragment();
        settingFg = new SettingFragment();        //将三个页面添加到容器里面
        mFragmentList.add(mainFg);
        mFragmentList.add(momentFg);
        mFragmentList.add(settingFg);        //重写一个FragmentAdapter继承FragmentPagerAdapter,需要FragmentManager和存放页面的容器过去
        mFragmentAdapter = new FragmentAdapter(this.getSupportFragmentManager(), mFragmentList);        //ViewPager绑定监听器
        viewPager.setAdapter(mFragmentAdapter);        //ViewPager设置默认当前的项
        viewPager.setCurrentItem(0);        //ViewPager设置监听器,需要重写onPageScrollStateChanged,onPageScrolled,onPageSelected三个方法
        viewPager.addOnPageChangeListener(new OnPageChangeListener() {        /**
         * state滑动中的状态 有三种状态(0,1,2) 1:正在滑动 2:滑动完毕 0:什么都没做。
         * 三个方法的执行顺序为:用手指拖动翻页时,最先执行一遍onPageScrollStateChanged(1),
         * 然后不断执行onPageScrolled,放手指的时候,直接立即执行一次onPageScrollStateChanged(2),
         * 然后立即执行一次onPageSelected,然后再不断执行onPageScrolled,
         * 最后执行一次onPageScrollStateChanged(0)。
         */

        /**
         * state滑动中的状态 有三种状态(0,1,2) 1:正在滑动 2:滑动完毕 0:什么都没做。
         */
        @Override
        public void onPageScrollStateChanged(int state) {
            Log.i("PageScroll:", "onPageScrollStateChanged" + ":" + state);
        }        /**
         * position :当前页面,及你点击滑动的页面 offset:当前页面偏移的百分比
         * offsetPixels:当前页面偏移的像素位置
         */
        @Override
        public void onPageScrolled(int position, float offset,                                   int offsetPixels) {
            LinearLayout.LayoutParams lp = (LinearLayout.LayoutParams) tablineIv.getLayoutParams();
            Log.i("mOffset", "offset:" + offset + ",position:" + position);            /**
              * 利用currentIndex(当前所在页面)和position(下一个页面)以及offset来
              * 设置mTabLineIv的左边距 滑动场景:
                 * 记3个页面,
                 * 从左到右分别为0,1,2
                 * 0->1; 1->2; 2->1; 1->0
                 */
                if (currentIndex == 0 && position == 0)// 0->1
                {
                    lp.leftMargin = (int) (offset * (screenWidth * 1.0 / 3) +     currentIndex
                            * (screenWidth / 3));

                } else if (currentIndex == 1 && position == 0) // 1->0
                {
                    lp.leftMargin = (int) (-(1 - offset)
                            * (screenWidth * 1.0 / 3) + currentIndex
                            * (screenWidth / 3));

                } else if (currentIndex == 1 && position == 1) // 1->2
                {
                    lp.leftMargin = (int) (offset * (screenWidth * 1.0 / 3) +     currentIndex
                            * (screenWidth / 3));
                } else if (currentIndex == 2 && position == 1) // 2->1
                {
                       lp.leftMargin = (int) (-(1 - offset)
                            * (screenWidth * 1.0 / 3) + currentIndex
                            * (screenWidth / 3));
                }
                tablineIv.setLayoutParams(lp);
            }            /**
             * 将当前选择的页面的标题设置字体颜色为蓝色
             */
            @Override
            public void onPageSelected(int position) {
                Log.i("PageScroll:", "onPageSelected" + ":" + position);
                resetTextView();                switch (position) {                    case 0:
                        mainTv.setTextColor(Color.BLUE);                        break;                    case 1:
                        momentTv.setTextColor(Color.BLUE);                        break;                    case 2:
                        settingTv.setTextColor(Color.BLUE);                        break;
                }
                currentIndex = position;
            }
        });

    }    /**
     * 设置滑动条的宽度为屏幕的1/3(根据Tab的个数而定)
     */
    private void initTabLineWidth() {
           DisplayMetrics dpMetrics = new DisplayMetrics();
        getWindow().getWindowManager().getDefaultDisplay().getMetrics(dpMetrics);
        screenWidth = dpMetrics.widthPixels;
        LinearLayout.LayoutParams lp = (LinearLayout.LayoutParam    tablineIv.getLayoutParams();
        lp.width = screenWidth / 3;
        tablineIv.setLayoutParams(lp);
    }    /**
     * 重置颜色
     */
    private void resetTextView() {
        mainTv.setTextColor(Color.BLACK);
        momentTv.setTextColor(Color.BLACK);
        settingTv.setTextColor(Color.BLACK);
    }
}
FragmentAdapter.java
    package com.example.ryan.viewpagerdemo;    import android.support.v4.app.Fragment;    import android.support.v4.app.FragmentManager;    import android.support.v4.app.FragmentPagerAdapter;    import java.util.ArrayList;    import java.util.List;    public class FragmentAdapter extends FragmentPagerAdapter {

        List<Fragment> fragmentList = new ArrayList<Fragment>();        public FragmentAdapter(FragmentManager fm,List<Fragment> fragmentList) {            super(fm);            this.fragmentList = fragmentList;
        }        @Override
        public Fragment getItem(int position) {            return fragmentList.get(position);
        }        @Override
        public int getCount() {            return fragmentList.size();
        }

    }
共同学习,写下你的评论
评论加载中...
作者其他优质文章