首先执行npm init:
然后一路回车,生成package.json
npm install -g cnpm --registry=https://registry.npm.taobao.org
sudo cnpm install webpack webpack-cli --save-dev
安装好webpack和webpack -cli
然后在项目根目录下新建src,在src底下建立index.js
在项目根目录下新建文件webpack.dev.config.js
module.exports = {
    entry: './src/index.js',
    output: {
        path: __dirname,
        filename: './release/bundle.js'  // release 会自动创建
    },
}
然后在package.json的scripts下增加:
"dev":"webpack --config ./webpack.dev.config.js --node development"
这时候package.json是
{
  "name": "fontend2",
  "version": "1.0.0",
  "description": "",
  "main": "index.js",
  "scripts": {
    "test": "echo \"Error: no test specified\" && exit 1",
    "dev":"webpack --config ./webpack.dev.config.js --node development"
  },
  "author": "",
  "license": "ISC",
  "devDependencies": {
    "webpack": "^4.29.6",
    "webpack-cli": "^3.3.0"
  }
}
然后在项目根目录下运行npm run dev:
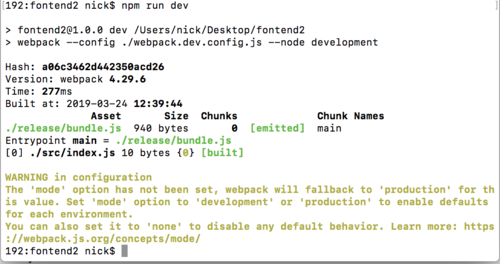
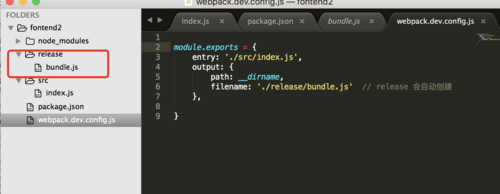
在项目的根目录生成release文件夹表示运行成功
如果想在浏览器中看到效果:
执行:
sudo cnpm install webpack-dev-server html-webpack-plugin --save-dev
然后在根目录下新建index.html:
<!doctype html>
<html>
<head>
    <meta charset="UTF-8">
    <title>慕课网-nick老师的前端设计模式</title>
</head>
<body>
    慕课网-nick老师的前端设计模式
</body>
</html>
修改webpack.dev.config.js的配置:
const path = require('path')
const HtmlWebpackPlugin = require('html-webpack-plugin')
module.exports = {
    entry: './src/index.js',
    output: {
        path: __dirname,
        filename: './release/bundle.js'  // release 会自动创建
    },
    plugins:[
    new HtmlWebpackPlugin({
    template:'./index.html'
    })
    ],
    devServer:{
    contentBase: path.join(__dirname,'./release'),
    open:true,
    port:9000
    }
}
然后修改package.json的配置:
"scripts": {
    "test": "echo \"Error: no test specified\" && exit 1",
    "dev": "webpack-dev-server --config ./webpack.dev.config.js --mode development"
  },
在根目录下执行npm run dev:
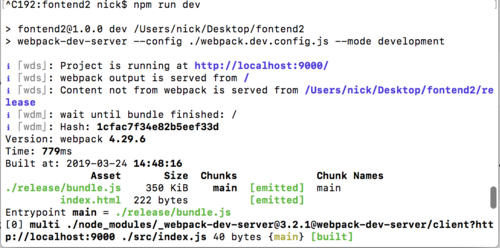
就可以自动打开浏览器看到内容了
然后安装babel
cnpm install babel-core babel-loader babel-polyfill babel-preset-es2015 babel-preset-latest --save-dev
在安装运行过程中发现一个问题:
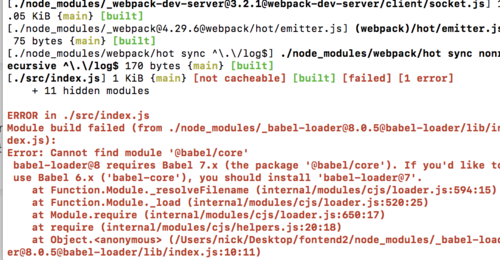
这个babel-loader版本不对,建议安装7.x的版本,所以我运行了
cnpm i babel-loader@7.1.5 -D
然后在项目根目录下建立.babelsrc
{
"presets":["es2015","lastest"],
"plugins":[]
}
然后在webpack.dev.config.js那里配置babel:
 module:{
    rules:[{
    test:/\.js?$/,
    exclude:/(node_modules)/,
    loader:'babel-loader'
    }
    ]
    },
然后在index.js那里我们引入ex6语法:
class Person{
constructor(name) {
this.name = name
}
getName() {
return this.name
}
}
let p = new Person("nick老师")
alert(p.getName())
然后在项目根目录下运行npm run dev:
项目成功运行起来了
共同学习,写下你的评论
评论加载中...
作者其他优质文章