SpringBoot实现session共享和国际化
SpringBoot Session共享
修改pom.xml添加依赖
org.springframework.sessionspring-session-data-redis
添加配置类 RedisSessionConfig
@Configuration@EnableRedisHttpSession(maxInactiveIntervalInSeconds =60)//默认是1800秒过期,这里测试修改为60秒public class RedisSessionConfig {}
添加一个控制器类 SessionController 来进行测试
@RestControllerpublicclassSessionController{@RequestMapping("/uid")String uid(HttpSession session) { UUID uid = (UUID) session.getAttribute("uid");if(uid ==null) { uid = UUID.randomUUID(); } session.setAttribute("uid", uid);returnsession.getId(); }}
先访问http://localhost:8083/boot/uid
然后修改配置文件application.yml
spring:profiles:active: test
重新运行IDEA,test配置文件配置的端口是8085,所以浏览器输入http://localhost:8085/boot/uid
我们看到两个uid是一样的。
在这里我是使用spring boot redis来实现session共享,你还可以配合使用nginx进行负载均衡,同时共享session。
关于nginx可以参考我的另一篇文章:Nginx详解-服务器集群
spring boot 国际化
在spring boot中实现国际化是很简单的的一件事情。
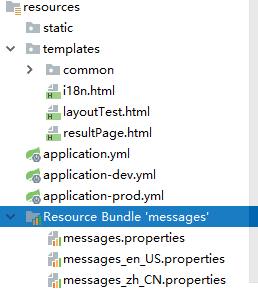
(1)在resources目录下面,我们新建几个资源文件,messages.properties相当于是默认配置的,当其它配置中找不到记录的时候,最后会再到这个配置文件中去查找。
messages.propertiesmessages_en_US.propertiesmessages_zh_CN.properties
依次在这三个配置文件中添加如下配置值:
msg=我是中国人
msg=I'm Chinese
msg=我是中国人
添加完之后,会自动将这几个文件包在一块
需要注意的是这个命名是有讲究的, messages.properties 部分是固定的,不同语言的话,我们可以在它们中间用_区分。为什么是固定的命名,因为源码是硬编码这样命名的。
(2)新建一个配置文件 LocaleConfig
@Configuration@EnableAutoConfiguration@ComponentScanpublicclassLocaleConfigextendsWebMvcConfigurerAdapter{@BeanpublicLocaleResolverlocaleResolver() {SessionLocaleResolverslr =newSessionLocaleResolver();// 默认语言slr.setDefaultLocale(Locale.CHINA);returnslr; }@BeanpublicLocaleChangeInterceptorlocaleChangeInterceptor() {LocaleChangeInterceptorlci =newLocaleChangeInterceptor();// 参数名lci.setParamName("lang");returnlci; }@Overridepublic void addInterceptors(InterceptorRegistryregistry) { registry.addInterceptor(localeChangeInterceptor()); }}
(3)在控制器中,我们添加测试用的方法
// i18n@RequestMapping("/")publicString i18n() {return"i18n"; }@RequestMapping("/changeSessionLanauage")publicString changeSessionLanauage(HttpServletRequest request, HttpServletResponse response, String lang){ System.out.println(lang); LocaleResolver localeResolver = RequestContextUtils.getLocaleResolver(request);if("zh".equals(lang)){ localeResolver.setLocale(request, response, new Locale("zh","CN")); }elseif("en".equals(lang)){ localeResolver.setLocale(request, response, new Locale("en","US")); }return"redirect:/"; }
(4)添加视图来展示,在templates下新建文件i18n.html,通过#可以直接获取国际化配置文件中的配置项的值。
$Title$English(US)简体中文
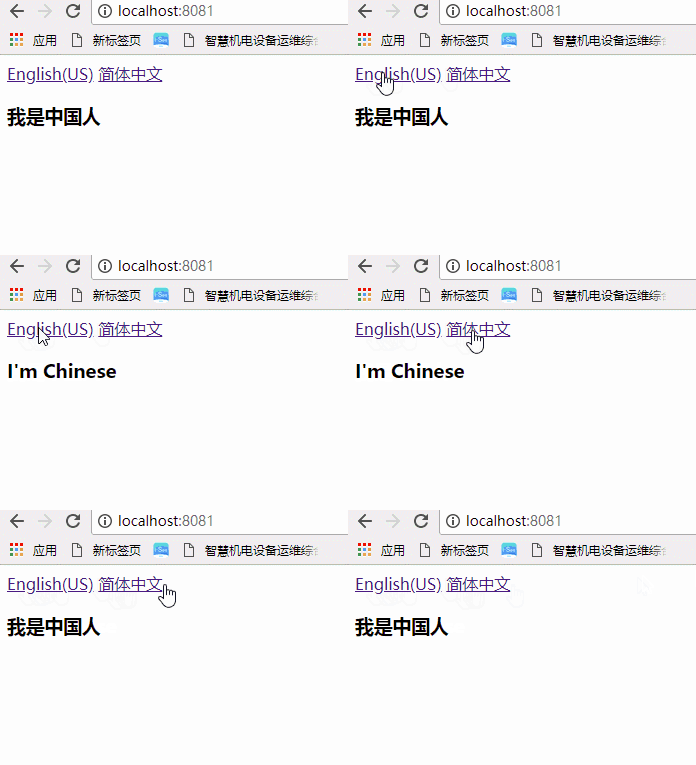
(5)运行查看效果
作者:欧阳海阳
链接:https://www.jianshu.com/p/8f4135f4b553
來源:简书
简书著作权归作者所有,任何形式的转载都请联系作者获得授权并注明出处。
共同学习,写下你的评论
评论加载中...
作者其他优质文章


