Android快捷方式作为Android设备的杀手锏技能,一直都是非常重要的一个功能,也正是如此,各种流氓App也不断通过快捷方式霸占着这样一个用户入口。
同时,各大国产ROM和Luncher的崛起,让这个桌面之争变的更加激烈。毕竟大家都只想用户用自己的App资源,所以,现在各大App不仅仅是要抢占入口,同时还要和各大ROM斗智斗勇。本文将对这个快捷方式进行深度解密,同时给出App适配各种ROM的整合方案。
本文很多地方参考了这位朋友的实现:
https://gist.github.com/waylife/437a3d98a84f245b9582
特此表示感谢!
创建快捷方式之——少林派
所谓少林,是指系统正统的解决方法
天下武功出少林,天下的快捷方式都是Google给的,我们先来看看如何使用Android系统提供的方式来使用Android的快捷方式。
首先大家要知道各种Launcher的区别,原生的Launcher,是两层结构,桌面是快捷方式,而进去后的App列表是App的Launch Icon;而以小米为首的一帮ROM,参考iOS风格,将Launcher改为了一层,即直接显示Launch Icon。
权限设置
<!-- 添加快捷方式 --><uses-permission android:name="com.android.launcher.permission.INSTALL_SHORTCUT" /><!-- 移除快捷方式 --><uses-permission android:name="com.android.launcher.permission.UNINSTALL_SHORTCUT" /><!-- 查询快捷方式 --><uses-permission android:name="com.android.launcher.permission.READ_SETTINGS" />
创建快捷方式
创建快捷方式的Action:
// Action 添加Shortcutpublic static final String ACTION_ADD_SHORTCUT = "com.android.launcher.action.INSTALL_SHORTCUT";
通过广播创建快捷方式:
/**
 * 添加快捷方式
 *
 * @param context      context
 * @param actionIntent 要启动的Intent
 * @param name         name
 */public static void addShortcut(Context context, Intent actionIntent, String name,							   boolean allowRepeat, Bitmap iconBitmap) {
	Intent addShortcutIntent = new Intent(ACTION_ADD_SHORTCUT);	// 是否允许重复创建
	addShortcutIntent.putExtra("duplicate", allowRepeat);	// 快捷方式的标题
	addShortcutIntent.putExtra(Intent.EXTRA_SHORTCUT_NAME, name);	// 快捷方式的图标
	addShortcutIntent.putExtra(Intent.EXTRA_SHORTCUT_ICON, iconBitmap);	// 快捷方式的动作
	addShortcutIntent.putExtra(Intent.EXTRA_SHORTCUT_INTENT, actionIntent);
	context.sendBroadcast(addShortcutIntent);
}
参数相信大家都能看得懂,只是有一点需要注意的,duplicate这个属性,是设置该快捷方式是否允许多次创建的属性,但是,在很多ROM上都不能成功识别,嗯,这就是我们最开始说的快捷方式乱现象。
删除快捷方式
删除快捷方式的Action:
// Action 移除Shortcutpublic static final String ACTION_REMOVE_SHORTCUT = "com.android.launcher.action.UNINSTALL_SHORTCUT";
通过广播删除快捷方式:
/**
 * 移除快捷方式
 *
 * @param context      context
 * @param actionIntent 要启动的Intent
 * @param name         name
 */public static void removeShortcut(Context context, Intent actionIntent, String name) {
	Intent intent = new Intent(ACTION_REMOVE_SHORTCUT);
	intent.putExtra(Intent.EXTRA_SHORTCUT_NAME, name);//        intent.addCategory(Intent.CATEGORY_LAUNCHER);
	intent.putExtra("duplicate", false);
	intent.putExtra(Intent.EXTRA_SHORTCUT_INTENT, actionIntent);
	context.sendBroadcast(intent);
}
参数与创建快捷方式的方法击败类似,需要注意的是,Intent.EXTRA_SHORTCUT_INTENT,与之前创建快捷方式的Intent必须要是同一个,不然是无法删除快捷方式的。
创建快捷方式之——逍遥派
所谓逍遥派,是指我们从原理来理解如何来适配各种Launcher。
原生的快捷方式添加方法,虽然是官方提供的,但在天国这样一个怎么说呢的国家里,基本是很难使用、适配的,也就是我们最开始说的那些原因。下面我们先从快捷方式的整个生命周期来了解下产生、添加、删除快捷方式的原理,再来思考如何实现多ROM、Launcher的适配。
快捷方式的存储
快捷方式其实都存储在Launcher的数据库中,我们在手机上打开SQLite Editor打开Launcher的数据库。
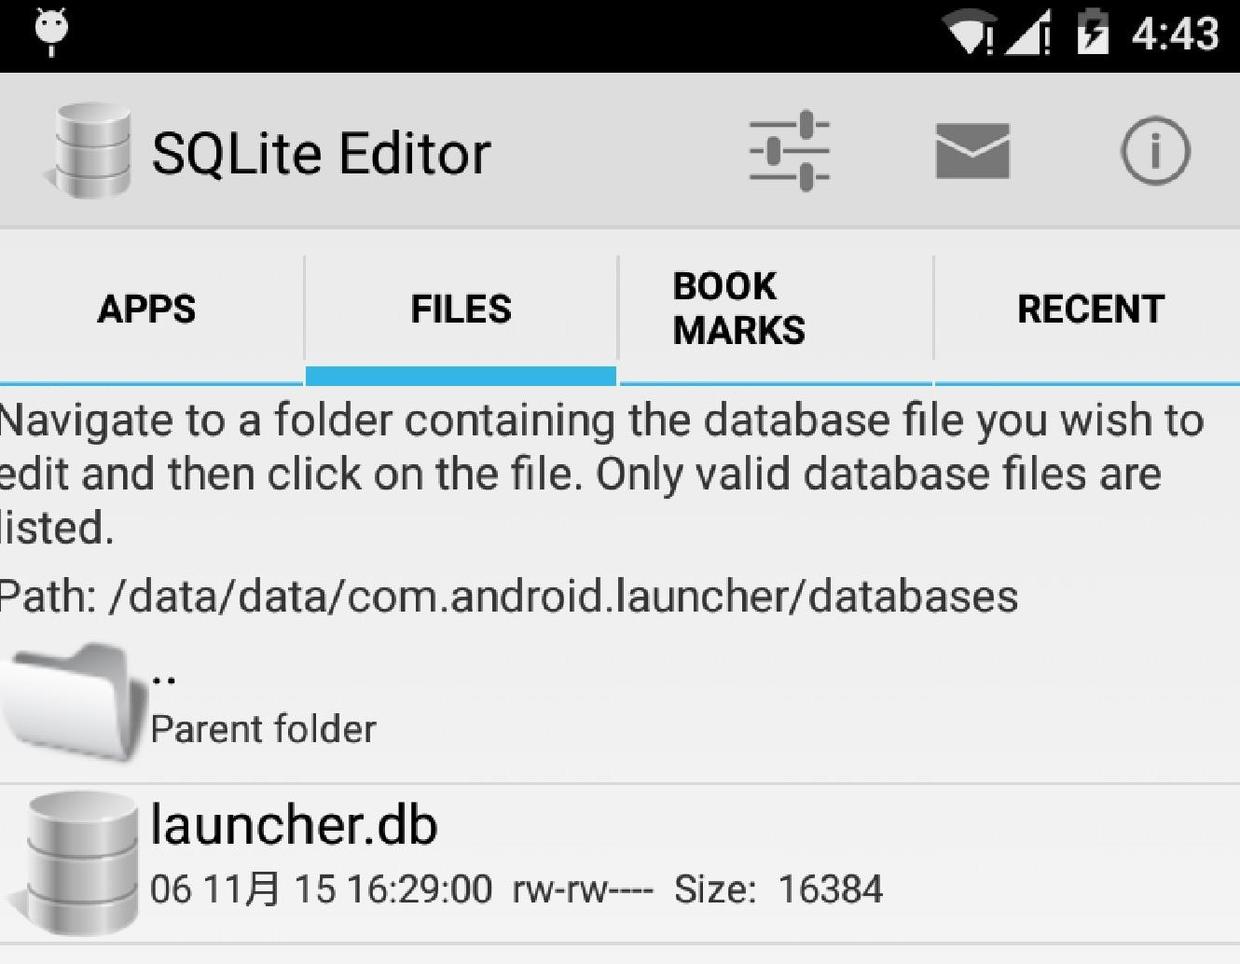
我们打开Launcher.db的favorite表,这里就是我们保存的快捷方式数据:
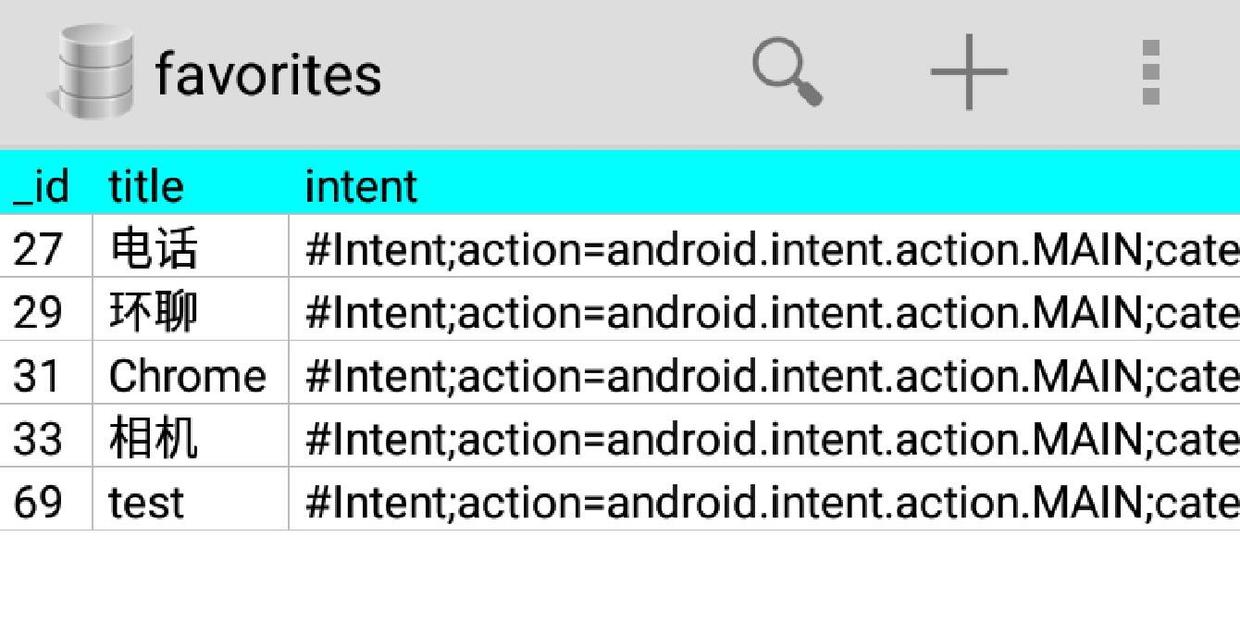
几个主要的字段大家基本一看就懂:title、intent、iconResource、icon,分别对应快捷方式名称,快捷方式intent,快捷方式图标来源,快捷方式图标二进制数据。
快捷方式的创建
了解了快捷方式的存储原理,我们就可以针对这个数据库来做文章,所有的快捷方式都可以通过修改这个数据库来实现,同时还不用太考虑兼容性问题。
对于快捷方式的创建,我们依然可以使用系统提供的方法,所以这里不再多说。
快捷方式的判断是否存在
前面我们说了,通过duplicate属性可以区分是否允许创建重复的快捷方式,但是,很多ROM是无法兼容到的,所以,这里我们使用查询Launcher数据库的方式来实现。
我们先来看代码:
/**
 * 检查快捷方式是否存在 <br/>
 * <font color=red>注意:</font> 有些手机无法判断是否已经创建过快捷方式<br/>
 * 因此,在创建快捷方式时,请添加<br/>
 * shortcutIntent.putExtra("duplicate", false);// 不允许重复创建<br/>
 * 最好使用{@link #isShortCutExist(Context, String, Intent)}
 * 进行判断,因为可能有些应用生成的快捷方式名称是一样的的<br/>
 */public static boolean isShortCutExist(Context context, String title) {	boolean result = false;	try {
		ContentResolver cr = context.getContentResolver();
		Uri uri = getUriFromLauncher(context);
		Cursor c = cr.query(uri, new String[]{"title"}, "title=? ", new String[]{title}, null);		if (c != null && c.getCount() > 0) {
			result = true;
		}		if (c != null && !c.isClosed()) {
			c.close();
		}
	} catch (Exception e) {
		result = false;
		e.printStackTrace();
	}	return result;
}/**
 * 不一定所有的手机都有效,因为国内大部分手机的桌面不是系统原生的<br/>
 * 更多请参考{@link #isShortCutExist(Context, String)}<br/>
 * 桌面有两种,系统桌面(ROM自带)与第三方桌面,一般只考虑系统自带<br/>
 * 第三方桌面如果没有实现系统响应的方法是无法判断的,比如GO桌面<br/>
 */public static boolean isShortCutExist(Context context, String title, Intent intent) {	boolean result = false;	try {
		ContentResolver cr = context.getContentResolver();
		Uri uri = getUriFromLauncher(context);
		Cursor c = cr.query(uri, new String[]{"title", "intent"}, "title=?  and intent=?",				new String[]{title, intent.toUri(0)}, null);		if (c != null && c.getCount() > 0) {
			result = true;
		}		if (c != null && !c.isClosed()) {
			c.close();
		}
	} catch (Exception ex) {
		result = false;
		ex.printStackTrace();
	}	return result;
}private static Uri getUriFromLauncher(Context context) {
	StringBuilder uriStr = new StringBuilder();
	String authority = LauncherUtil.getAuthorityFromPermissionDefault(context);	if (authority == null || authority.trim().equals("")) {
		authority = LauncherUtil.getAuthorityFromPermission(context, LauncherUtil.getCurrentLauncherPackageName(context) + ".permission.READ_SETTINGS");
	}
	uriStr.append("content://");	if (TextUtils.isEmpty(authority)) {		int sdkInt = android.os.Build.VERSION.SDK_INT;		if (sdkInt < 8) { // Android 2.1.x(API 7)以及以下的
			uriStr.append("com.android.launcher.settings");
		} else if (sdkInt < 19) {// Android 4.4以下
			uriStr.append("com.android.launcher2.settings");
		} else {// 4.4以及以上
			uriStr.append("com.android.launcher3.settings");
		}
	} else {
		uriStr.append(authority);
	}
	uriStr.append("/favorites?notify=true");	return Uri.parse(uriStr.toString());
}
这里有两个重载的isShortCutExist方法,唯一的区别就是最后一个参数——intent,加这个参数的原因,在注释中已经写了,更加精确。而getUriFromLauncher方法,是给调用的ContentResolver提供Uri。构造的时候,可以看见,Android的版本话碎片问题,是多么的严重……
这样在添加快捷方式前,通过这个判断下,就可以只添加一个快捷方式了。
为任意PackageName的App添加快捷方式
知道了我们是如何判断快捷方式是是否存在的,我们就可以通过这种思路来为任意PackageName的App添加快捷方式,代码如下:
/**
 * 为PackageName的App添加快捷方式
 *
 * @param context context
 * @param pkg     待添加快捷方式的应用包名
 * @return 返回true为正常执行完毕
 */public static boolean addShortcutByPackageName(Context context, String pkg) {	// 快捷方式名
	String title = "unknown";	// MainActivity完整名
	String mainAct = null;	// 应用图标标识
	int iconIdentifier = 0;	// 根据包名寻找MainActivity
	PackageManager pkgMag = context.getPackageManager();
	Intent queryIntent = new Intent(Intent.ACTION_MAIN, null);
	queryIntent.addCategory(Intent.CATEGORY_LAUNCHER);// 重要,添加后可以进入直接已经打开的页面
	queryIntent.setFlags(Intent.FLAG_ACTIVITY_RESET_TASK_IF_NEEDED);
	queryIntent.addFlags(Intent.FLAG_ACTIVITY_LAUNCHED_FROM_HISTORY);	List<ResolveInfo> list = pkgMag.queryIntentActivities(queryIntent,
			PackageManager.GET_ACTIVITIES);	for (int i = 0; i < list.size(); i++) {
		ResolveInfo info = list.get(i);		if (info.activityInfo.packageName.equals(pkg)) {
			title = info.loadLabel(pkgMag).toString();
			mainAct = info.activityInfo.name;
			iconIdentifier = info.activityInfo.applicationInfo.icon;			break;
		}
	}	if (mainAct == null) {		// 没有启动类
		return false;
	}
	Intent shortcut = new Intent(			"com.android.launcher.action.INSTALL_SHORTCUT");	// 快捷方式的名称
	shortcut.putExtra(Intent.EXTRA_SHORTCUT_NAME, title);	// 不允许重复创建
	shortcut.putExtra("duplicate", false);
	ComponentName comp = new ComponentName(pkg, mainAct);
	shortcut.putExtra(Intent.EXTRA_SHORTCUT_INTENT,
			queryIntent.setComponent(comp));	// 快捷方式的图标
	Context pkgContext = null;	if (context.getPackageName().equals(pkg)) {
		pkgContext = context;
	} else {		// 创建第三方应用的上下文环境,为的是能够根据该应用的图标标识符寻找到图标文件。
		try {
			pkgContext = context.createPackageContext(pkg,
					Context.CONTEXT_IGNORE_SECURITY
							| Context.CONTEXT_INCLUDE_CODE);
		} catch (PackageManager.NameNotFoundException e) {
			e.printStackTrace();
		}
	}	if (pkgContext != null) {
		Intent.ShortcutIconResource iconRes = Intent.ShortcutIconResource
				.fromContext(pkgContext, iconIdentifier);
		shortcut.putExtra(Intent.EXTRA_SHORTCUT_ICON_RESOURCE, iconRes);
	}	// 发送广播,让接收者创建快捷方式
	// 需权限<uses-permission
	// android:name="com.android.launcher.permission.INSTALL_SHORTCUT" />
	context.sendBroadcast(shortcut);	return true;
}
创建快捷方式之——星宿派
所谓星宿派,是指我们使用一些Trick来解决多Launcher适配的问题。
由于快捷方式的碎片化非常严重,所以,你顾得上这种ROM,顾不上其它ROM。例如,在原生ROM上,你需要使用类似原生的Launcher权限:
<uses-permission android:name="com.android.launcher.permission.INSTALL_SHORTCUT" /><uses-permission android:name="com.android.launcher.permission.UNINSTALL_SHORTCUT" />
但是,在其它ROM上呢,例如华为,你需要这样的权限:
<uses-permission android:name="com.huawei.launcher3.permission.READ_SETTINGS" /><uses-permission android:name="com.huawei.launcher3.permission.WRITE_SETTINGS" />
为了程序能够通用性够强,理论上我们得为所有不使用原生Launcher权限的Launcher配置权限代码,是的,你妹听错,是所有,只有通过这种奇技淫巧,才能适配更多的Launcher,这里贴一部分给大家爽一下:
<uses-permission android:name="android.permission.WRITE_EXTERNAL_STORAGE"/><uses-permission android:name="android.permission.READ_EXTERNAL_STORAGE"/><uses-permission android:name="android.permission.WRITE_SETTINGS"/><uses-permission android:name="com.android.launcher.permission.INSTALL_SHORTCUT" /><uses-permission android:name="com.android.launcher.permission.UNINSTALL_SHORTCUT" /><uses-permission android:name="com.android.launcher.permission.READ_SETTINGS" /><uses-permission android:name="com.android.launcher.permission.WRITE_SETTINGS" /><uses-permission android:name="com.android.launcher2.permission.READ_SETTINGS" /><uses-permission android:name="com.android.launcher2.permission.WRITE_SETTINGS" /><uses-permission android:name="com.android.launcher3.permission.READ_SETTINGS" /><uses-permission android:name="com.android.launcher3.permission.WRITE_SETTINGS" /><uses-permission android:name="org.adw.launcher.permission.READ_SETTINGS" /><uses-permission android:name="org.adw.launcher.permission.WRITE_SETTINGS" /><uses-permission android:name="com.htc.launcher.permission.READ_SETTINGS" /><uses-permission android:name="com.htc.launcher.permission.WRITE_SETTINGS" /><uses-permission android:name="com.qihoo360.launcher.permission.READ_SETTINGS" /><uses-permission android:name="com.qihoo360.launcher.permission.WRITE_SETTINGS" /><uses-permission android:name="com.lge.launcher.permission.READ_SETTINGS" /><uses-permission android:name="com.lge.launcher.permission.WRITE_SETTINGS" /><uses-permission android:name="net.qihoo.launcher.permission.READ_SETTINGS" /><uses-permission android:name="net.qihoo.launcher.permission.WRITE_SETTINGS" /><uses-permission android:name="org.adwfreak.launcher.permission.READ_SETTINGS" /><uses-permission android:name="org.adwfreak.launcher.permission.WRITE_SETTINGS" /><uses-permission android:name="org.adw.launcher_donut.permission.READ_SETTINGS" /><uses-permission android:name="org.adw.launcher_donut.permission.WRITE_SETTINGS" /><uses-permission android:name="com.huawei.launcher3.permission.READ_SETTINGS" /><uses-permission android:name="com.huawei.launcher3.permission.WRITE_SETTINGS" /><uses-permission android:name="com.fede.launcher.permission.READ_SETTINGS" /><uses-permission android:name="com.fede.launcher.permission.WRITE_SETTINGS" /><uses-permission android:name="com.sec.android.app.twlauncher.settings.READ_SETTINGS" /><uses-permission android:name="com.sec.android.app.twlauncher.settings.WRITE_SETTINGS" /><uses-permission android:name="com.anddoes.launcher.permission.READ_SETTINGS" /><uses-permission android:name="com.anddoes.launcher.permission.WRITE_SETTINGS" /><uses-permission android:name="com.tencent.qqlauncher.permission.READ_SETTINGS" /><uses-permission android:name="com.tencent.qqlauncher.permission.WRITE_SETTINGS" /><uses-permission android:name="com.huawei.launcher2.permission.READ_SETTINGS" /><uses-permission android:name="com.huawei.launcher2.permission.WRITE_SETTINGS" /><uses-permission android:name="com.android.mylauncher.permission.READ_SETTINGS" /><uses-permission android:name="com.android.mylauncher.permission.WRITE_SETTINGS" /><uses-permission android:name="com.ebproductions.android.launcher.permission.READ_SETTINGS" /><uses-permission android:name="com.ebproductions.android.launcher.permission.WRITE_SETTINGS" /><uses-permission android:name="com.oppo.launcher.permission.READ_SETTINGS" /><uses-permission android:name="com.oppo.launcher.permission.WRITE_SETTINGS" /><uses-permission android:name="com.miui.mihome2.permission.READ_SETTINGS" /><uses-permission android:name="com.miui.mihome2.permission.WRITE_SETTINGS" /><uses-permission android:name="com.huawei.android.launcher.permission.READ_SETTINGS" /><uses-permission android:name="com.huawei.android.launcher.permission.WRITE_SETTINGS" /><uses-permission android:name="telecom.mdesk.permission.READ_SETTINGS" /><uses-permission android:name="telecom.mdesk.permission.WRITE_SETTINGS" /><uses-permission android:name="dianxin.permission.ACCESS_LAUNCHER_DATA" />
这时候大家肯定要问了,你申请这么多权限,用户在安装App的时候,不是要崩溃了,尼玛,这么多看都看不过来啊,其实,根本不需要担心,因为这些基本都是各自ROM中的第三方ROM权限,在用户安装的时候,他们通常会被解析成原生Launcher的权限,例如:添加、修改桌面快捷方式。并不会将所有的权限都写出来。
创建快捷方式之——西域派
所谓西域派,是因为我想不出其他名字了。西域一派,使用其他方式来实现类似快捷方式的方法。
快捷方式的确是我们为应用导流的一个非常重要的入口,但是,由于碎片化实在太严重,所以,我们可以使用在Launcher App列表中为应用增加一个入口的方式来为App导流,简单的说,就是增进一个App的入口Activity。
<activity android:name=".MainActivity">
    <intent-filter>
        <action android:name="android.intent.action.MAIN" />

        <category android:name="android.intent.category.LAUNCHER" />
    </intent-filter></activity><activity
    android:name="com.hujiang.hj_shortcut_lib.HJShortcutActivity"
    android:theme="@style/Base.Theme.AppCompat.Dialog">
    <intent-filter>
        <action android:name="android.intent.action.MAIN" />

        <category android:name="android.intent.category.LAUNCHER" />
    </intent-filter></activity>
非常简单,相信大家都知道这种方式来给App增加一个Activity入口。但是,这种方式,我们如何能够自由的控制这个入口是否显示呢?
奇技PackageManager
PackageManager提供了一系列Package的管理方法,当然,也包含了我们非常关心的启用、停用组件这一方法,这个方法在Root情况下,可以修改任一App的任意组件,在普通情况下,对自身App有绝对权限。使用方法也非常简单:
public static void toggleFlowEntrance(Context context, Class launcherClass) {
	PackageManager packageManager = context.getPackageManager();
	ComponentName componentName = new ComponentName(context, launcherClass);	int res = packageManager.getComponentEnabledSetting(componentName);	if (res == PackageManager.COMPONENT_ENABLED_STATE_DEFAULT ||
			res == PackageManager.COMPONENT_ENABLED_STATE_ENABLED) {		// 隐藏应用图标
		packageManager.setComponentEnabledSetting(
				componentName,
				PackageManager.COMPONENT_ENABLED_STATE_DISABLED,
				PackageManager.DONT_KILL_APP);
	} else {		// 显示应用图标
		packageManager.setComponentEnabledSetting(
				componentName,
				PackageManager.COMPONENT_ENABLED_STATE_DEFAULT,
				PackageManager.DONT_KILL_APP);
	}
}
一统江湖
前面我们分析了各种快捷方式、Launcher入口的方式来对App进行导流,当然,这不是我们的目的,我们的目的是能够掌握Android快捷方式的哭花宝典而不用那个啥。
所以,下面我封装了一个shortcut的开源库,从而可以尽可能的忽略ROM的差异,来使用快捷方式和Launcher入口。
项目地址:
https://github.com/xuyisheng/ShortcutHelper
目前该项目还在测试阶段,还要很多问题和适配bug需要解决,欢迎大家提issue。
共同学习,写下你的评论
评论加载中...
作者其他优质文章