今天说下wpf中的模板,前面一篇中我们讲到了style,但是style所能做的仅仅是在现有控件的基础上进行修修补补,但是如果我们想
彻底颠覆控件样式,那么我们就必须使用这一篇所说的模板。
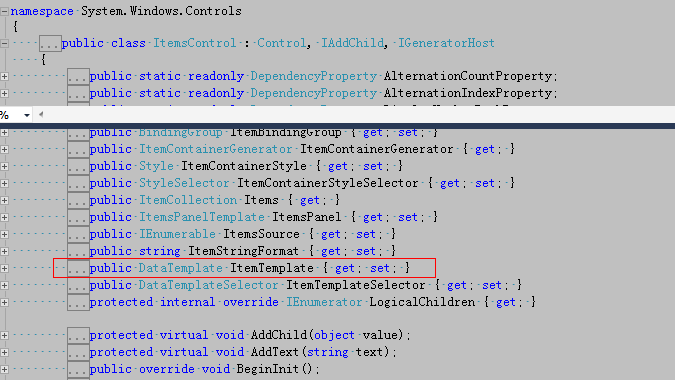
老外写书都喜欢在篇头搞一个类图,方便我们宏观认识,这里我也上一个。
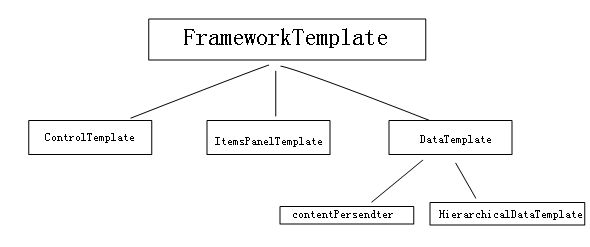
一:控件模板
1:ControlTemplate
我们知道wpf的控件都是继承自Control,在Control类中有一个Template属性,类型就是ControlTemplate。
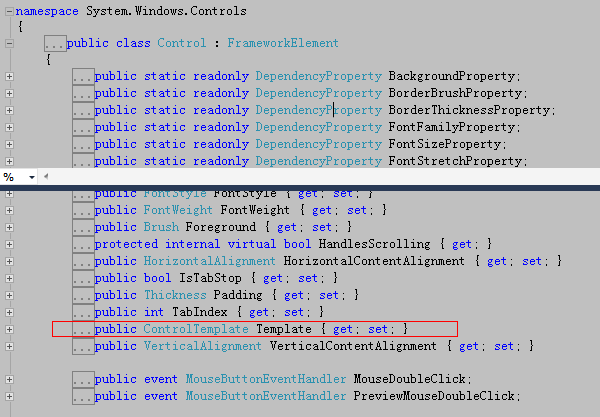
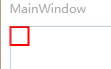
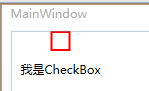
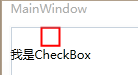
那么利用这个ControlTemplate就可以彻底的颠覆控件的默认外观,这里我把一个checkbox变成一个小矩形,蛮有意思的。

1 <Window x:Class="WpfApplication1.MainWindow" 2 xmlns="http://schemas.microsoft.com/winfx/2006/xaml/presentation" 3 xmlns:x="http://schemas.microsoft.com/winfx/2006/xaml" 4 xmlns:sys="clr-namespace:System;assembly=mscorlib" 5 Title="MainWindow" Height="350" Width="525"> 6 <Window.Resources> 7 <ControlTemplate x:Key="rect" TargetType="{x:Type CheckBox}"> 8 <StackPanel> 9 <Rectangle Name="breakRectangle" Stroke="Red" StrokeThickness="2" Width="20" Height="20">10 <Rectangle.Fill>11 <SolidColorBrush Color="White"/>12 </Rectangle.Fill>13 </Rectangle>14 </StackPanel>15 </ControlTemplate>16 </Window.Resources>17 <Canvas>18 <CheckBox Template="{StaticResource ResourceKey=rect}" Content="我是CheckBox"/>19 </Canvas>20 </Window>
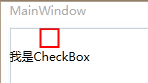
确实,我们干了一件漂亮的事情,把checkbox变成了“小矩形”,但是我们发现了一个小问题,为什么我的Content=“xxx”没有显示到模板上?
很简单,我们已经重定义了控件模板,默认模板将会被覆盖...
2:ContentPresenter
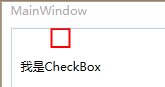
幸好,wpf给我们提供了一个ContentPresenter,它的作用就是把原有模板的属性原封不动的投放到自定义模板中。
1 <Window x:Class="WpfApplication1.MainWindow" 2 xmlns="http://schemas.microsoft.com/winfx/2006/xaml/presentation" 3 xmlns:x="http://schemas.microsoft.com/winfx/2006/xaml" 4 xmlns:sys="clr-namespace:System;assembly=mscorlib" 5 Title="MainWindow" Height="350" Width="525"> 6 <Window.Resources> 7 <ControlTemplate x:Key="rect" TargetType="{x:Type CheckBox}"> 8 <StackPanel> 9 <Rectangle Name="breakRectangle" Stroke="Red" StrokeThickness="2" Width="20" Height="20">10 <Rectangle.Fill>11 <SolidColorBrush Color="White"/>12 </Rectangle.Fill>13 </Rectangle>14 <ContentPresenter/>15 </StackPanel>16 </ControlTemplate>17 </Window.Resources>18 <Canvas>19 <CheckBox Template="{StaticResource ResourceKey=rect}" Content="我是CheckBox"/>20 </Canvas>21 </Window>
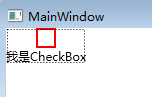
当然你也可以玩一些小技巧,比如我想在"矩形“和”文字”中间设置边距,那么我们可以设置ContentPresenter的margin。
1 <Window x:Class="WpfApplication1.MainWindow" 2 xmlns="http://schemas.microsoft.com/winfx/2006/xaml/presentation" 3 xmlns:x="http://schemas.microsoft.com/winfx/2006/xaml" 4 xmlns:sys="clr-namespace:System;assembly=mscorlib" 5 Title="MainWindow" Height="350" Width="525"> 6 <Window.Resources> 7 <ControlTemplate x:Key="rect" TargetType="{x:Type CheckBox}"> 8 <StackPanel> 9 <Rectangle Name="breakRectangle" Stroke="Red" StrokeThickness="2" Width="20" Height="20">10 <Rectangle.Fill>11 <SolidColorBrush Color="White"/>12 </Rectangle.Fill>13 </Rectangle>14 <ContentPresenter Margin="10" />15 </StackPanel>16 </ControlTemplate>17 </Window.Resources>18 <Canvas>19 <CheckBox Template="{StaticResource ResourceKey=rect}" Content="我是CheckBox"/>20 </Canvas>21 </Window>
如果你够聪明,你会发现我设置的margin是一个非常呆板的事情,意思就是说能不能根据具体控件灵活控制margin呢?答案肯定是没问题的,
因为我们记得一个控件可以绑定到另一个控件上,比如这里我将模板中的Margin绑定到原控件中的Padding上去。
1 <Window x:Class="WpfApplication1.MainWindow" 2 xmlns="http://schemas.microsoft.com/winfx/2006/xaml/presentation" 3 xmlns:x="http://schemas.microsoft.com/winfx/2006/xaml" 4 xmlns:sys="clr-namespace:System;assembly=mscorlib" 5 Title="MainWindow" Height="350" Width="525"> 6 <Window.Resources> 7 <ControlTemplate x:Key="rect" TargetType="{x:Type CheckBox}"> 8 <StackPanel> 9 <Rectangle Name="breakRectangle" Stroke="Red" StrokeThickness="2" Width="20" Height="20">10 <Rectangle.Fill>11 <SolidColorBrush Color="White"/>12 </Rectangle.Fill>13 </Rectangle>14 <ContentPresenter Margin="{TemplateBinding Padding}" />15 </StackPanel>16 </ControlTemplate>17 </Window.Resources>18 <Canvas>19 <CheckBox Template="{StaticResource ResourceKey=rect}" Content="我是CheckBox" Padding="10"/>20 </Canvas>21 </Window>
3:Trigger
我们知道style里面也是有trigger的,废话不多说,上代码说话。
1 <Window x:Class="WpfApplication1.MainWindow" 2 xmlns="http://schemas.microsoft.com/winfx/2006/xaml/presentation" 3 xmlns:x="http://schemas.microsoft.com/winfx/2006/xaml" 4 xmlns:sys="clr-namespace:System;assembly=mscorlib" 5 Title="MainWindow" Height="350" Width="525"> 6 <Window.Resources> 7 <ControlTemplate x:Key="rect" TargetType="{x:Type CheckBox}"> 8 <ControlTemplate.Resources> 9 <SolidColorBrush x:Key="redBrush" Color="Red"/>10 </ControlTemplate.Resources>11 <StackPanel>12 <Rectangle Name="breakRectangle" Stroke="Red" StrokeThickness="2" Width="20" Height="20">13 <Rectangle.Fill>14 <SolidColorBrush Color="White"/>15 </Rectangle.Fill>16 </Rectangle>17 <ContentPresenter/>18 </StackPanel>19 <ControlTemplate.Triggers>20 <Trigger Property="IsChecked" Value="True">21 <Setter TargetName="breakRectangle" Property="Fill" Value="{StaticResource ResourceKey=redBrush}">22 </Setter>23 </Trigger>24 </ControlTemplate.Triggers>25 </ControlTemplate>26 </Window.Resources>27 <Canvas>28 <CheckBox Template="{StaticResource ResourceKey=rect}" Content="我是CheckBox"/>29 </Canvas>30 </Window>
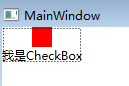
最后形成的效果就是当checkbox选中时为实心框,不选中为空心框。
4:与Style混搭
可能刚才我也说了,style只能在原有的控件基础上修修补补,如果我们让Style修补Control控件的Template属性时,此时我们是不是
就可以实现ControlTemplate和Style的混搭呢?
1 <Window x:Class="WpfApplication1.MainWindow" 2 xmlns="http://schemas.microsoft.com/winfx/2006/xaml/presentation" 3 xmlns:x="http://schemas.microsoft.com/winfx/2006/xaml" 4 xmlns:sys="clr-namespace:System;assembly=mscorlib" 5 Title="MainWindow" Height="350" Width="525"> 6 <Window.Resources> 7 <Style x:Key="cbx" TargetType="{x:Type CheckBox}"> 8 <Setter Property="Template"> 9 <Setter.Value>10 <ControlTemplate TargetType="{x:Type CheckBox}">11 <ControlTemplate.Resources>12 <SolidColorBrush x:Key="redBrush" Color="Red"/>13 </ControlTemplate.Resources>14 <StackPanel>15 <Rectangle Name="breakRectangle" Stroke="Red" StrokeThickness="2" Width="20" Height="20">16 <Rectangle.Fill>17 <SolidColorBrush Color="White"/>18 </Rectangle.Fill>19 </Rectangle>20 <ContentPresenter/>21 </StackPanel>22 <ControlTemplate.Triggers>23 <Trigger Property="IsChecked" Value="True">24 <Setter TargetName="breakRectangle" Property="Fill" Value="{StaticResource ResourceKey=redBrush}">25 </Setter>26 </Trigger>27 </ControlTemplate.Triggers>28 </ControlTemplate>29 </Setter.Value>30 </Setter>31 </Style>32 33 </Window.Resources>34 <Canvas>35 <CheckBox Style="{StaticResource ResourceKey=cbx}" Content="我是CheckBox"/>36 </Canvas>37 </Window>
二:数据模板
现在我们已经知道“控件模板”是用于改变控件外观,那么“数据模板”顾名思义就是控制数据的显示方式,下面做个demo让person绑定到listbox上。
1 namespace WpfApplication1 2 { 3 /// <summary> 4 /// MainWindow.xaml 的交互逻辑 5 /// </summary> 6 public partial class MainWindow : Window 7 { 8 public static string name = "一线码农"; 9 10 public MainWindow()11 {12 InitializeComponent();13 }14 }15 16 public class PersonList : ObservableCollection<Person>17 {18 public PersonList()19 {20 this.Add(new Person() { Name = "一线码农", Age = 24, Address = "上海" });21 this.Add(new Person() { Name = "小师妹", Age = 20, Address = "上海" });22 }23 }24 25 public class Person26 {27 public string Name { get; set; }28 29 public int Age { get; set; }30 31 public string Address { get; set; }32 }33 }
xaml:
1 <Window x:Class="WpfApplication1.MainWindow" 2 xmlns="http://schemas.microsoft.com/winfx/2006/xaml/presentation" 3 xmlns:x="http://schemas.microsoft.com/winfx/2006/xaml" 4 xmlns:sys="clr-namespace:System;assembly=mscorlib" 5 xmlns:class="lazyload" src="data:image/png;base64,iVBORw0KGgoAAAANSUhEUgAAAAEAAAABCAYAAAAfFcSJAAAAAXNSR0IArs4c6QAAAARnQU1BAACxjwv8YQUAAAAJcEhZcwAADsQAAA7EAZUrDhsAAAANSURBVBhXYzh8+PB/AAffA0nNPuCLAAAAAElFTkSuQmCC" data-original="clr-namespace:WpfApplication1" 6 Title="MainWindow" Height="350" Width="525"> 7 <Window.Resources> 8 <ObjectDataProvider x:Key="personList" ObjectType="{x:Type src:PersonList}"/> 9 </Window.Resources>10 <Grid>11 <ListBox ItemsSource="{Binding Source={StaticResource ResourceKey=personList}}"></ListBox>12 </Grid>13 </Window>
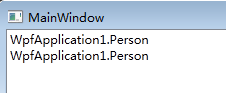
最后我们发现,listbox中并没有呈现我们需要的数据,只是呈现了当前类的ToString()方法,很简单,因为我们绑定的不是简单的数据类型集合,
而是多字段的复杂类型,更重要的是我们并没有告诉wpf该如何呈现person数据。
<1>重写Tostring()
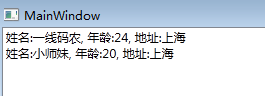
既然wpf在Render数据的时候呈现的是当前的ToString()形式,那下面我们来重写ToString()试试看。
1 public class Person 2 { 3 public string Name { get; set; } 4 5 public int Age { get; set; } 6 7 public string Address { get; set; } 8 9 public override string ToString()10 {11 return string.Format("姓名:{0}, 年龄:{1}, 地址:{2}", Name, Age, Address);12 }13 }
最后看看效果,如我们所愿,person信息已经呈现。
<2>DataTemplate重写
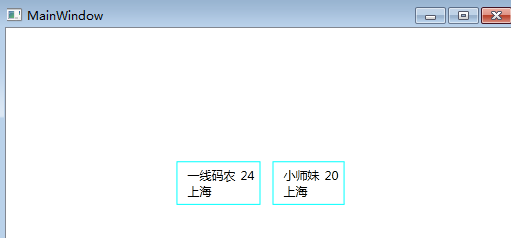
或许有的人比较苛刻,他需要person是作为矩形一块一块的呈现,而不是这些简单的形式,那么此时我们就可以用DataTemplate来颠覆。
1 <Window x:Class="WpfApplication1.MainWindow" 2 xmlns="http://schemas.microsoft.com/winfx/2006/xaml/presentation" 3 xmlns:x="http://schemas.microsoft.com/winfx/2006/xaml" 4 xmlns:sys="clr-namespace:System;assembly=mscorlib" 5 xmlns:class="lazyload" src="data:image/png;base64,iVBORw0KGgoAAAANSUhEUgAAAAEAAAABCAYAAAAfFcSJAAAAAXNSR0IArs4c6QAAAARnQU1BAACxjwv8YQUAAAAJcEhZcwAADsQAAA7EAZUrDhsAAAANSURBVBhXYzh8+PB/AAffA0nNPuCLAAAAAElFTkSuQmCC" data-original="clr-namespace:WpfApplication1" 6 Title="MainWindow" Height="350" Width="525"> 7 <Window.Resources> 8 <ObjectDataProvider x:Key="personList" ObjectType="{x:Type src:PersonList}"/> 9 <DataTemplate x:Key="rect">10 <Border Name="border" BorderBrush="Aqua" BorderThickness="1" Padding="5" Margin="5">11 <StackPanel>12 <StackPanel Orientation="Horizontal">13 <TextBlock Text="{Binding Name}" Margin="5,0,0,0"/>14 <TextBlock Text="{Binding Age}" Margin="5,0,0,0"/>15 </StackPanel>16 <StackPanel Orientation="Horizontal">17 <TextBlock Text="{Binding Address}" Margin="5,0,0,0"/>18 </StackPanel>19 </StackPanel>20 </Border>21 </DataTemplate>22 </Window.Resources>23 <Grid>24 <ListBox ItemsSource="{Binding Source={StaticResource ResourceKey=personList}}"25 ItemTemplate="{StaticResource ResourceKey=rect}"></ListBox>26 </Grid>27 </Window>
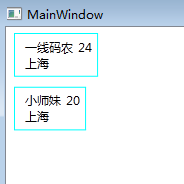
哈哈,果然是以一块一块的形式展现,大功告成,当然这里的”触发器“和”style混搭“跟ConrolTemplate非常相似,我想应该不需要累赘了。
三: ItemsPanelTemplate
在条目控件(ItemControl)里面,有一个属性叫ItemPanel,类型是ItemPanelTemplate。
那么ItemsPanelTemplate主要用来干什么的呢?首先我们要知道常见的条目控件有:ListBox,Menu,StatusBar,比如拿ListBox来说,
我们经过仔细研究,发现ItemBox的ItemPanel其实是一个VisualizingStackPanel,就是说ListBox的每一项的排列方式是遵循StackPanel的
原则,也就是从上到下的排列方式,比如”一线码农“和”小师妹“是按照竖行排列方式,好,我现在的要求就是能够”横排“,该如何做到呢?
1 <Window x:Class="WpfApplication1.MainWindow" 2 xmlns="http://schemas.microsoft.com/winfx/2006/xaml/presentation" 3 xmlns:x="http://schemas.microsoft.com/winfx/2006/xaml" 4 xmlns:sys="clr-namespace:System;assembly=mscorlib" 5 xmlns:class="lazyload" src="data:image/png;base64,iVBORw0KGgoAAAANSUhEUgAAAAEAAAABCAYAAAAfFcSJAAAAAXNSR0IArs4c6QAAAARnQU1BAACxjwv8YQUAAAAJcEhZcwAADsQAAA7EAZUrDhsAAAANSURBVBhXYzh8+PB/AAffA0nNPuCLAAAAAElFTkSuQmCC" data-original="clr-namespace:WpfApplication1" 6 Title="MainWindow" Height="350" Width="525"> 7 <Window.Resources> 8 <ObjectDataProvider x:Key="personList" ObjectType="{x:Type src:PersonList}"/> 9 <DataTemplate x:Key="rect">10 <Border Name="border" BorderBrush="Aqua" BorderThickness="1" Padding="5" Margin="5">11 <StackPanel>12 <StackPanel Orientation="Horizontal">13 <TextBlock Text="{Binding Name}" Margin="5,0,0,0"/>14 <TextBlock Text="{Binding Age}" Margin="5,0,0,0"/>15 </StackPanel>16 <StackPanel Orientation="Horizontal">17 <TextBlock Text="{Binding Address}" Margin="5,0,0,0"/>18 </StackPanel>19 </StackPanel>20 </Border>21 </DataTemplate>22 <ItemsPanelTemplate x:Key="items">23 <StackPanel Orientation="Horizontal" VerticalAlignment="Center" HorizontalAlignment="Center"/>24 </ItemsPanelTemplate>25 </Window.Resources>26 <Grid>27 <ListBox ItemsSource="{Binding Source={StaticResource ResourceKey=personList}}"28 ItemTemplate="{StaticResource ResourceKey=rect}" ItemsPanel="{StaticResource ResourceKey=items}"></ListBox>29 </Grid>30 </Window>
哈哈,确实有意思,我们改变了ListBox中Item的默认排序方向,当然在menu,statusBar中我们也可以用同样的方式来更改。
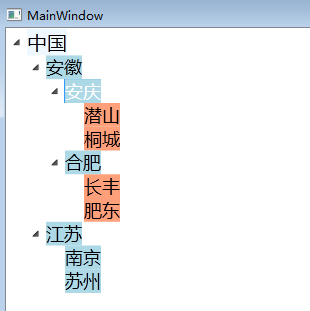
四: HierarchicalDataTemplate
它是针对具有分层数据结构的控件设计的,比如说TreeView,相当于可以每一个层级上做DataTemplate,很好很强大。
1 <Window x:Class="WpfApplication1.MainWindow" 2 xmlns="http://schemas.microsoft.com/winfx/2006/xaml/presentation" 3 xmlns:x="http://schemas.microsoft.com/winfx/2006/xaml" 4 xmlns:sys="clr-namespace:System;assembly=mscorlib" 5 xmlns:class="lazyload" src="data:image/png;base64,iVBORw0KGgoAAAANSUhEUgAAAAEAAAABCAYAAAAfFcSJAAAAAXNSR0IArs4c6QAAAARnQU1BAACxjwv8YQUAAAAJcEhZcwAADsQAAA7EAZUrDhsAAAANSURBVBhXYzh8+PB/AAffA0nNPuCLAAAAAElFTkSuQmCC" data-original="clr-namespace:WpfApplication1" 6 Title="MainWindow" Height="350" Width="525"> 7 <Window.Resources> 8 <XmlDataProvider x:Key="Info" XPath="Nations"> 9 <x:XData>10 <Nations xmlns="">11 <Nation Name="中国">12 <Provinces>13 <Province Name="安徽">14 <Citys>15 <City Name="安庆">16 <Countrys>17 <Country Name="潜山"/>18 <Country Name="桐城"/>19 </Countrys>20 </City>21 <City Name="合肥">22 <Countrys>23 <Country Name="长丰"/>24 <Country Name="肥东"/>25 </Countrys>26 </City>27 </Citys>28 </Province>29 <Province Name="江苏">30 <Citys>31 <City Name="南京">32 <Countys>33 <Country Name="溧水"/>34 <Country Name="高淳"/>35 </Countys>36 </City>37 <City Name="苏州">38 <Countys>39 <Country Name="常熟"/>40 </Countys>41 </City>42 </Citys>43 </Province>44 </Provinces>45 </Nation>46 </Nations>47 </x:XData>48 </XmlDataProvider>49 <HierarchicalDataTemplate DataType="Nation" ItemsSource="{Binding XPath=Provinces/Province}">50 <StackPanel Background="AliceBlue">51 <TextBlock FontSize="20" Text="{Binding XPath=@Name}"/>52 </StackPanel>53 </HierarchicalDataTemplate>54 <HierarchicalDataTemplate DataType="Province" ItemsSource="{Binding XPath=Citys/City}">55 <StackPanel Background="LightBlue">56 <TextBlock FontSize="18" Text="{Binding XPath=@Name}"/>57 </StackPanel>58 </HierarchicalDataTemplate>59 <HierarchicalDataTemplate DataType="City" ItemsSource="{Binding XPath=Countrys/Country}">60 <StackPanel Background="LightBlue">61 <TextBlock FontSize="18" Text="{Binding XPath=@Name}"/>62 </StackPanel>63 </HierarchicalDataTemplate>64 <HierarchicalDataTemplate DataType="Country">65 <StackPanel Background="LightSalmon">66 <TextBlock FontSize="18" Text="{Binding XPath=@Name}"/>67 </StackPanel>68 </HierarchicalDataTemplate>69 </Window.Resources>70 <TreeView ItemsSource="{Binding Source={StaticResource ResourceKey=Info},XPath=Nation}"></TreeView>71 </Window>
共同学习,写下你的评论
评论加载中...
作者其他优质文章