

-
定义atts
查看全部 -
s查看全部
-
<?xml version="1.0" encoding="utf-8"?>
<resources>
    <declare-styleable name="Toolbar">
        <attr name="titleText" format="string"/>
        <attr name="titleTextSize" format="dimension"/>
        <attr name="titleTextColor" format="color"
    </declare-styleable>
</resources>
private TextView titleView;
private float titleTextSize;
private int titleTextColor;
private String title;
private LayoutParams titleParam;
TypedArray ta = context.obtainStyledAttributes(attrs, R.styleable.Toolbar);

title = ta.getString(R.styleable.Toolbar_titleText);
titleTextColor = ta.getInt(R.styleable.Toolbar_titleTextColor, 0);
titleTextSize = ta.getDimension(R.styleable.Toolbar_titleTextSize, 15);
ta.recycle();
titleView = new TextView(context);
titleView.setText(title);
titleView.setTextColor(titleTextColor);
titleView.setTextSize(titleTextSize);
titleView.setGravity(Gravity.CENTER);
titleParam = new LayoutParams(LayoutParams.WRAP_CONTENT, LayoutParams.MATCH_PARENT);
titleParam.addRule(RelativeLayout.CENTER_IN_PARENT);
addView(titleView, titleParam);
查看全部 -
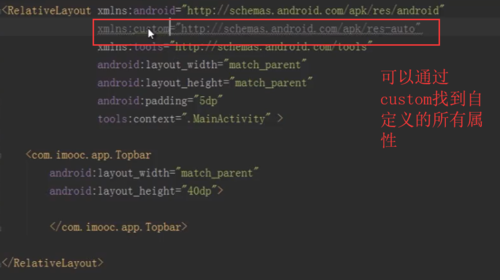
引用自定义view属性
xmlns:定义一个命名空间=“
http://schemas.android.com/apk/res-auto"用定义的命名空间名进行引用属性
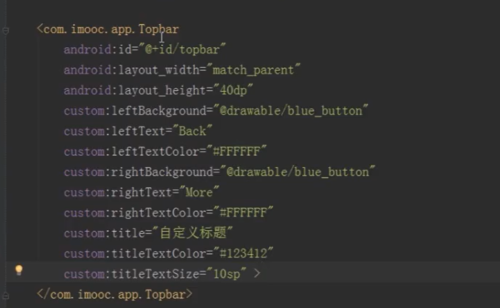
例如xmlns:app="app:title="IMOOC"
app:titleTextColor="@android:color/black"
app:titleTextSize="12dp"
app:leftBackgroud="@android:color/black"
app:leftText="返回"
app:leftTextColor="@android:color/white"
app:rightBackgroud="@android:color/black"
app:rightText="下一页"
app:rightTextColor="@android:color/white"
查看全部 -
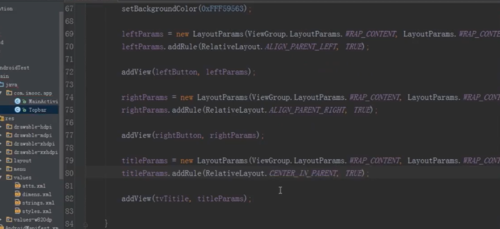
package study.com.mytopbar;

import android.content.Context;
import android.content.res.TypedArray;
import android.graphics.drawable.Drawable;
import android.util.AttributeSet;
import android.view.Gravity;
import android.view.ViewGroup;
import android.widget.Button;
import android.widget.RelativeLayout;
import android.widget.TextView;

/**
 * Created by Administrator on 2019/9/25.
 */

public class Topbar extends RelativeLayout {
    private Button leftButton, rightButton;
    private TextView tvTitle;

    private int leftTextColor;
    private Drawable leftBackGroud;
    private String leftText;

    private int rightTextColor;
    private Drawable rightBackGroud;
    private String rightText;

    private float titleTextSize;
    private int titleTextColor;
    private String title;

    private LayoutParams leftParams, rightParams, titleParams;

    public Topbar(Context context, AttributeSet attrs) {
        super(context, attrs);
        //进行属性关联, TypedArray类 取attrs下的属集合性
        TypedArray typedArray = context.obtainStyledAttributes(attrs, R.styleable.Topbar);
        //属性赋值 根据类型选择合适类型getColor getDrawable getDimension, 取值对应的key是自定义属性名+字属性名 ,后面跟默认值
        leftTextColor = typedArray.getColor(R.styleable.Topbar_leftTextColor, 0);
        leftBackGroud = typedArray.getDrawable(R.styleable.Topbar_leftBackgroud);
        leftText = typedArray.getString(R.styleable.Topbar_leftText);
        rightTextColor = typedArray.getColor(R.styleable.Topbar_rightTextColor, 0);
        rightBackGroud = typedArray.getDrawable(R.styleable.Topbar_rightBackgroud);
        rightText = typedArray.getString(R.styleable.Topbar_rightText);
        titleTextSize = typedArray.getDimension(R.styleable.Topbar_titleTextSize, 0);
        titleTextColor = typedArray.getColor(R.styleable.Topbar_titleTextColor, 0);
        title = typedArray.getString(R.styleable.Topbar_title);
        //typedArray使用完记得回收 避免资源浪费
        typedArray.recycle();

        leftButton = new Button(context);
        rightButton = new Button(context);
        tvTitle = new TextView(context);

        leftButton.setTextColor(leftTextColor);
        leftButton.setText(leftText);
        leftButton.setBackground(leftBackGroud);

        rightButton.setTextColor(rightTextColor);
        rightButton.setText(rightText);
        rightButton.setBackground(rightBackGroud);

        tvTitle.setTextColor(titleTextColor);
        tvTitle.setTextSize(titleTextSize);
        tvTitle.setText(title);
        tvTitle.setGravity(Gravity.CENTER);

        //设置父view背景色
        setBackgroundColor(0xFFF59563);

        leftParams = new RelativeLayout.LayoutParams(ViewGroup.LayoutParams.WRAP_CONTENT,
                ViewGroup.LayoutParams.WRAP_CONTENT);
        leftParams.addRule(RelativeLayout.ALIGN_PARENT_LEFT, TRUE);
        //添加子view 并设置位置属性
        addView(leftButton, leftParams);

        rightParams = new RelativeLayout.LayoutParams(ViewGroup.LayoutParams.WRAP_CONTENT,
                ViewGroup.LayoutParams.WRAP_CONTENT);
        rightParams.addRule(RelativeLayout.ALIGN_PARENT_RIGHT, TRUE);
        addView(rightButton, rightParams);

        titleParams = new RelativeLayout.LayoutParams(ViewGroup.LayoutParams.WRAP_CONTENT,
                ViewGroup.LayoutParams.MATCH_PARENT);
        titleParams.addRule(RelativeLayout.CENTER_IN_PARENT, TRUE);
        addView(tvTitle,titleParams);
    }
}
查看全部 -
自定义属性三步
①设计需要的属性
创建模块module 在values下新建atts.xml文件,定义属性
<declare-styleable name="Topbar">
    <attr name="title" format="string"></attr>
    <attr name="titleTextSize" format="dimension"></attr>
    <attr name="titleTextColor" format="color"></attr>
    <attr name="leftTextColor" format="color"></attr>
    <attr name="leftText" format="string"></attr>
    <attr name="leftBackgroud" format="reference|color"></attr>
    <attr name="rightTextColor" format="color"></attr>
    <attr name="rightText" format="string"></attr>
    <attr name="rightBackgroud" format="reference|color"></attr>
</declare-styleable>
②实现一个继承的view
③引用自定义的view
查看全部 -
引用自己定义的View
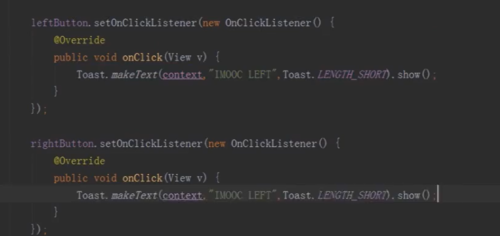
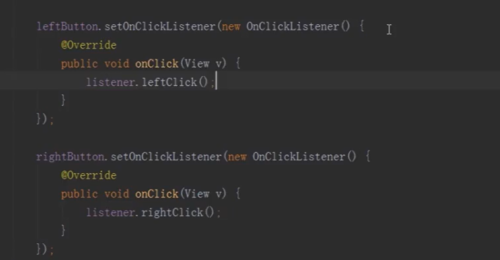
动态控制自定义View的控件,回到java中给button控件添加点击方法
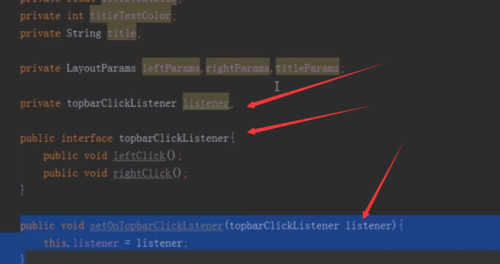
接口回调
定义一个接口
定义一个方法,暴露给实现者的方法
再次修改点击事件
1.Android Studio中只需要写上res-auto即可 2.Eclipse中则需要加上完整的包名和控件名 3.xmlns:custom="http://schmas.android.com/apk/res-auto"
查看全部 -
20181225 注册慕课,173xxx/32168888查看全部
-
引用自己定义的View
动态控制自定义View的控件,回到java中给button控件添加点击方法
接口回调
定义一个接口
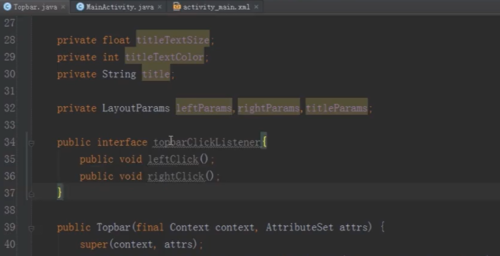
定义一个方法,暴露给实现者的方法
再次修改点击事件
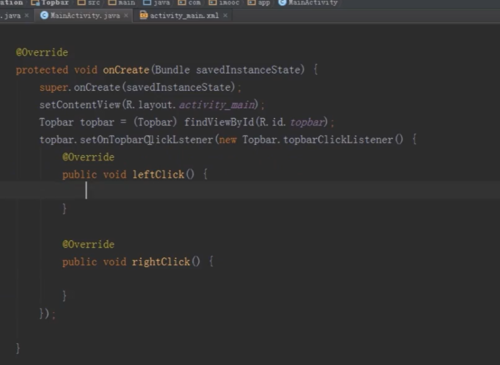
调用者的使用
 查看全部
查看全部 -
自定义View第二部,新建java文件,继承Relativelayout,如果需要自定义属性,就需要实现带有AttributeSet参数的方法,否则只需要实现Context参数的方法。
声明需要的控件,声明控件需要的属性,即attrs.xml中的属性

3.把属性赋值给相应的控件

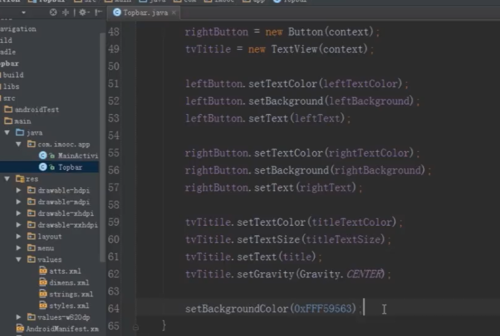
4.把这个控件放到一个layout中,需要声明每个控件的LayoutParams,并且new出来。实现控件的添加。
555
 查看全部
查看全部 -
topbar可以抽象一个类一样,单独抽取出来进行设计
自定义View,第一步首先在res/values下新建atts.xml,然后再定义View中控件相关的属性
查看全部 -
自定义Topbar查看全部
-
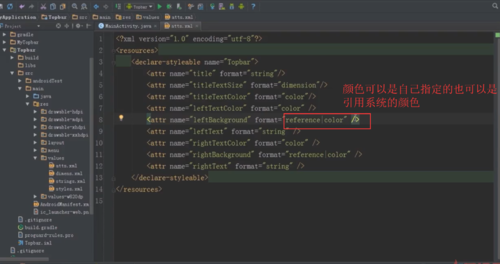
atts.xml 码 <?xml version="1.0" encoding="utf-8"?> <resources> <declare-styleable name="Topbar"> <attr name="title" format="string"/> <attr name="titleTextSize" format="dimension"/> <attr name="titleTextColor" format="color"/> <attr name="leftTextColor" format="color"/> <attr name="leftBackground" format="reference|color"/> <attr name="leftText" format="string"/> <attr name="rightTextColor" format="color" /> <attr name="rightBackground" format="reference|color" /> <attr name="rightText" format="string"/> </declare-styleable> </resources>查看全部
-
设计自定义view所需要的步骤查看全部


举报
0/150
提交
取消