


 沈无奇 ·
沈无奇 ·Django 模板语言 DTL
接下来,我们会详细描述 Django 内置模板语言的语法 (DTL),和 Mako、Jinja2 一样,需要掌握其注释、变量、过滤器、标签、控制语句等等的写法,并用实际的案例进行说明。
1. DTL 基础用法
1.1 变量
DTL 中变量的写法为 {{ variable }}, 这和 Jinja2 非常类似。模版引擎碰到模板变量时,会从上下文 context 中获取这个变量的值,然后用该值替换掉它本身。变量的命名包括任何字母数字以及下划线("_")的组合,其中点(".")号在 DTL 中是有特殊含义的,因此要注意:变量名称中不能有空格或标点符号。
<p>{{ content }}</p>
<div>{{ spyinx.age }}</div>
注意:spyinx.age 表示的是 spyinx 的 age 属性值。我们可以基于 manager.py 的 shell 命令做如下测试:
(django-manual) [root@server first_django_app]# cat templates/test1.html
<p>{{ content }}</p>
<div>{{ spyinx.age }}</div>

(django-manual) [root@server first_django_app]# python manage.py shell
Python 3.8.1 (default, Dec 24 2019, 17:04:00)
[GCC 4.8.5 20150623 (Red Hat 4.8.5-39)] on linux
Type "help", "copyright", "credits" or "license" for more information.
(InteractiveConsole)
>>> from django.template.loader import get_template
>>> tp = get_template('test1.html')
>>> tp.render(context={'content': '正文我文本', 'spyinx': {'age': 29, 'sex': 'male'}})
'<p>正文我文本</p>\n<div>29</div>\n'
>>> text = tp.render(context={'content': '正文我文本', 'spyinx': {'age': 29, 'sex': 'male'}})
>>> print(text)
<p>正文我文本</p>
<div>29</div>
1.2 标签
DTL 中标签的写法为: {% 标签 %},常用的标签有 for 循环标签,条件判断标签 if/elif/else。部分标签在使用时,需要匹配对应的结束标签。Django 中常用的内置标签如下表格所示:
| 标签 | 描述 |
|---|---|
| {% for %} | for 循环,遍历变量中的内容 |
| {% if %} | if 判断 |
| {% csrf_token %} | 生成 csrf_token 的标签 |
| {% static %} | 读取静态资源内容 |
| {% with %} | 多用于给一个复杂的变量起别名 |
| {% url %} | 反向生成相应的 URL 地址 |
| {% include 模板名称 %} | 加载指定的模板并以标签内的参数渲染 |
| {% extends 模板名称 %} | 模板继承,用于标记当前模板继承自哪个父模板 |
| {% block %} | 用于定义一个模板块 |
1.2.1 for 标签的用法:
{# 遍历列表 #}
<ul>
{% for person in persons %}
<li>{{ person }}</li>
{% endfor %}
</ul>

{# 遍历字典 #}
<ul>
{% for key, value in data.items %}
<li>{{ key }}:{{ value }}</li>
{% endfor %}
</ul>
在 for 循环标签中,还提供了一些变量,供我们使用:
| 变量 | 描述 |
|---|---|
| forloop.counter | 当前循环位置,从1开始 |
| forloop.counter0 | 当前循环位置,从0开始 |
| forloop.revcounter | 反向循环位置,从n开始,到1结束 |
| forloop.revcounter0 | 反向循环位置,从n-1开始,到0结束 |
| forloop.first | 如果是当前循环的第一位,返回True |
| forloop.last | 如果是当前循环的最后一位,返回True |
| forloop.parentloop | 在嵌套for循环中,获取上层for循环的forloop |
实验:
(django-manual) [root@server first_django_app]# cat templates/test_for.html
遍历列表:
<ul>
{% spaceless %}
{% for person in persons %}
{% if forloop.first %}
<li>第一次:{{ forloop.counter }}:{{ forloop.counter0 }}:{{ person }}:{{ forloop.revcounter }}:{{ forloop.revcounter }}</li>
{% elif forloop.last %}
<li>最后一次:{{ forloop.counter }}:{{ forloop.counter0 }}:{{ person }}:{{ forloop.revcounter }}:{{ forloop.revcounter }}</li>
{% else %}
</li>{{ forloop.counter }}:{{ forloop.counter0 }}:{{ person }}:{{ forloop.revcounter }}:{{ forloop.revcounter }}</li>
{% endif %}
{% endfor %}
{% endspaceless %}
</ul>

{% for name in name_list %}
{{ name }}
{% empty %}
<p>name_list变量为空</p>
{% endfor %}

倒序遍历列:
{% spaceless %}
{% for person in persons reversed %}
<p>{{ person }}:{{ forloop.revcounter }}</p>
{% endfor %}
{% endspaceless %}

遍历字典:
{% spaceless %}
{% for key, value in data.items %}
<p>{{ key }}:{{ value }}</p>
{% endfor %}
{% endspaceless %}


(django-manual) [root@server first_django_app]# python manage.py shell
Python 3.8.1 (default, Dec 24 2019, 17:04:00)
[GCC 4.8.5 20150623 (Red Hat 4.8.5-39)] on linux
Type "help", "copyright", "credits" or "license" for more information.
(InteractiveConsole)
>>> from django.template.loader import get_template
>>> tp = get_template('test_for.html')
>>> content = tp.render(context={'persons':['张三', '李四', '王二麻子'], 'name_list': [], 'data': {'key1': 'value1', 'key2': 'value2', 'key3': 'value3'}})
>>> print(content)
遍历列表:
<ul>
<li>第一次:1:0:张三:3:3</li></li>2:1:李四:2:2</li><li>最后一次:3:2:王二麻子:1:1</li>
</ul>


<p>name_list变量为空</p>


倒序遍历列:
<p>王二麻子:3</p><p>李四:2</p><p>张三:1</p>

遍历字典:
<p>key1:value1</p><p>key2:value2</p><p>key3:value3</p>
1.2.2 if 标签:
支持嵌套,判断的条件符号与变量之间必须使用空格隔开,示例如下。
(django-manual) [root@server first_django_app]# cat templates/test_if.html
{% if spyinx.sex == 'male' %}
<label>他是个男孩子</label>
{% else %}
<label>她是个女孩子</label>
{% endif %}
(django-manual) [root@server first_django_app]# python manage.py shell
Python 3.8.1 (default, Dec 24 2019, 17:04:00)
[GCC 4.8.5 20150623 (Red Hat 4.8.5-39)] on linux
Type "help", "copyright", "credits" or "license" for more information.
(InteractiveConsole)
>>> from django.template.loader import get_template
>>> tp = get_template('test_if.html')
>>> tp.render(context={'spyinx': {'age':29, 'sex': 'male'}})
'\n<label>他是个男孩子</label>\n\n'
>>> tp.render(context={'spyinx': {'age':29, 'sex': 'male'}})
1.2.3 csrf_token 标签:
这个标签会生成一个隐藏的 input 标签,其值为一串随机的字符串。这个标签通常用在页面上的 form 标签中。在渲染模块时,使用 RequestContext,由它处理 csrf_token 这个标签。下面来做个简单的测试:
# 模板文件
[root@server first_django_app]# cat templates/test_csrf.html
<html>
<head></head>
<body>
<form enctype="multipart/form-data" method="post">
{% csrf_token %}
<div><span>账号:</span><input type="text" style="margin-bottom: 10px" placeholder="请输入登录手机号/邮箱" /></div>
<div><span>密码:</span><input type="password" style="margin-bottom: 10px" placeholder="请输入密码" /></div>
<div><label style="font-size: 10px; color: grey"><input type="checkbox" checked="checked"/>7天自动登录</label></div>
<div style="margin-top: 10px"><input type="submit"/></div>
</form>
</body>
</html>

# 定义视图:hello_app/views.py
[root@server first_django_app]# cat hello_app/views.py
from django.shortcuts import render

# Create your views here.
def test_csrf_view(request, *args, **kwargs):
    return render(request, 'test_csrf.html', context={})

# 配置URLconf:hello_app/urls.py
[root@server first_django_app]# cat hello_app/urls.py
from django.urls import path

urlpatterns = [
    path('test-csrf/', views.test_csrf_view),
]

# 最后激活虚拟环境并启动django工程
[root@server first_django_app] pyenv activate django-manual
(django-manual) [root@server first_django_app]# python manage.py runserver 0:8881
Watching for file changes with StatReloader
Performing system checks...

System check identified no issues (0 silenced).

You have 17 unapplied migration(s). Your project may not work properly until you apply the migrations for app(s): admin, auth, contenttypes, sessions.
Run 'python manage.py migrate' to apply them.

March 27, 2020 - 04:10:05
Django version 2.2.11, using settings 'first_django_app.settings'
Starting development server at http://0:8881/
Quit the server with CONTROL-C.
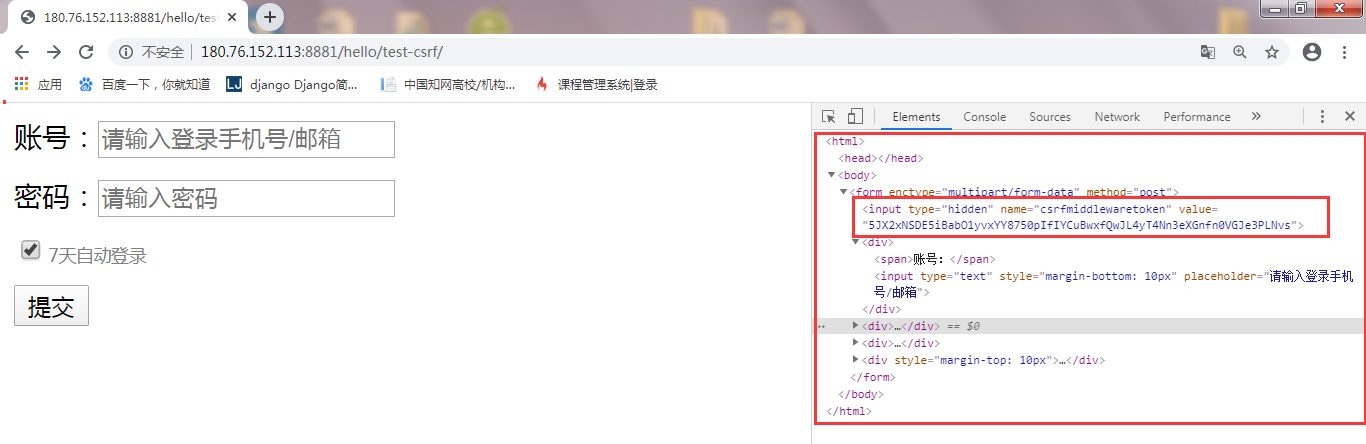
现在通过外部请求这个URL,效果图如下。通过右键的检查功能,可以看到 {% csrf_token %} 被替换成了隐藏的 input 标签,value 属性是一个随机的长字符串:
1.2.4 with 标签:
对某个变量重新命名并使用:
(django-manual) [root@server first_django_app]# cat templates/test_with.html
{% spaceless %}
{% with age1=spyinx.age %}
<p>{{ age1 }}</p>
{% endwith %}
{% endspaceless %}

{% spaceless %}
{% with spyinx.age as age2 %}
<div>{{ age2 }} </div>
{% endwith %}
{% endspaceless %}

(django-manual) [root@server first_django_app]# python manage.py shell
Python 3.8.1 (default, Dec 24 2019, 17:04:00)
[GCC 4.8.5 20150623 (Red Hat 4.8.5-39)] on linux
Type "help", "copyright", "credits" or "license" for more information.
(InteractiveConsole)
>>> from django.template.loader import get_template
>>> tp = get_template('test_with.html')
>>> content = tp.render(context={'spyinx': {'age': 29}})
>>> print(content)
<p>29</p>

<div>29 </div>
1.2.5 spaceless 标签:
移除 HTML 标签中的空白字符,包括空格、tab键、换行等。具体示例参见上面的示例;
1.2.6 cycle 标签:
循环提取 cycle 中的值,用法示例如下
# 假设模板如下:
{% for l in list %}
<tr class="{% cycle 'r1' 'r2' 'r3'%}">
{{l}}
</tr>
{% endfor %}

# 对于传入的 list 参数为:['l1', 'l2', 'l3'],最后生成的结果如下:
<tr class="r1">
l1
</tr>

<tr class="r2">
l2
</tr>

<tr class="r3">
l3
</tr>
1.2.7 include 标签:
加载其他模板进来。
{% include "base/base.html" %}
除了加载模板进来外,include 标签还可以像加载进来的模板传递变量。假设我们有个 base/base.html 模板文件,其内容为:
{# base/base.html #}
Hello {{ name|default:"Unknown" }}
此时,我们引入 base.html 模板文件时,可以给 name 传递变量值:
{% include "base/base.html" with name="test" %}
1.3 注释
在 DTL 中单行注释使用 {# 单行注释内容 #} 这样的方式,对于多行注释,我们使用 comment 标签:
{# 单行注释内容 #}

{% comment %}
多行注释内容
{% endcomment %}
1.4 过滤器
DTL 中的过滤器会在下一节中详细介绍。
2. DTL 中的模板继承
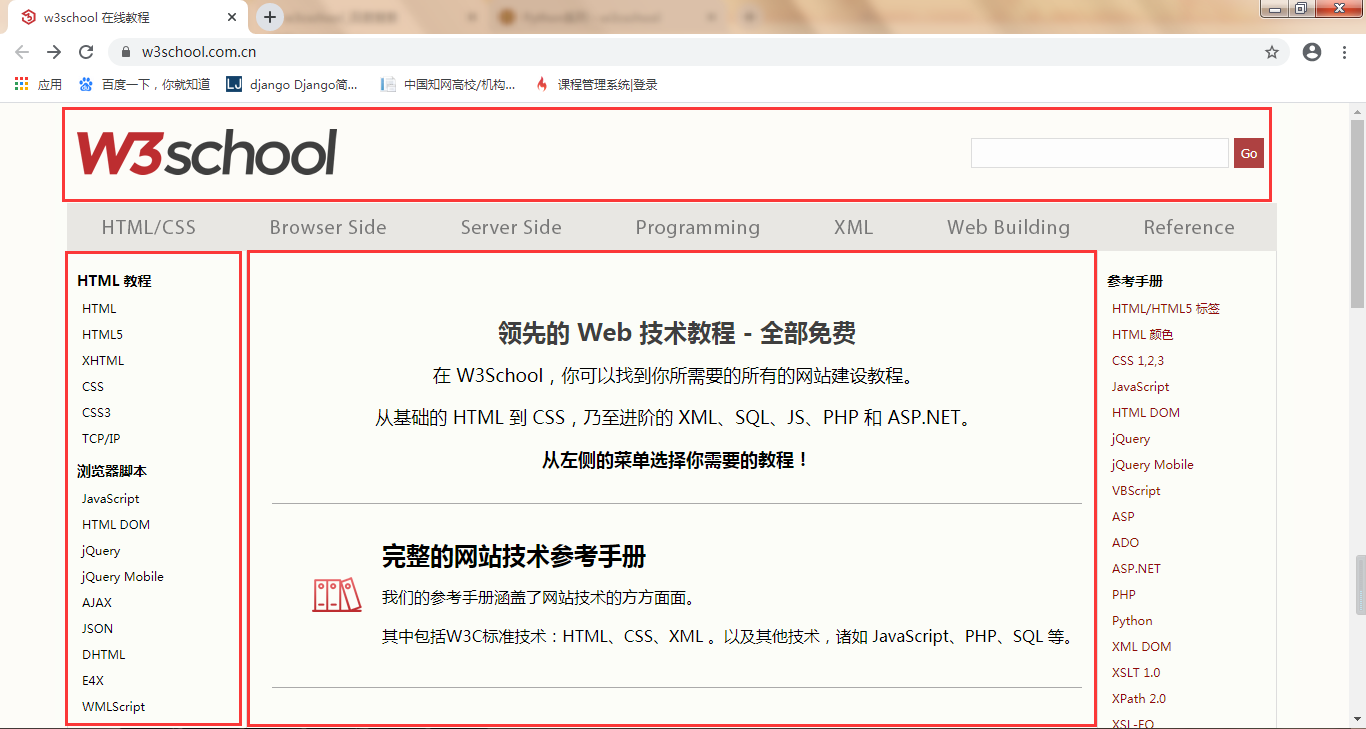
在这里将介绍 DTL 中的模板继承语法,主要涉及到 block、extends 两个标签。Django 中的模板和 Python 中的类一样是可以被继承的,通过合理的模板继承可以减少前端的工作量,提高代码的复用性以及开发效率。例如下面的 w3school 的在线教程网站:
大致上,该网站有一个固定的头部,有一些侧边栏,以及内容主体部分。现在我们使用 Django 中的模板教程来完成一个这样的简单例子。
首先在 template 目录下准备网站的框架模板文件 base.html,其内容如下:
<html>
{% load staticfiles %}
<head>
</head>

<link rel="stylesheet" type="text/css" href="{% static 'css/main.css' %}">
<body>

<!-- 大容器 -->
<div class="container">
	<div class="header"><center>网站头部</center></div>
	<div class="sidebar">
                {% block sidebar %} {% endblock %}
	</div>
	<div class="content">
		{% block content %} {% endblock %}
	</div>
</div>

</body>
</html>
由于模板文件中加载了静态资源文件,我们除了加上静态资源文件外,还需要加上在 Django 的全局配置文件中进行相关属性的设置:
新建 static 目录,并在其下新建 css 目录,然后准备样式表 main.css:
.container {
	border-style: dotted;
	border-color: red;
	border-width: 10px;
	width: 90%;
	height: 80%;
}

.container .header {
    border-bottom-style: solid;
    border-color: black;
	border-width: 5px;
	font-size: 24px;
	height: 100px;
    line-height: 100px;
}

.container .sidebar {
	border-right-style: solid;
    border-color: black;
	border-width: 5px;
	font-size: 24px;
	width: 20%;
	float: left;
    height: 80%;
}

.container .content {
    float: left;
    width: 60%;
}

.container .content .title {
	margin-top: 20px;
    margin-left: 40%;
    width: 100%;
    font-size: 24px;
    font-weight: bold;
}
在 Django 的 settings.py 文件中添加 STATICFILES_DIRS 属性:
STATIC_URL = '/static/'
# 新添加的配置,方便前面的模板文件中找到静态资源路径
STATICFILES_DIRS = [ os.path.join(BASE_DIR, "static") ]
可以看到,在前面的 base.html 文件中,我们定义了页面的基本框架,包括了网站头部、侧边栏数据以及内容主体。其中侧边栏和内容主体部分分别定义了两个 block 标签,并进行了命名。接下来我们新建模板文件 test_extends.html,该模板文件继承自 base.html,并给出两个 block 标签对应的数据:
{# 继承base.html模板文件 #}
{% extends "base.html" %}

{# 侧边栏 #}
{% block sidebar %}
<ul>
    {% for lesson in lessons %}
    <li><a href="{{ lesson.addr }}">{{ lesson.name }}</a></li>
    {% endfor %}
</ul>
{% endblock %}

{# 内容主体 #}
{% block content %}
<div class="title">{{ title }}</div>
{% endblock %}
准备好视图函数,这里我们会实现两个视图,使用的模板是一样的,但是填充的数据不一样而已:
# hello_app/views.py
from django.shortcuts import render

def test_django_view(request, *args, **kwargs):
    data = {
       'title': 'Django教程手册',
       'lessons': [
          {'name': 'web框架', 'addr': '/web_framework'},
          {'name': 'django发展历史', 'addr': '/django_history'},
          {'name': 'django基础上', 'addr': '/base_one'},
          {'name': 'django基础下', 'addr': '/base_two'},

       ]
    }
    return render(request, 'test_extends.html', context=data)

def test_nginx_view(request, *args, **kwargs):
    data = {
       'title': 'Nginx教程手册',
       'lessons': [
          {'name': 'Nginx介绍', 'addr': '/web_server'},
          {'name': 'Nginx发展历史', 'addr': '/nginx_history'},
          {'name': 'Nginx优势', 'addr': '/nginx_advantages'},

       ]
    }
    return render(request, 'test_extends.html', context=data)
准备好 URLconf 配置:
from django.urls import path, re_path

urlpatterns = [
    path('test-django/', views.test_django_view),
    path('test-nginx/', views.test_nginx_view),
]
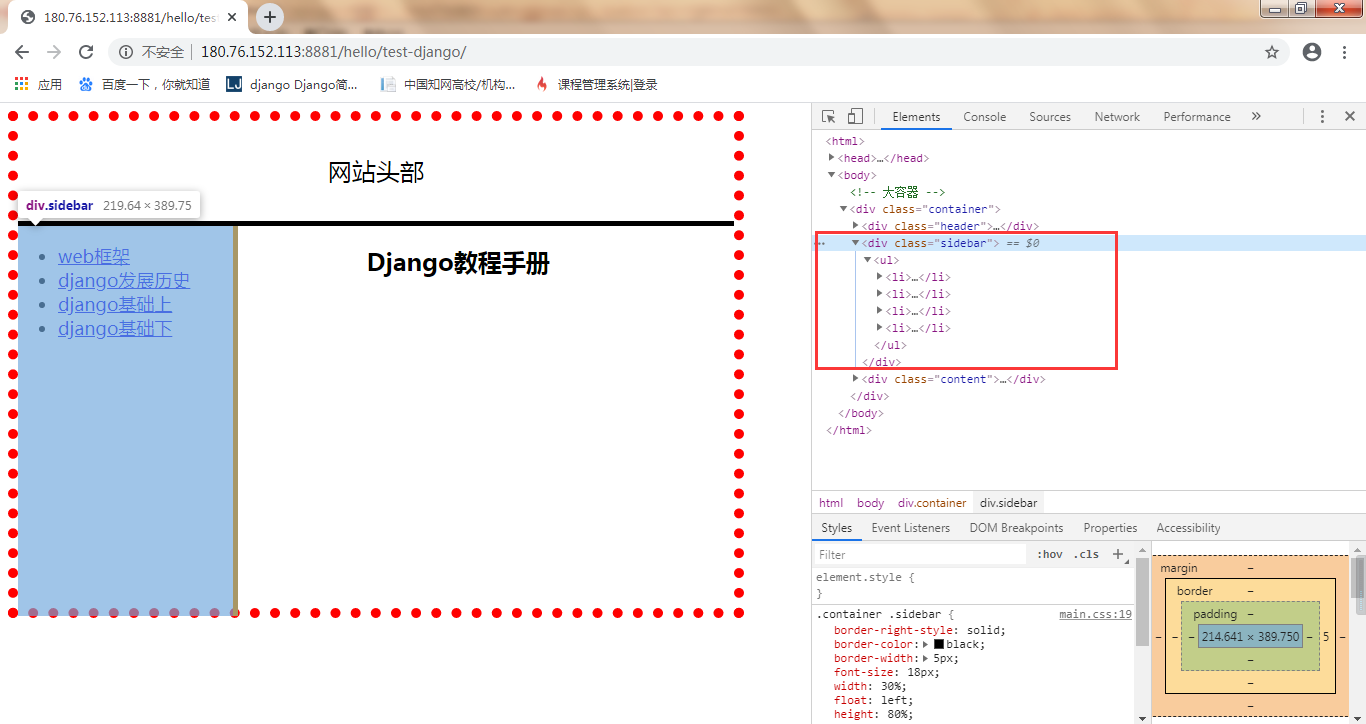
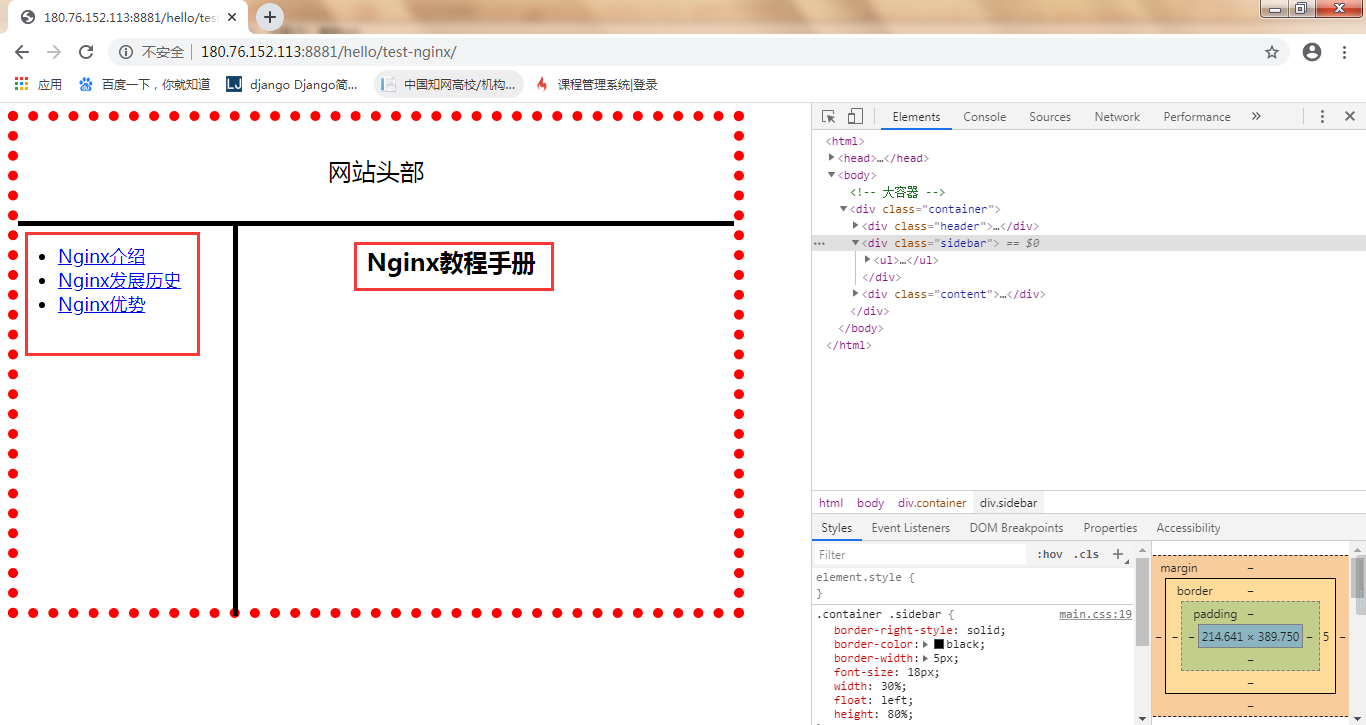
启动 Django 服务页面,然后分别请求/hello/test-django/ 和 /hello/test-nginx/ 两个地址,可以看到如下两个效果图,网页的整体布局不变,但是数据不同。几乎所有的大型网站都是靠这样继承模式实现的优化前端代码和统一页面的风格。
通过上面的简单实验,我们能够理解并初步掌握 Django 中模板的继承用法。这种基于继承网页的做法能使得我们开发的网站具有统一的风格,也是后面经常会用到的一种模板编写手段。
3. 小结
本小节我们详细介绍了 Django 中自带的模板引擎的语法,介绍了各种 DTL 的标签以及其用法并进行了测试。此外还通过一个简单的实战例子介绍了 DTL 中的模板继承语法。这些是后面编写 HTML 模板的基础,必须熟练掌握。接下来会继续介绍 DTL 中的过滤器以及如何自定义过滤器。

 2024 imooc.com All Rights Reserved |