


 PT950 ·
Android Studio 中使用命令行构建应用
前面的小节我们介绍了通过图形界面如何构建和运行我们的应用,从本小结我们学习如何在命令行中构建我们的应用。
1. 关于构建类型
1.1 关于 Gradle 封装容器
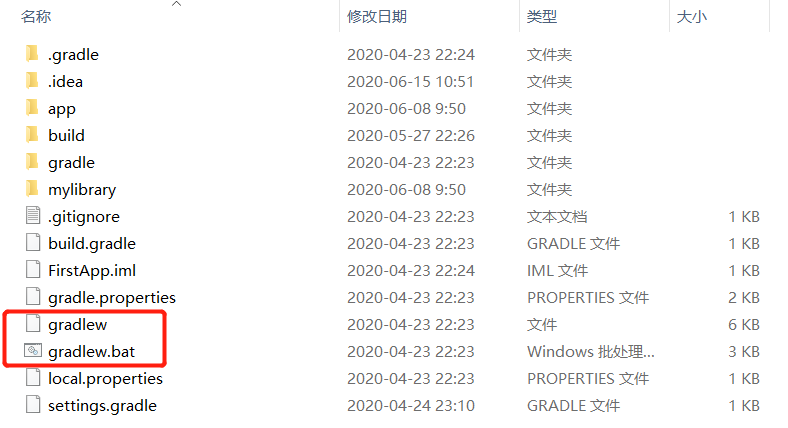
在命令行中构建应用,我们使用的是 Gradle 封装容器,它可作为 Windows 的批处理文件 (gradlew.bat) 和 Linux 与 Mac 的 shell 脚本 (gradlew) 使用,而且我们可以从使用 Android Studio 创建的每个项目的根目录启动该工具。
我们可以使用 Gradle 封装容器命令行工具执行 Android 项目可用的所有构建任务。要使用封装容器运行任务,请在终端窗口中(在 Android Studio 中,依次选择 View > Tool Windows > Terminal)使用下列命令之一:
- 在 Windows 上:
gradlew task-name
- 在 Mac 或 Linux 上:
./gradlew task-name
Tips:task-name是代指具体的 Gradle 任务名称。
如需查看项目的所有可用构建任务的列表,请执行如下命令:
gradlew tasks
输出结果如下:
------------------------------------------------------------
Tasks runnable from root project
------------------------------------------------------------

Android tasks
-------------
androidDependencies - Displays the Android dependencies of the project.
signingReport - Displays the signing info for the base and test modules
sourceSets - Prints out all the source sets defined in this project.

Build tasks
-----------
assemble - Assemble main outputs for all the variants.
assembleAndroidTest - Assembles all the Test applications.
build - Assembles and tests this project.
buildDependents - Assembles and tests this project and all projects that depend on it.
buildNeeded - Assembles and tests this project and all projects it depends on.
bundle - Assemble bundles for all the variants.
clean - Deletes the build directory.
cleanBuildCache - Deletes the build cache directory.
compileDebugAndroidTestSources
compileDebugSources
compileDebugUnitTestSources
compileReleaseSources
compileReleaseUnitTestSources
extractDebugAnnotations - Extracts Android annotations for the debug variant into the archive file
extractReleaseAnnotations - Extracts Android annotations for the release variant into the archive file

Build Setup tasks
-----------------
init - Initializes a new Gradle build.
wrapper - Generates Gradle wrapper files.

Cleanup tasks
-------------
lintFix - Runs lint on all variants and applies any safe suggestions to the source code.

Help tasks
----------
buildEnvironment - Displays all buildscript dependencies declared in root project 'FirstApp'.
components - Displays the components produced by root project 'FirstApp'. [incubating]
dependencies - Displays all dependencies declared in root project 'FirstApp'.
dependencyInsight - Displays the insight into a specific dependency in root project 'FirstApp'.
dependentComponents - Displays the dependent components of components in root project 'FirstApp'. [incubating]
help - Displays a help message.
model - Displays the configuration model of root project 'FirstApp'. [incubating]
projects - Displays the sub-projects of root project 'FirstApp'.
properties - Displays the properties of root project 'FirstApp'.
tasks - Displays the tasks runnable from root project 'FirstApp' (some of the displayed tasks may belong to subprojects).

Install tasks
-------------
installDebug - Installs the Debug build.
installDebugAndroidTest - Installs the android (on device) tests for the Debug build.
uninstallAll - Uninstall all applications.
uninstallDebug - Uninstalls the Debug build.
uninstallDebugAndroidTest - Uninstalls the android (on device) tests for the Debug build.
uninstallRelease - Uninstalls the Release build.

Verification tasks
------------------
check - Runs all checks.
connectedAndroidTest - Installs and runs instrumentation tests for all flavors on connected devices.
connectedCheck - Runs all device checks on currently connected devices.
connectedDebugAndroidTest - Installs and runs the tests for debug on connected devices.
deviceAndroidTest - Installs and runs instrumentation tests using all Device Providers.
deviceCheck - Runs all device checks using Device Providers and Test Servers.
lint - Runs lint on all variants.
lintDebug - Runs lint on the Debug build.
lintRelease - Runs lint on the Release build.
lintVitalRelease - Runs lint on just the fatal issues in the release build.
test - Run unit tests for all variants.
testDebugUnitTest - Run unit tests for the debug build.
testReleaseUnitTest - Run unit tests for the release build.
1.2 关于 Build 类型
默认情况下,每个 Android 应用都有两个版本类型:一个是调试版本,用于调试我们的应用;另一个是发布版本,用于向用户发布我们的应用。必须先使用证书为从每个版本生成的输出签名,然后才能将我们的应用部署到设备。调试版本会使用 SDK 工具提供的调试密钥自动签名(此版本不安全,我们不能将其发布到应用市场),而发布版本必须使用我们自己的私钥进行签名。
Tips:如果我们要构建发布版应用,还请务必使用适当的签名密钥为我们的应用签名。 不过,如果我们刚刚入门,也可以构建调试版 APK,这样就可以尽快在模拟器或连接的设备上运行我们的应用。
2. 构建APK
2.1 构建调试版 APK
调试版 APK 使用 SDK 工具提供的调试密钥进行签名,并允许通过 adb 进行调试。要构建调试版 APK,请打开命令行,然后转到项目的根目录。如需启动调试版本,请调用 assembleDebug 任务:
gradlew assembleDebug
这将在 project_name/module_name/build/outputs/apk/ 中创建一个名为 module_name-debug.apk 的 APK。 该文件已使用调试密钥进行签名并使用 zipalign 对齐,因此我们可以立即将其安装到设备上。
或者,如需构建 APK 并立即在运行的模拟器或连接的设备上安装,请改为调用 installDebug:
gradlew installDebug
Tips:上述任务名称中的“Debug”部分只是构建变体名称的驼峰式大小写版本,因此可以替换为我们想组装或安装的任何 Build 类型或变体。例如,如果我们有“demo”这个产品变种,则可以使用 assembleDemoDebug 任务来构建调试版本。
2.2 构建发布版 APK
当我们准备好发布和分发我们的应用时,必须构建一个使用我们的私钥进行签名的发布版 APK。发布版 APK 和调试版 APK 的不同之处在于私钥签名,关于应用签名部分将在后面介绍。
3. 构建 app bundle
Android App Bundle 包含应用的所有经过编译的代码和资源,但 APK 的生成和签名将转到 Google Play 上来完成。与 APK 不同的是,我们不能直接将 app bundle 部署到设备上。
如需构建 app bundle,最简单的方法是使用 Android Studio。不过,如果需要从命令行构建 app bundle,我们可以使用 Gradle 或 bundletool 来执行这项操作。
3.1 Gradle 构建 app bundle
如果我们更喜欢从命令行生成 app bundle,请在应用的基础模块上运行 bundleVariant Gradle 任务。 例如,以下命令会为基础模块的调试版本构建 app bundle:
./gradlew :base:bundleDebug
如果我们要构建已签名的 bundle 以上传到 Play 管理中心,则需要先使用应用的签名信息来配置基础模块的 build.gradle 文件。如何配置 Gradle 来为我们的应用签名将在后面介绍。当我们配置好 build.gradle 之后,我们就可以构建应用的发布版本,Gradle 会自动生成 app bundle,并使用我们在 build.gradle 文件中提供的签名信息为其签名。
3.2 bundletool 构建 app bundle
bundletool 是一个命令行工具,Android Studio、Android Gradle 插件和 Google Play 使用这项工具将应用的经过编译的代码和资源转换为 app bundle,并根据这些 bundle 生成可部署的 APK。
bundletool 要求关于应用项目的某些信息(如应用的清单和资源)采用 Google 的协议缓冲区格式(也称为“protobuf”),并以 *.pb 作为文件扩展名。Protobuf 提供了一种不依赖于语言和平台且可扩展的机制,用于对结构化数据进行序列化。
3.2.1 下载 AAPT2
我们可以使用 Google Maven 代码库中的最新版 AAPT2 以 protobuf 格式生成应用的清单文件和资源表。
Tips:请勿使用 Android 构建工具包中包含的 AAPT2 版本,因为它不支持 bundletool。
要从 Google 的 Maven 代码库下载 AAPT2,请按以下步骤操作:
-
在代码库索引中依次转到 com.android.tools.build > aapt2;
-
复制最新版 AAPT2 的名称;
-
将复制的版本名称插入以下网址并指定目标操作系统:https://dl.google.com/dl/android/maven2/com/android/tools/build/aapt2/aapt2-version/aapt2-aapt2-version-[windows|linux|osx].jar;
例如,要下载适用于 Windows 的版本 3.2.0-alpha18-4804415,我们应使用:https://dl.google.com/dl/android/maven2/com/android/tools/build/aapt2/3.2.0-alpha18-4804415/aapt2-3.2.0-alpha18-4804415-windows.jar; -
在浏览器中导航到该网址,系统应该会随即开始下载 AAPT2;
-
解压缩刚刚下载的 JAR 文件。
3.2.2 编译并链接应用的资源
我们可以通过以下命令,使用 AAPT2 编译应用的资源:
aapt2 compile \
project_root/module_root/src/main/res/drawable/Image1.png \
project_root/module_root/src/main/res/drawable/Image2.png \
-o compiled_resources/
Tips:虽然我们可以使用 --dir 标记将资源目录传递给 AAPT2,但这样做会重新编译目录中的所有文件,无论我们实际更改了多少个文件。
在链接阶段(在此阶段,AAPT2 会将各种编译后的资源链接到一个 APK 中),通过添加 --proto-format 标记,指示 AAPT2 将应用的清单和编译后的资源转换为 protobuf 格式,如下所示:
aapt2 link --proto-format -o output.apk \
-I android_sdk/platforms/android_version/android.jar \
--manifest project_root/module_root/src/main/AndroidManifest.xml \
-R compiled_resources/*.flat \
--auto-add-overlay
Tips:此外,当使用 -R 标记指定已编译的资源时,我们可以指定一个包含每个已编译资源的绝对路径(各路径之间用一个空格分隔)的文本文件。然后,我们可以将该文本文件传递给 AAPT2,如下所示:aapt2 link … -R @compiled_resources.txt。
接下来,我们可以从输出 APK 提取内容,如应用的 AndroidManifest.xml、resources.pb 及其他资源文件(这些文件现在采用 protobuf 格式)。在准备 bundletool 构建 app bundle 所需的输入时,我们需要用到这些文件。
3.2.3 打包预编译的代码和资源
在使用 bundletool 为我们的应用生成 app bundle 之前,我们必须先提供 ZIP 文件,每个 ZIP 文件包含给定应用模块的经过编译的代码和资源。每个模块的 ZIP 文件的内容和组织方式都与 Android App Bundle 格式非常类似。 例如,我们应该为应用的基础模块创建一个 base.zip 文件,并按如下方式组织其内容:
| 文件或目录 | 说明 |
|---|---|
| manifest/AndroidManifest.xml | 模块的清单,采用 protobuf 格式。 |
| dex/… | 此目录包含应用的一个或多个经过编译的 DEX 文件。这些文件应按如下方式命名:classes.dex、classes2.dex、classes3.dex,依此类推。 |
| res/… | 包含模块的资源,这些资源采用 protobuf 格式,适用于所有设备配置。子目录和文件的组织方式应与典型的 APK 类似。 |
| root/…、assets/… 和 lib/… | 这些目录与关于 Android App Bundle 格式的目录完全相同。 |
| resources.pb | 应用的资源表,采用 protobuf 格式。 |
准备好每个应用模块的 ZIP 文件后,我们可以将其传递给 bundletool 来构建 app bundle。
3.2.4 构建 app bundle
要构建 app bundle,请使用 bundletool build-bundle 命令,如下所示:
bundletool build-bundle --modules=base.zip --output=mybundle.aab
下表对用于 build-bundle 命令的标记进行了更详细的说明:
| 标记 | 说明 |
|---|---|
| –modules=path-to-base.zip, path-to-module2.zip,path-to-module3.zip | 指定 bundletool 构建 app bundle 时应使用的模块 ZIP 文件的列表。 |
| –output=path-to-output.aab | 指定输出 *.aab 文件的路径和文件名。 |
| –config=path-to-BundleConfig.json | 指定可用于自定义构建流程的可选配置文件的路径。 |
| –metadata-file=target-bundle-path:local-file-path | 指示 bundletool 将可选的元数据文件打包到 app bundle 中。 |
3.2.5 自定义 APK 生成
app bundle 包含一个 BundleConfig.pb 文件,该文件提供应用商店(如 Google Play)在根据 bundle 生成 APK 时所需的元数据。 虽然 bundletool 会为我们创建此文件,但我们可以在 BundleConfig.json 文件中配置元数据的某些方面,并将其传递给 bundletool build-bundle 命令。bundletool 随后会转换此文件并将其与每个 app bundle 中包含的 protobuf 版本进行合并。
例如,我们可以控制要启用或停用哪些类别的配置 APK。以下 BundleConfig.json 文件示例会停用分别以不同语言为目标的配置 APK(即,各个语言的资源分别包含在各自的基础功能 APK 或动态功能 APK 中):
{
  "optimizations": {
    "splitsConfig": {
      "splitDimension": [{
        "value": "LANGUAGE",
        "negate": true
      }]
    }
  }
}
在 BundleConfig.json 文件中,我们还可以指定在使用 glob 模式打包 APK 时要让哪些类型的文件保持未压缩状态,如下所示:
{
  "compression": {
    "uncompressedGlob": ["res/raw/**", "assets/**.uncompressed"]
  }
}
4. 应用签名
不使用 Android Studio 也可以为我们的应用签名。我们可以从命令行为我们的应用签名(对于 APK,使用 apksigner;对于 app bundle,使用 jarsigner),或在构建期间配置 Gradle 来为我们的应用签名。无论使用哪种方式,我们都需要先使用 keytool 生成一个私钥,如下所示:
keytool -genkey -v -keystore my-release-key.jks -keyalg RSA -keysize 2048 -validity 10000 -alias my-alias
上面的示例会提示我们输入密钥库和密钥的密码,并提示我们在 Distinguished Name 字段中为我们的密钥输入相应的名称。随后,它会生成一个名为 my-release-key.jks 的密钥库文件,并将其保存在当前目录中。该密钥库包含一个有效期为 10000 天的密钥。
现在,我们可以手动为我们的 APK 或 app bundle 签名,也可以在构建过程中配置 Gradle 来为我们的应用签名,
4.1 使用命令行为应用签名
如果要从命令行为 app bundle 签名,我们可以使用 jarsigner。 如果要为 APK 签名,则需要使用 zipalign 和 apksigner。
-
打开命令行(在 Android Studio 中,依次选择 View > Tool Windows > Terminal),然后转到未签名的 APK 所在的目录。
-
使用 zipalign 对齐未签名的 APK:
zipalign -v -p 4 my-app-unsigned.apk my-app-unsigned-aligned.apk
zipalign 可以确保所有未压缩数据的开头均相对于文件开头执行特定的字节对齐,从而减少应用占用的 RAM 量。
- 通过 apksigner 使用我们的私钥为 APK 签名:
apksigner sign --ks my-release-key.jks --out my-app-release.apk my-app-unsigned-aligned.apk
在本例中,在使用存储在单个密钥库文件 my-release-key.jks 中的私钥和证书为 APK 签名后,将以 my-app-release.apk 的形式输出已签名的 APK。
- 验证我们的 APK 是否已签名:
apksigner verify my-app-release.apk
4.2 配置 Gradle 为应用签名
打开模块级 build.gradle 文件,并添加包含 storeFile、storePassword、keyAlias 和 keyPassword 条目的 signingConfigs {} 代码块,然后将该对象传递给我们的版本类型中的 signingConfig 属性。例如:
android {
    ...
    defaultConfig { ... }
    signingConfigs {
        release {
            // You need to specify either an absolute path or include the
            // keystore file in the same directory as the build.gradle file.
            storeFile file("my-release-key.jks")
            storePassword "password"
            keyAlias "my-alias"
            keyPassword "password"
        }
    }
    buildTypes {
        release {
            signingConfig signingConfigs.release
            ...
        }
    }
}
现在,当我们通过调用 Gradle 任务来构建我们的应用时,Gradle 会为我们的应用签名(并运行 zipalign)。此外,因为我们已使用签名密钥配置了发布版本,所以该版本类型可以执行“安装”任务。因此,我们可以使用 installRelease 任务在模拟器或设备上构建、对齐、签署和安装发布版 APK。
5. 小结
本节课程我们主要学习了如何在命令行中构建我们的应用。本节课程的重点如下:
- 了解命令行构建应用的方法;
- 掌握命令行为应用签名的方法。

 2026 imooc.com All Rights Reserved |